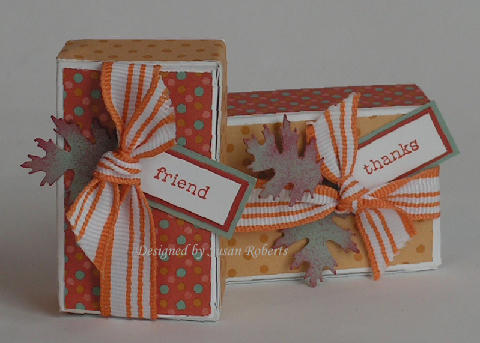
I just love making these little miniature boxes. Aren’t they cute!
Last week I made one for a door hanger project and promised a template for it this week. So here it is.. more or less. lol
I tried to make it such that the template actually printed to the size/measurements shown on the template. However, I could not get it to be exact. Sorry I’m so computer challenged. However because of the angles and shape of the template it is relatively easy to tell where the folds and cuts go without doing any measuring.
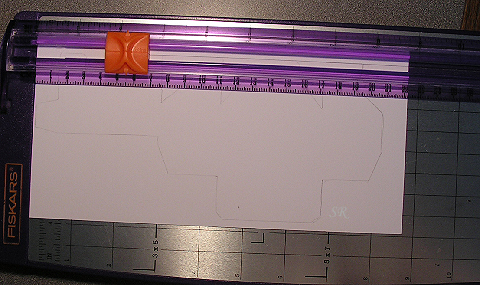
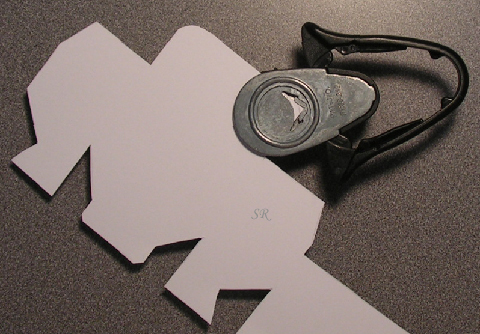
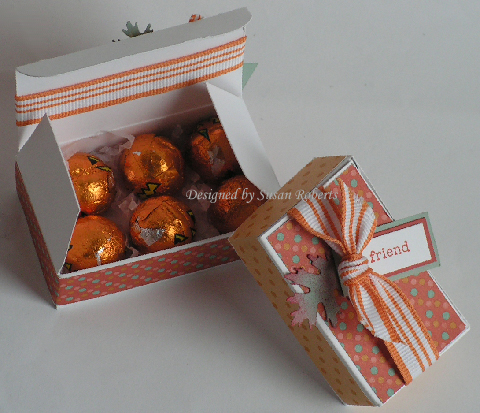
So the easiest thing to do is simply print the template, cut it out and then just trace around the outside of it. As long as the proportions are kept the same, the template will work fine to make a smaller or larger size box. When I printed it out the longest measurement (which shows as 9″ on the template) was just over 8″ in actuality. So it printed a little smaller. The picture of the boxes at the top of this post shows this smaller box in front (“friend”) and the actual measured to scale box is shown in back (“thanks”).
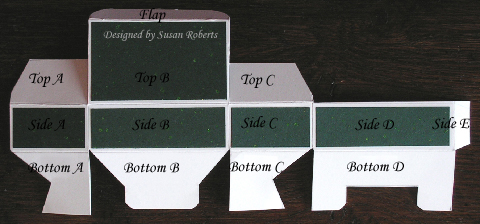
If you do want to make a box the exact size as the template and you want to measure it, I have all the measurements on the template in a 1/16″ scale, ie 4/16″ instead of 1/4″. This was just to keep it consistent.
Here is the template: 4blog115boxtemplate.jpg
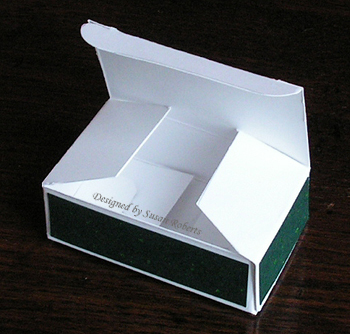
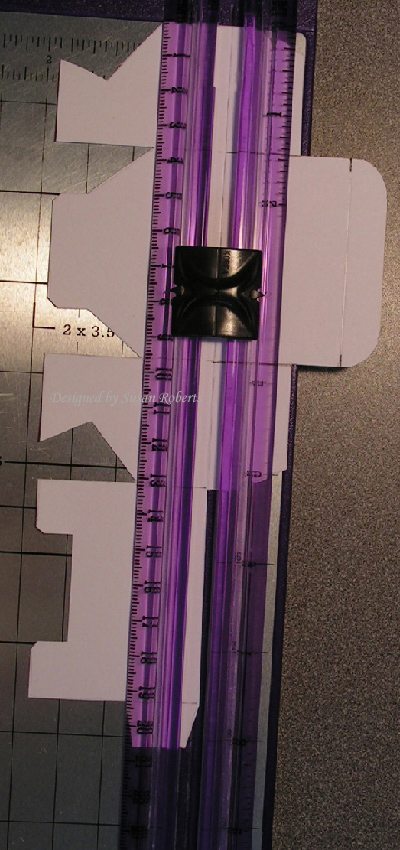
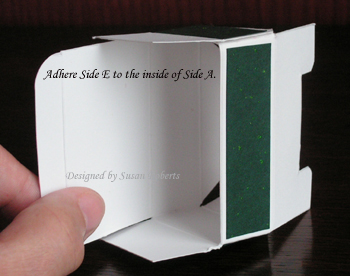
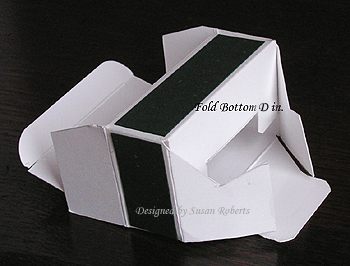
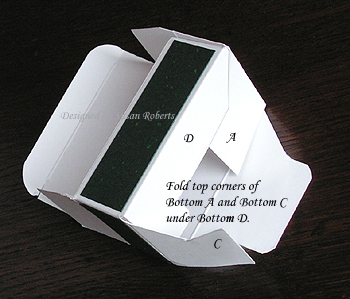
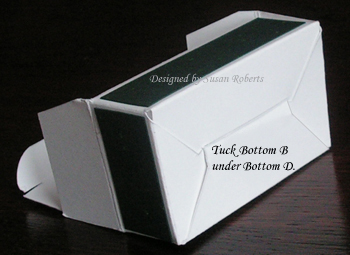
Here are some pictures of the box construction. Just a note.. on the “Flap” I used a corner rounder punch to round the corners. On “Bottom B” and “Bottom D” I used scissors to snip off a small triangular shape at the angled corners as shown in the pictures below.
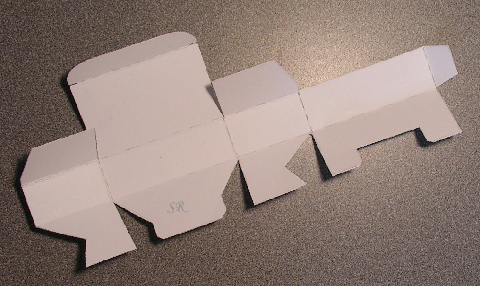
All folds are in the same direction.
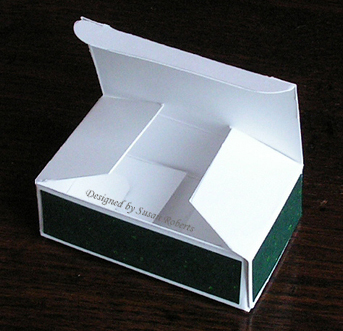
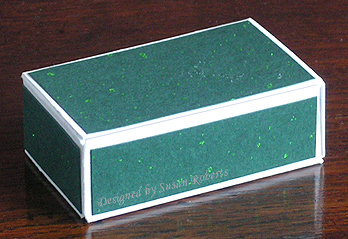
The Glittering Christmas paper on the green box is from Flourishes.
And it’s done! If you have any questions, just ask. I will answer them as soon as possible which will most likely be next week. Got a big weekend planned. Tonight is a craft night of sorts at our church, and I will be teaching a couple of ladies how to make a few cards. And then tomorrow is my 17 year old son’s homecoming dance. There are 14 couples in his group. He has organized the whole thing, has everyone showing up at our home for pictures to start the evening off (14 couples and parents) and then 2 huge limos will come to take them to dinner and the dance, etc. Plus they are all returning here around midnight after their haunted house adventure to watch a movie in our little home theater. Should be some crazy fun. He is my last of 4 sons and I am cherishing every minute of it. They grow up so so so fast…
Finally… the BLOG CANDY! A Muse has just released the coolest set called “Hero Mail”. $2 from the sale of each set goes to Operation Troop Aid. Well I just love the set, and so I bought 2… one for me and one for you if you are the winner! I’ll have it up on my blog sometime next week. It’s a perfect set for Veteran’s Day!
Hope everyone has a great weekend. Oh and if you do make a box or two and post them somewhere, PLEASE leave me a link. I would LOVE to see them!!
——————————
Stamps: SU! Everyday Flexible Phrases
Papers: SU! DSP Autumn Vine, Really Rust, Sage Shadow; PTI White
Inks: SU! Really Rust Classic
Accessories: SU! 1/2 inch Striped Grosgrain; McGill Leaf Punch


Thank you very much for the great tutorial! Love your cute little boxes! Wow! You would be very busy! Hope everything will go well! Thank you for the template and tutorial!
Your boxes are so cute and what a great little gift for my next meeting with my stamping friends. Also love you card on the post below, beautiful. Pat
Did you model that after the box that a bar of Dove soap comes in? I took one apart and it is sitting on my desk, because the task of making a template was too daunting! thanks for sharing 🙂
The boxes are so cute! Thanks for the template and the tutorial!
these boxes are adorable. thanks for the chance at blog candy too!!
Oh Susan, these are so neat! What wonderful boxes to fill with sweet treats or small gifts. Oh my, my head is just spinning with ideas — Thank you for the wonderful inspiration!
Thanks for the tutorial! I’m always more likely to try something if I have step-by-step pictures. 🙂 What awesome blog candy!! I’m a military wife (and Army Veteran myself) and could use this set over and over! Thanks so much for the opportunity!
These boxes are so cute! Tiny things awlays catch my attention! LOL!
These are adorable! And the stamop set is too. But then again, I may be considered biased….I’m a military mom.
These boxes are too cute! Thank you so much for taking the time to share the tutorial!!!
You are also very generous to share a set of the new Hero Mail with your readers!
These are soooo pretty!!! Thanks for sharing!!
A fabulous tutorial for that adorable box Susan! Thanks so much for sharing!
There is just something so cute about little boxes…love the paper and the leaf…perfect fall finishes!
Susan – this is sooo cute – great looking boxes – love the inside too – he,he,he!!! Thanks for the tutorial!!!
Have a great weekend!!!
Thanks so much for the tutorial! I just bought some early Christmas presents, and need a small box for them. This will be perfect!
Your box is so cute. I have to come up with a a gift idea to try it. Thanks so much!
I love this box thank you so much for the wonderful tutorial. TFS.
Debbie/Phx AZ
What a cute box!! I love your autumn box with the candies inside — adorable! Thanks so much for sharing the tutorial!
Great tutorial…can’t wait to try it out. Love the leaves.
Charmaine
Adorable little boxes and awesome template. I think you did great showing us it! I will be checking back this week. make sure you check out my Romo card on my blog when you get a chance. You will get a kick out of it. :0)
What a really cute and useful little box. Thanks for the tutorial, Rainy! Wonderful!
Thanks for sharing the template for these cute little boxes! They can be used for a gazillion things!!
Have a fun weekend with all your activities!!
I will have to make time to try your box template, it just looks so cute! Thank you for sharing it with us 🙂
I will be sure to post some pictures when I make that too cute box. thanks for sharing everything.
Love the box and the tutorial. So cute and so easy!!!
Your boxes are soooo pretty, and I love the little leaves!! Thanks for the MOST awesome tutorial too!!
these are so adorable! it’s exactly what I was thinking of making soon & you did all the work (no worries, I will give you credit when I post) TFS!!
Very neat project. Thanks for the detailed tutorial. Love how they look made up.
These are darling little boxes, Susan! You’re so GOOD to provide a template! I wouldn’t begin to know how to do that. I’ve taken boxes apart before and used them as a template, but to make my own that I could share as a computer file–no way. You’re much more computer savvy than I ever thought of being!
Your son’s evening out sounds grand! He’s quite the organizer. I’ll bet he’ll go far in the world. You must be very proud of all your boys, as well you should be. It’s good you’re appreciating every moment of this time.
Your little boxes are soooo cute! Thanks so much for the tutorial — I’m a visual learner so this helps a lot.
Hope your son’s Homecoming night was a special time to remember — it sounded like it was gonna be a blast!
I recently came across your blog and have been reading along. I thought I would leave my first comment. I don’t know what to say except that I have enjoyed reading. Nice blog. I will keep visiting this blog very often.
Sarah
http://www.lyricsdigs.com
Thanks so much! This is just what I was looking for. They’re adorable.
[…] box tutorials and templates. Here’s a link to a whole host of them. And here’s the template and tutorial I based mine off. Use pretty paper or decorate the box itself and you’ve eliminated the need […]
I love the template though I wish you had done it with words, then illustrated with pictures