Looks like dad will be getting a few shirts and ties for Father’s Day… again! LOL
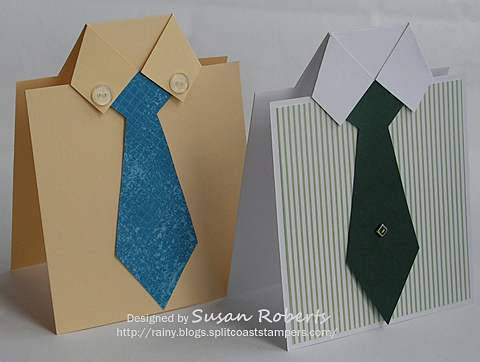
There is a darling shirt and tie card on p.154 of the current SU catalog. Not being a demonstrator, I have no idea if SU has a template for this card, so I worked up my own A2 sized design.
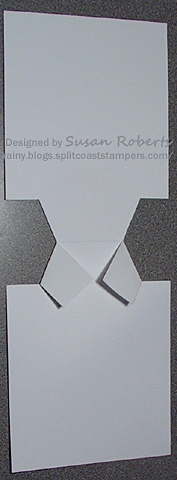
Shirt Tutorial
1. Begin with a standard A2 sized card base (cut to 11″ x 4-1/4″, scored in half so that the card opens from the bottom).
2. On card front, measure 1″ down from the fold and draw a line across the width of the card.
3. Mark fold at 1-1/4″ from either side. Mark on 1″ line at 7/8″ from either side and at center (2-1/8″). (Marks “on fold and 1″ line should be made slightly below the fold and above the 1” pencil line, respectively.)
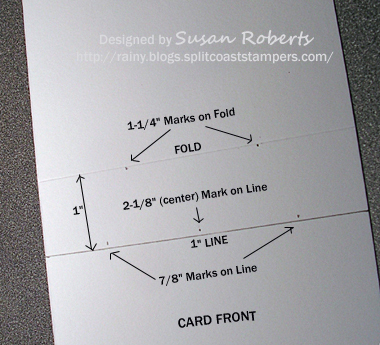
4. Cut to the 1-1/4″ marks on the fold line and the 7/8″ marks on the pencil line. (Cut directly on the fold and pencil line, respectively.)
5. Fold the point of the top outer corners to the 2-1/8″ center mark right above the pencil line.

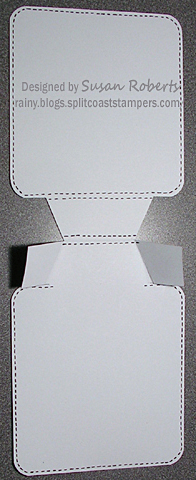
6. Close the card and trace and cut out the outline on the back of the card of the area created by the folded down collar. (Cut slightly outside of the pencil lines to ensure that none of the card back is visible from the front when the card is closed.
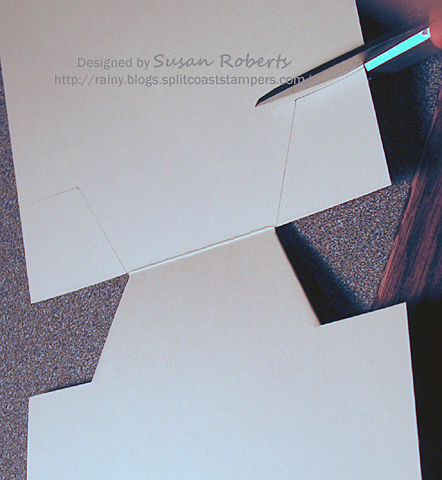
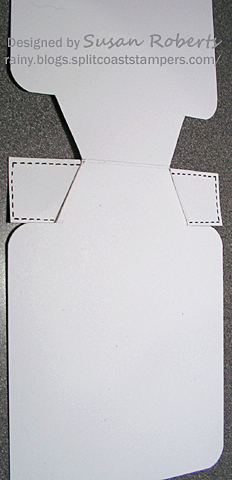
You should end up with a card base that looks like this!
That’s it! Of course, you can add stitching or round the corners, button down the collar or whatever! If you want to add a patterned paper to the shirt front, it should measure 4″ x 4-1/4″. (This will leave an 1/8″ card base border.)
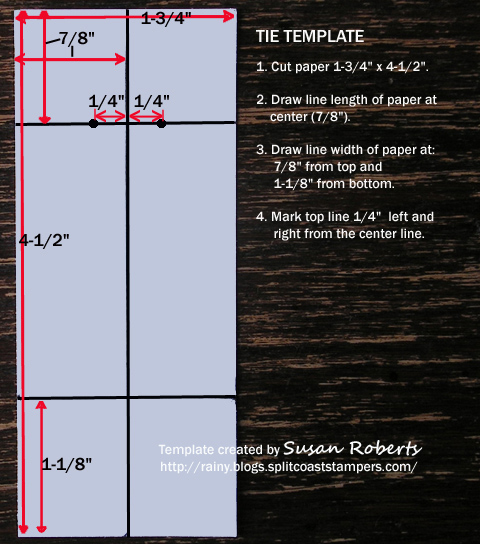
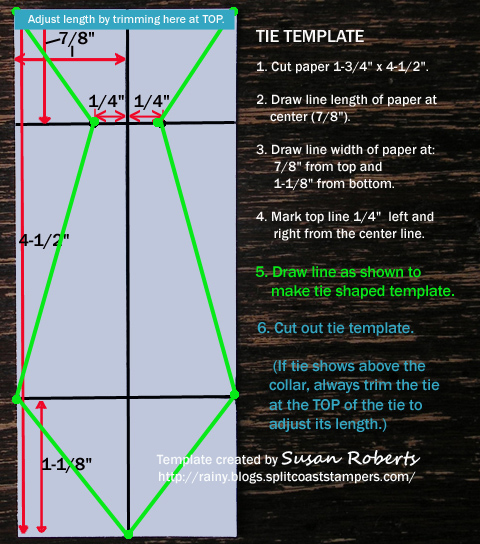
Tie Template

Hope you have some fun with these!
Happy Crafting!
——————————
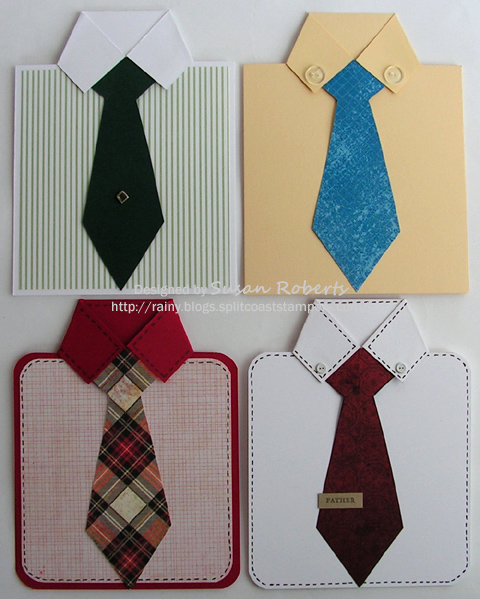
The GREEN shirt:
Papers: PTI Select White; SU Handsome Hunter; Memory Box Ethan and Bella DP
Accessories: SU Ice Rhinestone Square Brad
The YELLOW shirt:
Papers: SU Barely Banana and Blueberry Crisp DSP
Accessories: SU Bitty Buttons
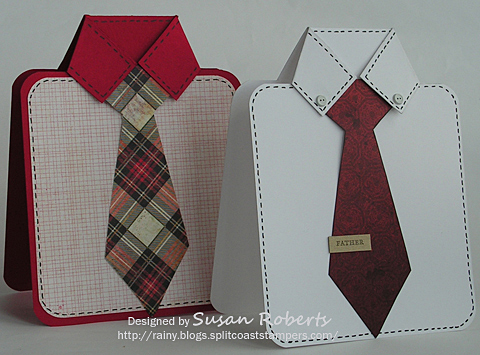
The RED shirt:
Papers: PTI Pure Poppy; My Mind’s Eye Stella Rose Hazel DP; Basic Grey Jovial DP
Inks: Black Gel Pen
Accessories: Corner Rounder Punch
The WHITE shirt:
Stamps: Teeny Tiny Wishes – Only a portion of the stamp was used for the tie clip. Since part of the sentiment was so close to the part that I wanted, I covered it with scotch tape before applying the ink. This assured me that no ink would sneak onto the unwanted section. The tape is, of course, removed before stamping.

Papers: PTI Select White; SU Brushed Gold; Basic Grey Boxer DP
Inks: SU Basic Black Marker
Accessories: Small White Button Brads; Corner Rounder Punch


