Looks like dad will be getting a few shirts and ties for Father’s Day… again! LOL
There is a darling shirt and tie card on p.154 of the current SU catalog. Not being a demonstrator, I have no idea if SU has a template for this card, so I worked up my own A2 sized design.
Shirt Tutorial
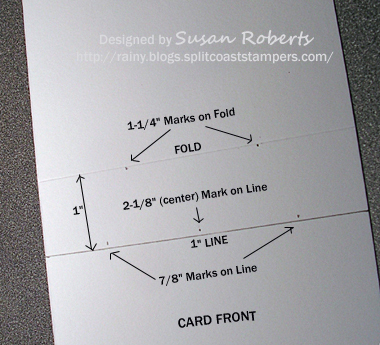
1. Begin with a standard A2 sized card base (cut to 11″ x 4-1/4″, scored in half so that the card opens from the bottom).
2. On card front, measure 1″ down from the fold and draw a line across the width of the card.
3. Mark fold at 1-1/4″ from either side. Mark on 1″ line at 7/8″ from either side and at center (2-1/8″). (Marks “on fold and 1″ line should be made slightly below the fold and above the 1” pencil line, respectively.)
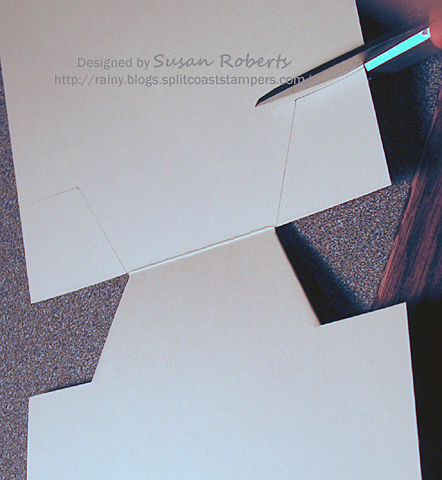
4. Cut to the 1-1/4″ marks on the fold line and the 7/8″ marks on the pencil line. (Cut directly on the fold and pencil line, respectively.)
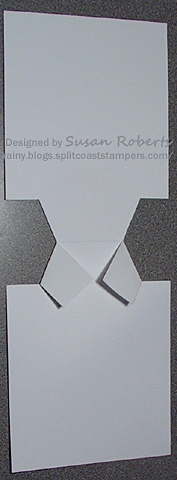
5. Fold the point of the top outer corners to the 2-1/8″ center mark right above the pencil line.
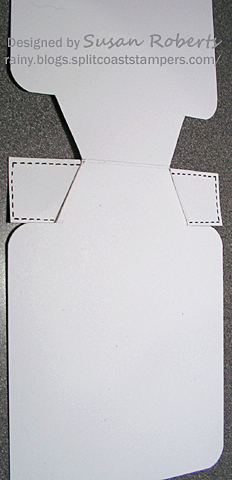
6. Close the card and trace and cut out the outline on the back of the card of the area created by the folded down collar. (Cut slightly outside of the pencil lines to ensure that none of the card back is visible from the front when the card is closed.
You should end up with a card base that looks like this!
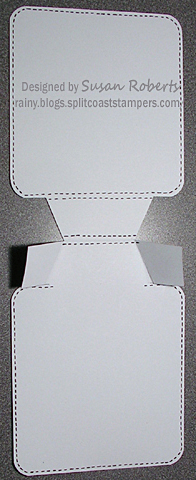
That’s it! Of course, you can add stitching or round the corners, button down the collar or whatever! If you want to add a patterned paper to the shirt front, it should measure 4″ x 4-1/4″. (This will leave an 1/8″ card base border.)
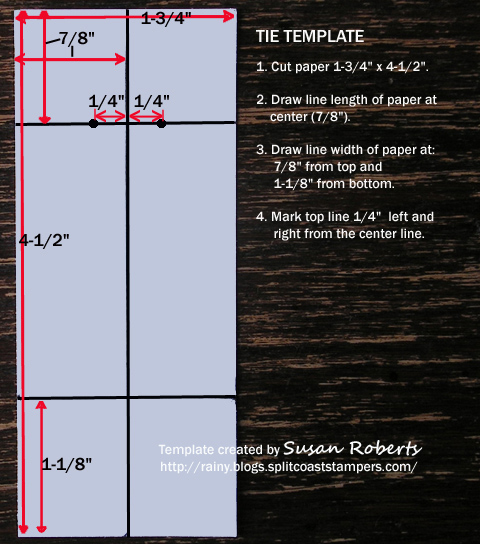
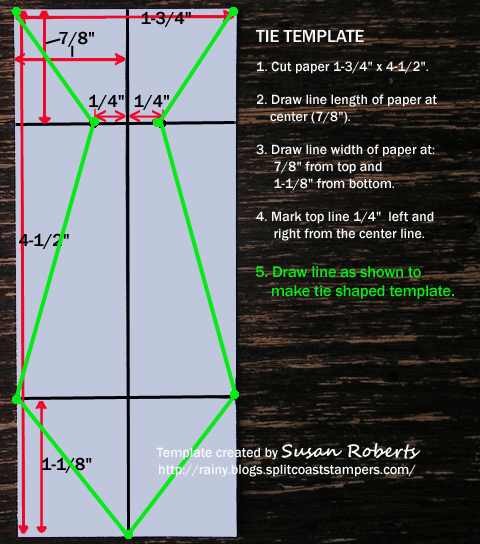
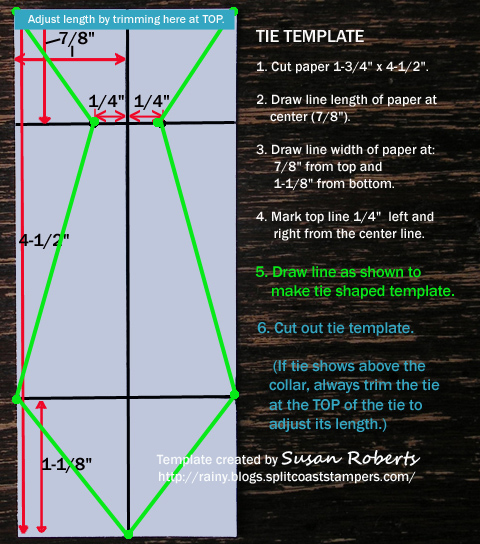
Tie Template
Hope you have some fun with these!
Happy Crafting!
——————————
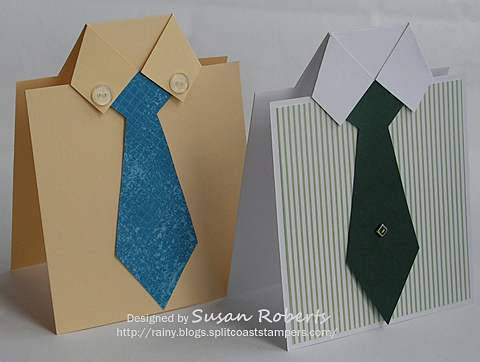
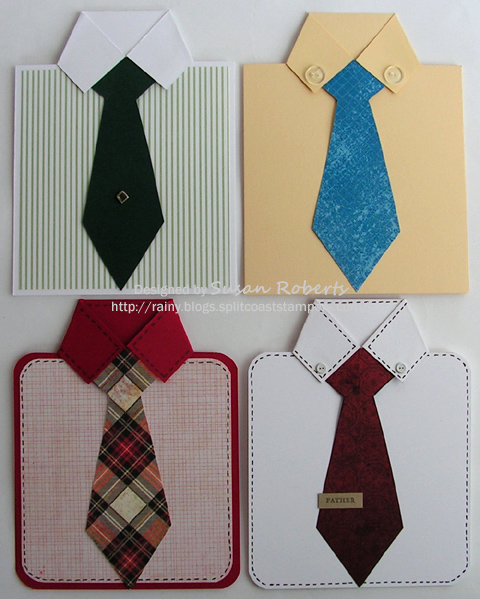
The GREEN shirt:
Papers: PTI Select White; SU Handsome Hunter; Memory Box Ethan and Bella DP
Accessories: SU Ice Rhinestone Square Brad
The YELLOW shirt:
Papers: SU Barely Banana and Blueberry Crisp DSP
Accessories: SU Bitty Buttons
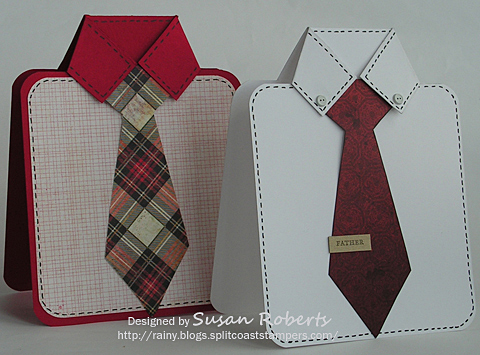
The RED shirt:
Papers: PTI Pure Poppy; My Mind’s Eye Stella Rose Hazel DP; Basic Grey Jovial DP
Inks: Black Gel Pen
Accessories: Corner Rounder Punch
The WHITE shirt:
Stamps: Teeny Tiny Wishes – Only a portion of the stamp was used for the tie clip. Since part of the sentiment was so close to the part that I wanted, I covered it with scotch tape before applying the ink. This assured me that no ink would sneak onto the unwanted section. The tape is, of course, removed before stamping.
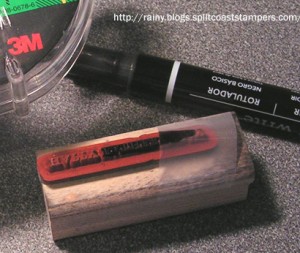
Papers: PTI Select White; SU Brushed Gold; Basic Grey Boxer DP
Inks: SU Basic Black Marker
Accessories: Small White Button Brads; Corner Rounder Punch

























Great shirts! Thanks for the tutorial :).
SOOO clever!! I love it Susan! I also love all your unique shirts and ties! 🙂 Thanks for sharing, I am totally going to use this!
Susan these are FABULOUS!!~
Susan,
You continue to amaze me with your talents! Your cards are fantastic! I’m going to try them for my Father’s Day Sale at church. You are truly a blessing to share the directions and templates!
Blessings,
Sue
What a perfect card idea! Thanks for all the effort you put into these detailed instructions. Fantastic!
Your cards are amazing and so perfect for father’s day! Thanks for sharing your expertise in creating them 🙂
Fab cards, Susan. Thanks so much for sharing your amazing tutorial.
These are just so clever and cute and fabulous!! Love them…thanks for sharing the template!
Hi Susan, great project, thanks for the tutorial.
I LOVE LOVE it..this is absouttely adorable…thank you so much for sharing your talent…
cheryl
OMG!!!! I LOVE, LOVE, LOVE this FABULOUS shirt card…WOW!!!! Thanks sooo much for the tutorial…I am sooo going to make some of these!!!!!
I LOVE LOVE LOVE this.. I have an idea on how to use it too.. Thank you so much for the tutorial. You have been busy. I really like the way you added the collar. I did one with a folded collar and it was a bear.. Great job.
Oh my gosh…these are soooo awesome, Susan!! Thanks for all of the details and your wonderful tutorial!!
very cute! They’re perfect for Father’s Day!
Fantastic shirts Susan!! Thanks for the tutorial!
Oh Susann, this is really COOL. Works for sure also as a male birthday card!
Great tutorial! I love them all but my fav is the plain white shirt with red tie…reminds me of my Dad going to work! 😉
So very clever and creative, love them, thanks so much for sharing the tutorial!
Thank you very-very MUCH, Susan for sharing this fantastic tutorial! What a great idea! I think I am going to try making these shirts too! 🙂
Susan, I made some of these thanks to your wonderful tutorial. You can see them here.
http://www.splitcoaststampers.com/gallery/photo/1989918?&cat=500&ppuser=34518
Thanks again for your tutorial.
Blessings,
Sue
Love your tutorial! I found you via Sue’s (Bensarmom) blog. My blog has a different shirt tutorial, if you’d like to take a look.
Thanks for your tutorial! I made it into a cut file that I would be happy to share (for free of course) if it is okay with you. I can make it in a .pdf format, .mtc (Make the Cut), and .svg.
Please let me know and I will be happy to host it on my blog.
hello! Did you ever make an .svg for the tie and shirt card?
What a great tutorial! Your shirt cards are so cool!
Hi Susan. I saw your shirt box and it’s sooo cute I had to come to your link to see how you did the shirt. Thanks.
Ter 😉
Thanks for tutorial.
I just love these shirts with the stand-up collars and the lovely ties to match! Well done!
Thank you for such detailed instructions.
Hey I know this is off topic but Iwass wondering if
you knew of anny widgets I could add tto my blog that automatically tweet
my newest twitter updates. I’ve been looking for a plug-in like this
for quite some time and was hoping maybe you would have some experience with something like this.
Please let me know if you run into anything. I truly enjoy reading your blog and I look forward to your new updates.
[…] have a template for the shirt and tie card HERE. I also have a template to make the shirt and tie into a little tote HERE. Hope you’ll […]
This tutorial is awesome! So easy to follow and understand. The pictures are great and very helpful. Thank you so SO much for sharing this template for a shirt and tie card that opens.
Thanks Susan, these are just what I’ve been looking for, thanks so much for sharing your templates with us.
Much appreciated Gail
I have made a version of this card many years and have the kids design their own tie, instead of using scrapbook paper. I get 3 cards out of one piece of folded construction paper, cut on a paper cutter.