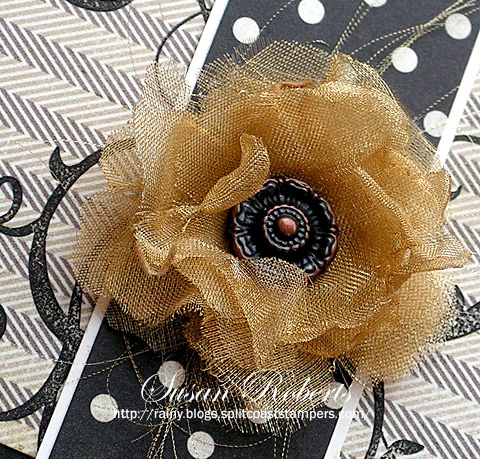
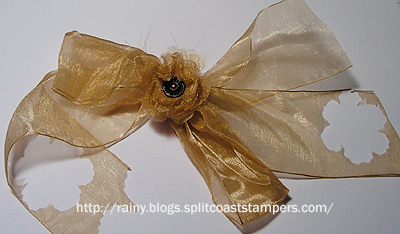
Seattle Chocolates.. Oh the truffles! My hubby gave me a box of them for Valentines. The box came all tied up with a big wide organdy ribbon. And as much as I LOVE chocolate, {{ribbon}} is right up there on the list as well. After the chocolates were gone, the ribbon found it’s way to my craft table. Today it became a flower!
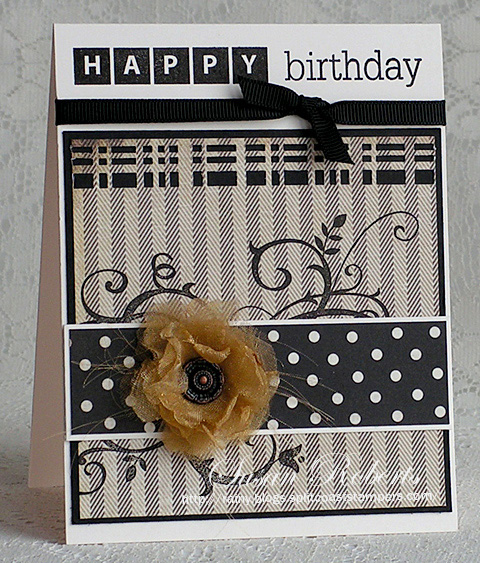
The challenge over at Stampin’ Sisters in Christ this week is to use a flower(s) on your project. I played along with my new little creation. (Now after reading the challenge more carefully, it says that the image must either be or have a flower in it. Well, technically the flourish stamped on my designer paper does have a couple of silhouetted flowers. So I’m hoping my card still qualifies.)
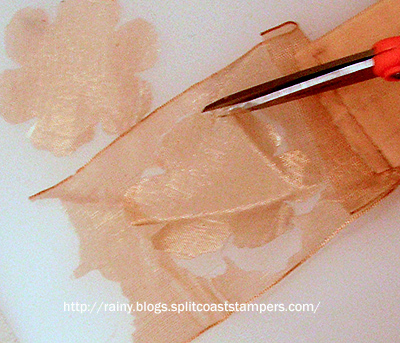
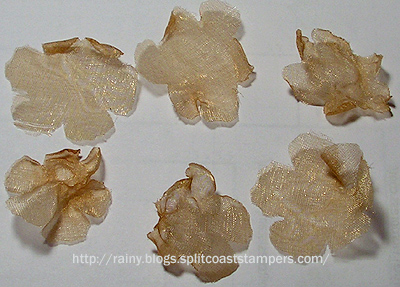
To make the flower, Jim Holtz Alterations “Tattered Florals” Die was used. I cut six flowers out from the ribbon. (Sometimes there are little threads that can be clipped with scissors as in the picture below.)
Using a heat gun, the cutout flowers were “melted.” In the picture below I am holding the flower with my fingers. However, I often will use a pair of tweezers to avoid any, “Ouch. That’s hot!” moments.
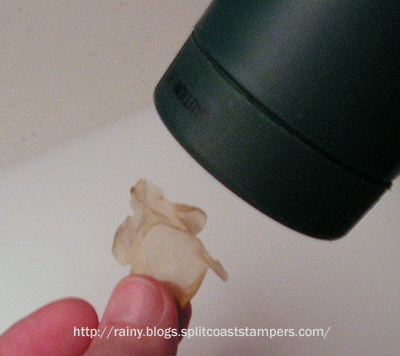
It doesn’t take much to really get them to crinkle. Here are all six flowers melted to various amounts.
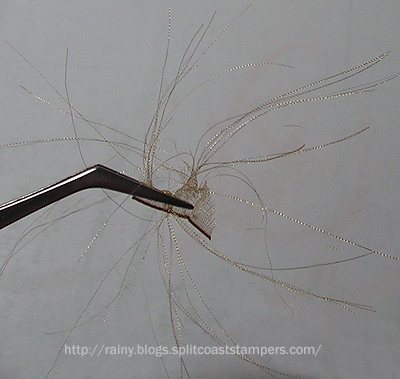
To add a little more fun to the flower, I pulled several threads on the ribbon leaving them attached on one side.

Clipping off this end, I then heated these threads just enough to slightly alter them.
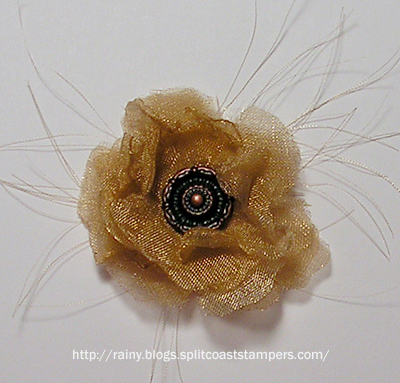
Taking a brad, I pushed through the center of each flower starting with the flowers which were crinkled the most. When all the flowers were secured together, the threads were attached at the back with a couple of glue dots. Voila!
This was so fun, and I still have a lot more ribbon to play with in the future!
Happy Crafting!
——————————
Stamps: PTI Birthday Bash Sentiments; SU Baroque Motifs
Papers: PTI Vintage Cream and True Black; Basic Grey “Little Black Dress” DP
Inks: Archival Brilliance “Graphite Black”
Accessories: Organdy Ribbon; Jim Holtz Alterations “Tattered Florals” Die; EK Success Plaid Border Punch; Decorative Brass Brad


The flower is fabulous! Thanks for the tutorial. I’d never have thought to use the heat gun to melt the ribbon though I’ve had a few unexpected surprises with an iron and delicate fabric. Very clever recycling. He will just have to buy you more chocolates, now!
What a lovely card and you’re so creative with recycling! The flower is just stunning!! I really like the stamped sentiment on this card too!
How creative and fun 🙂 Gorgeous flower and card. Glad you enjoyed the chocolates too 😉
I love your bow, especially with the fly away ends! I’m almost sure I have some ribbon like that around here, so I’m going to give it a try, too! Thank you, Susan!
Totally gorgeous Susan. Love your tutorial as well! This card just comes together so lovely! I am the same with ribbon, you should have seen me when my daughter opened her wedding presents LOL…she just rolled her eyes at me!
This is awesome! I really like the tip about the frayed bits going around the back! Iv’e never seen that! 🙂
Beautiful card and I am very impressed with the flower. I never would have thought about using the heat gun on it.
your flower is gorgeous! thanks for walking us through the process of making them!
Awesome tutorial!! Your a tougher cookie than I am! I always need tweezers! Your flowers are beautiful! TFS
Love that ribbon flower! My DH knows just to get me the ribbon now instead of the chocolates thanks to my migraines.
Susan, your flower is gorgeous! I hope your card qualifies for the challenge because it is a winner in my book!
Beautiful card and the flower is gorgeous. Neat design and colors too!
Love the card and the flower! Thanks for the directions – I am off to look through my ribbons right now and play with the heat gun!!! 🙂
Great way to recycle, Susan…this looks fantastic!!!!! I never would have thought to cut the flowers out of the ribbon and how cool to shread it for the threads…shear genius!!!!
so pretty, gorgeous flower and neat sentiment!
Awesome card. That flower embellishment is fabulous!
This is amazing. Thanks for sharing how you made it. I especially like the fiber look!! My kids are always saving me wrappers and ribbons that come on packaging because they know it will find it’s way to a card. Thanks for Sharing with the Stampin’ Sistesr in Christ Challenge.
Chocolate and Ribbon. Oh he must love you BTW your flower is darling thanks for the tutorial!
PS Congratulations on your blogsversary (sp?) Here is to 100 more lololol
Those flowers ARE fun…I need to make some again. Yours turned out beautiful! Way to recycle!
Susan, your flower looks gorgeous! So does your card.
Hugs and smiles
Your flower technique is great, the flower has a lovely “shabby chic” look which finishes the card beautifully.
This is just so darn classy looking! Great design, and I love how you did the flower, right down to those fun, feathery threads. Fabulous idea!
I take pleasure in the useful information and facts you present in your posts.