Oct 312008

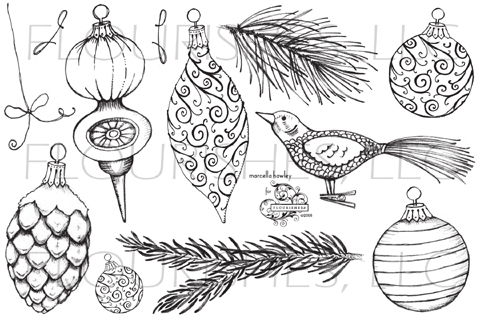
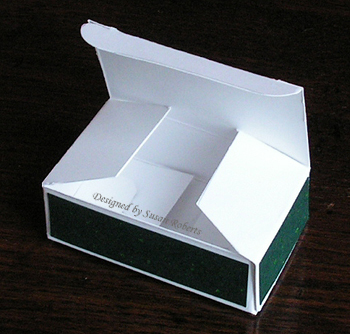
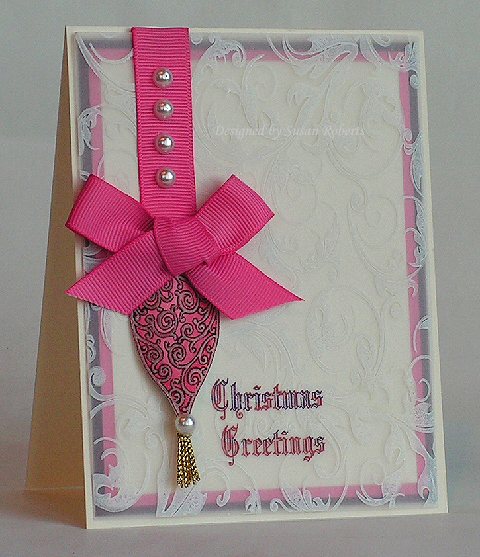
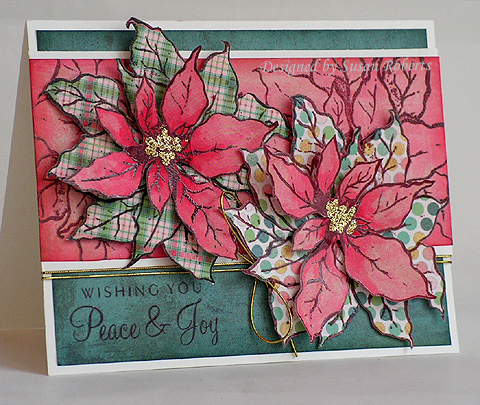
Since I first saw the pine bough image from Flourishes “All That Glitters” stamp set, the idea for this card has been in my head.  And I have to admit I love the serene and peaceful feel of this scene.

blog120withwm.jpg

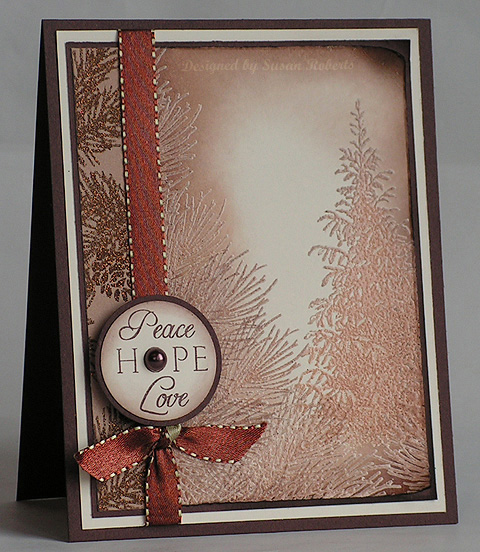
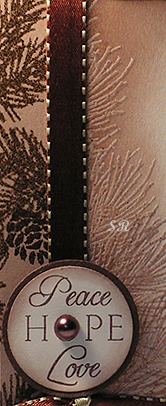
I stamped the bough image several times, starting at the bottom and moving up, to form the large half tree in the foreground.  The tree in the background is from Flourishes “Forest of Trees” stamp set.  Using the emboss resist technique, both trees are stamped with a blend of Creamy Caramel and VersaMark and then embossed with clear embossing powder.  SU!’s Creamy Caramel, Close to Cocoa and Chocolate Chip inks are then sponged onto the card stock.  The left panel is Flourishes “Glittering Christmas” designer paper. The sentiment is from Flourishes “Holiday Greetings” stamp set and stamped in Chocolate Chip.  There is a chocolate Kaiser flatback pearl placed on the sentiment.  The ribbon is May Arts.

——————————

Flourishes “All That Glitters”

blog114allthatglittersset.jpg

blog120closeup.jpg
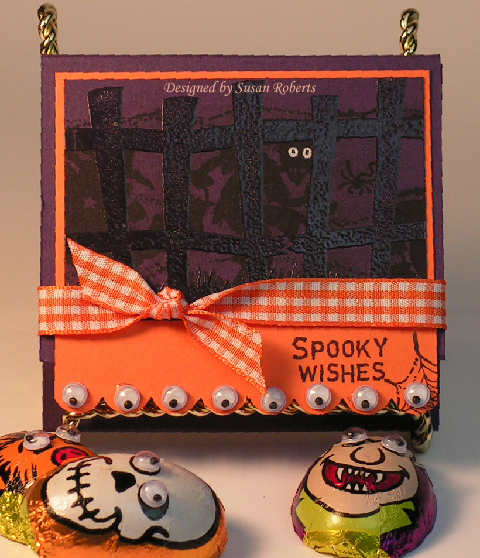
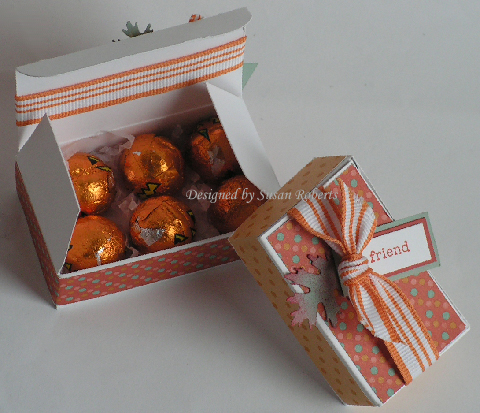
It’s Halloween and each year there have been fewer and fewer trick-or-treaters at my door.  I miss seeing all the little ones… *sigh*  Last year I bought full size candy bars in the hopes that the word would get around that the walk up our driveway was worth it.  But I only got seven total.  Well ever the optimist, I’m still hoping I get tons of spooks and goblins tonight!  lol  Have a safe and happy one!

——————————

Stamps: Flourishes “All That Glitters”, “Forest of Trees”, “Holiday Greetings”

Papers: SU! Very Vanilla, Chocolate Chip; Flourishes “Glittering Christmas” DP

Inks: SU! Creamy Caramel, Close to Cocoa, Chocolate Chip, VersaMark

Accessories: Ribbon, Pearl, Clear Embossing Powder, 1-1/4″ Punch, 1-3/8″ Punch

A beautiful bedroom setting is the inspiration piece for Beate’s challenge today.

blog119bic29piece.jpg

Here is the card I made for it.

blog119bic29withwm.jpg

This is a Stampin’ Up! only card.  I cut out the large flower from their Designer Series Paper “Urban Garden”.  The build-a-brad is made with Not Quite Navy card stock.  The embossed card base was done with the scoring blade on my paper cutter.

Be sure to check out the other Inspiration Team’s creations:

Jennifer Buck
Charmaine Ikach
Silke Ledlow
Danielle Lounds
Dawn McVey

 ——————————

Stamps: Fresh Cuts

Papers: Very Vanilla, Not Quite Navy, DSP Urban Garden

Inks: Not Quite Navy

Accessories: Build a Brad (Pewter), Rope Twine, Photo Corners Punch, 1/2 inch Circle Punch

I just got back from random.org.  The winner of my Hero Mail blog candy is comment #22:

Melissa (SCS: stampin_melissa)on 22 Oct 2008 at 4:47 pm

“Your card is absolutely wonderful! As an Army Veteran and now Army wife I just love this set! I could get lots of use out of it! *hint, hint* ;D Thank you so much for an opportunity to win this stamp set!”

Congrats, Melissa!!  Guess the random generator got the hint!  lol  I’ll be emailing you to get your address so I can zip this off in the mail to you asap!

List Randomizer

There were 71 items in your list. Here they are in random order:

  1. 22
  2. 60
  3. 6
  4. 33
  5. 53
  6. 11
  7. 16
  8. 35
  9. 32
  10. 56
  11. 36
  12. 70
  13. 49
  14. 50
  15. 2
  16. 7
  17. 29
  18. 28
  19. 55
  20. 24
  21. 61
  22. 21
  23. 17
  24. 37
  25. 68
  26. 34
  27. 4
  28. 26
  29. 5
  30. 44
  31. 38
  32. 43
  33. 19
  34. 3
  35. 1
  36. 12
  37. 42
  38. 30
  39. 25
  40. 27
  41. 69
  42. 31
  43. 59
  44. 65
  45. 66
  46. 54
  47. 8
  48. 57
  49. 18
  50. 9
  51. 45
  52. 40
  53. 52
  54. 13
  55. 71
  56. 51
  57. 58
  58. 23
  59. 48
  60. 15
  61. 63
  62. 62
  63. 14
  64. 39
  65. 10
  66. 41
  67. 64
  68. 20
  69. 46
  70. 67
  71. 47

Timestamp: 2008-10-27 03:39:42 UTC

I just couldn’t resist these darling baking dishes while shopping the other day.  And well of course I had to make a couple of tags to go with them!

blog118withwm.jpg

So using my JustRite Christmas Stamp Ensemble and my Flourishes Poinsettia and Boxwood set, I did just that and made some matching tags.  Doesn’t that pretty little poinsettia make a perfect accent!  The circles were all cut using the Classic Circle Nestabilities.  The center sentiment was popped up on dimensionals.

blog118closeupopenwithwm.jpg

The holly and bells on the border were colored in with markers.  I also used my Nestabilities to cut the round card base.

blog118back.jpg

blog118nestie.jpg

A portion of the circle Nestabilities hangs over the fold on the card stock to create a card base.  (After I photographed this I realized it might be confusing because I used red card stock to show how I cut the card base with the die cut, but the actual card base on my tag is white.)

Flourishes Poinsettia and Boxwood – Set of 10 Stamps

blog113poinsettiaandboxwoodset.jpg

And now that I’ve photographed this I can slice up and eat the bread!  Well it’s actually sort of a fruit cake.  So confession time… I like fruit cake!  Yay, I think I’m in the minority there!  Well all the more for me!  hehe  I do plan on giving these as gifts, but before I do I will fill them with something that tends to be more universally popular like banana bread!

 Have a great day!

blog118closeupwithwm.jpg

——————————

Stamps: Flourishes Poinsettia and Boxwood; JustRite Christmas Stamp Ensemble

Papers: SU! Real Red, Garden Green, Very Vanilla

Inks: SU! Real Red and Garden Green Craft and Markers

Accessories: Classic Circle Nestabilities, Cuttlebug, McGill Pine Punch, Striped GG Ribbon, Gold Cording, Gold Brads


With Veteran’s Day just around the corner, wouldn’t it be fun to win a stamp set dedicated to our heros?  Well here is your chance!

blog118amusecandycardwithwm.JPG

The set is called “Hero Mail” and was just recently released by A Muse.  The moment I saw it I fell in love!  lol  And with part of each sale going to Operation Troop Aid I decided to get two sets… one for me and one for you if you are the winner!

blog118amusecandystampswithwm.JPG

To enter just leave a comment here on this post.  Then Sunday evening I will use randon.org to pick a winner.  I would love to get this set in the mail on Monday morning to get it to the winner asap!

Oh and I almost forgot to mention that the card I made is for the Sketch Challenge today over on Splitcoaststampers.  You can check out the SC199 gallery on SCS here.

blog118amusecloseupwithwm.JPG

——————————

Stamps: A Muse “Hero Mail”

Papers: SU! Real Red, Whisper White; Provo Craft DP

Inks: Versafine Onyx Black; SU! Real Red, Brilliant Blue, Ballet Blue, Bashful Blue, Old Olive, Blush Blossom, Pretty in Pink, Creamy Caramel; Stardust Clear Pen

Accessories: Star Brad, GG Ribbon


This post is now closed for comments.  Congrats to Melissa, comment #22!  She is the winner!

On Splitcoaststampers the Dirty Dozen/Dirty Dozen Alumni have a challenge each month.  October’s challenge was to create a Halloween card or treat holder using googlie eyes but no pumpkins.  So I decided to make this treat holder.

blog117dcst1008withwm.JPG

Both the fence and the goblins behind it are Stampin’ Up Jumbo Wheels.  The fence was stamped first with VersaMark and then Clear Embossed.  The spooky goblins were then stamped with Versafine Onyx Black.

Here is the inside of the treat holder.  Beate Johns has done a tutorial for this holder over on Splitcoaststampers.

blog117dcst1008closeupwithwm.jpg

Have a spooky day!!  And if you want to check out what the other Dirty Dozen and Alumni have done with this challenge, you can check out the entire gallery here.

——————————

Stamps: SU! Haunting Jumbo Wheel, Frightful Fence Jumbo Wheel; Cobweb from Michael’s Dollar Spot; Sentiment from American Art Stamp

Papers: SU! Elegant Eggplant, Only Orange

Inks: SU! Elegant Eggplant, VersaMark; Versafine Onyx Black

Accessories: Googlie Eyes, Clear Embossing Powder, Gingham Ribbon, SU! Scalloped Border Punch, McGill Super Giant Punch Flower, Cuttlebug, Oval Nestabilities, White Gel Pen, Chocolate Candies

I just love making these little miniature boxes.  Aren’t they cute!

blog116boxeswithwm.jpg

Last week I made one for a door hanger project and promised a template for it this week.  So here it is.. more or less.  lol

blog114box6withwm.jpg

I tried to make it such that the template actually printed to the size/measurements shown on the template.  However, I could not get it to be exact.  Sorry I’m so computer challenged.smileyrolleyes.gif  However because of the angles and shape of the template it is relatively easy to tell where the folds and cuts go without doing any measuring.

blog116box8.jpg

blog116box99withwm.jpg

So the easiest thing to do is simply print the template, cut it out and then just trace around the outside of it.  As long as the proportions are kept the same, the template will work fine to make a smaller or larger size box. When I printed it out the longest measurement (which shows as 9″ on the template) was just over 8″ in actuality.  So it printed a little smaller.  The picture of the boxes at the top of this post shows this smaller box in front (“friend”) and the actual measured to scale box is shown in back (“thanks”).

If you do want to make a box the exact size as the template and you want to measure it, I have all the measurements on the template in a 1/16″ scale, ie 4/16″ instead of 1/4″.  This was just to keep it consistent.

Here is the template:  4blog115boxtemplate.jpg

Here are some pictures of the box construction.  Just a note.. on the “Flap” I used a corner rounder punch to round the corners.  On “Bottom B” and “Bottom D” I used scissors to snip off a small triangular shape at the angled corners as shown in the pictures below.

blog116box9.jpg

blog116box999.jpg

All folds are in the same direction.

blog116box1smallwithwm.jpg

blog116box2withwm.jpg

blog116box3withwm.jpg

blog116box4withwm.jpg

blog116box5withwm.jpg

blog116box6withwm.jpg

The Glittering Christmas paper on the green box is from Flourishes.

blog116box7withwm.jpg

And it’s done!  If you have any questions, just ask.  I will answer them as soon as possible which will most likely be next week.  Got a big weekend planned.  Tonight is a craft night of sorts at our church, and I will be teaching a couple of ladies how to make a few cards.  And then tomorrow is my 17 year old son’s homecoming dance.  There are 14 couples in his group.  He has organized the whole thing, has everyone showing up at our home for pictures to start the evening off (14 couples and parents) and then 2 huge limos will come to take them to dinner and the dance, etc.  Plus they are all returning here around midnight after their haunted house adventure to watch a movie in our little home theater.  Should be some crazy fun.  He is my last of 4 sons and I am cherishing every minute of it.  They grow up so so so fast…

Finally… the BLOG CANDY!  A Muse has just released the coolest set called “Hero Mail”.   $2 from the sale of each set goes to Operation Troop Aid.  Well I just love the set, and so I bought 2… one for me and one for you if you are the winner!  I’ll have it up on my blog sometime next week.  It’s a perfect set for Veteran’s Day!

Hope everyone has a great weekend.  Oh and if you do make a box or two and post them somewhere, PLEASE leave me a link.  I would LOVE to see them!!

——————————

blog116boxesopenwithwm.jpg

Stamps: SU! Everyday Flexible Phrases

Papers: SU! DSP Autumn Vine, Really Rust, Sage Shadow; PTI White

Inks: SU! Really Rust Classic

Accessories: SU! 1/2 inch Striped Grosgrain; McGill Leaf Punch

blog115bic27piece.jpg

Such beautiful colors in Beate’s inspiration piece today.  And I totally went with them.

blog115bic27withwm.jpg

All images are from Flourishes.  The ornament is from their newly released set All That Glitters.  The sentiment is also from a newly released set Sleigh Ride.  The background is Damask.  The sentiment and background were stamped with craft inks.  The ornament was stamped with Bravo Burgundy classic ink and VersaMark on watercolor paper and then clear embossed.  It was then watercolored with Regal Rose and Bravo Burgundy reinkers.  A Bravo Burgundy marker was used to outline the flourishes on the ornament.

4blog115bic27closeupwithwm.jpg

The ribbon treatment was inspired by this card by Jan Marie Curuso.

Be sure to check out the other Inspiration Team’s creations:

Jennifer Buck
Charmaine Ikach
Silke Ledlow
Danielle Lounds
Dawn McVey

Flourishes All That Glitters – Set of 12 Stamps

blog114allthatglittersset.jpg

Flourishes Sleigh Ride – Set of12 Stamps

blog113sleighrideset.jpg

——————————

Stamps: Flourishes All That Glitters, Sleigh Ride, Damask
Papers: SU! Very Vanilla, Bravo Burgundy, Watercolor, Vellum
Inks: SU! Craft Whisper White and Bravo Burgundy, Classic Bravo Burgundy, Reinkers Regal Rose and Bravo Burgundy, Marker Bravo Burgundy, VersaMark
Accessories: Kaiser Pearls; SU! Regal Rose 5/8 inch GG Ribbon, Clear Embossing Powder, Aquapainter; Gold Cording (non elastic); Heat Gun

My project today features the Flourishes “All That Glitters” set.  The stamp I chose to play with is the beautiful bird ornament image.

blog114birdwithwm.jpg

Because of the delicate detailing on the different ornament images in this set, I think they are very flexible as to how you can use them.  Here I have simply stamped and heat embossed in gold on red card stock.  But these images could completely lend themselves to coloring from just a little to as elaborate as one desired.

At Christmastime gift wrapping at our house generally takes place in the room where all of the ribbons, bows, tags and wrapping papers are stored.  I thought that it would be fun to have a warning for the door for those times when everyone really must stay out!

blog114door.jpg

Now that my youngest is 17, something like this might actually work!  I wouldn’t have counted on it years ago, though.  In fact this would have probably had just the opposite effect!  “Oh look, Mom’s wrapping our gifts.  Let’s go help”  *chuckle*

To start I used Mod Podge on a chipboard door hanger.  I adhered this GORGEOUS Glittering Christmas paper to the hanger and then Mod Podged again right over the top of it.  The result was wonderful because the glitter still showed, but it was now permanently sealed to the paper instead of getting all over everything everywhere!

blog114withwm.jpg

I used my Circle and Scalloped Circle Die Cut Nestabilities to cut and make the holly and scalloped rings around the hole for the door handle.  The holly ring image is from the new JustRite “Christmas Stamp Ensemble”.  The lettering is from two different JustRite Fonts “Curlz” 50 pt. size and “Times Roman” 50 and 95 pt. size.  May Arts velvet ribbon and lots of Kaiser rhinestones along with some gold cording and a miniature bow (store bought.. sh-h-h-h-h don’t tell anyone) finish out the project.

blog114box6withwm.jpg

Oh yes and the box…  I made the box with PTI white card stock and adhered strips of the Glittering Christmas paper to the top and sides.  I love this little functional box.  It measures approximately 1-1/2″ X 2-1/2″ and is the same-ish size as the metal tag/frame on my yesterday’s “Sleigh Ride” card.  I am putting together a template and tutorial for it and hope to have it ready to share in a few days.

Flourishes All That Glitters – Set of 12 Stamps

blog114allthatglittersset.jpg

Last month Flourishes offered a discount on the new releases – this month they’re offering you an even better deal! From now through Monday, October 13, get 10% OFF YOUR ENTIRE ORDER!!! So, now is the time to load up on that great Basic Grey paper and matching brads, or perhaps some luscious ribbon.  To get the discount you must put this code in the promotion code box at checkout: RSC88  Now, because you have to put that code in the promotion code box, you will not be able to enter the code for which design team member inspires you.  So…just send Flourishes an e-mail at [email protected] and they will reward your favorite designer!

To see more cards or projects made with this week’s new releases, check out the other Flourishes Design Team and Friends of Flourishes blogs:

Barb Schram

Faith Hofrichter

Julie Koerber

Linda Duke

Leslie Miller

Cindy Lawrence

Joan Bardee

——————————

Stamps: Flourishes “All That Glitters”; JustRite “Christmas Stamp Ensemble”, “Font Set – Curlz”, “Font Set – Times Roman”

Papers: Flourishes “Glittering Christmas”; SU! Whisper White, Garden Green, Real Red; PTI White

Inks: SU! Real Red Craft, Real Red and Garden Green Markers; VersaMark

Accessories: JustRite 3-1/4″ Circle Wood Stamper; May Arts Velvet Red Ribbon; Kaiser Rhinestones; Cuttlebug; Circle and Scalloped Circle Die Cut Nestabilities; Gold Embossing Powder, Gold Cording, Imaginations Chipboard Door Hanger, Bow, Corner Rounder Punch (box flap); Mod Podge

Today I have two cards which feature three of the Flourishes newly released Christmas sets.  The first card is made with the large poinsettia image in the “Poinsettia and Boxwood” set.  It also uses one of the sentiments in the “Holiday Greetings” set.

blog113pandbwithwm.jpg

The images were all stamped using Ruby Red classic ink and VersaMark.  (I have two VersaMark pads.  One is kept clean.  The other is almost black as I often use it to put VersaMark on a stamp that already has ink on it.  Such was the case here.  Because of the “dirty” VersaMark ink, it changed the color of the Ruby Red ink to more of a brownish color.)  The flowers and sentiment were stamped on Basic Grey’s “Two Scoops” designer paper and then heat embossed with clear embossing powder.  Two of the four cutout flowers were stamped on the darker of the two pink papers in the series.  (This was also how the background panel was made.)  One flower was stamped on the plaid and one on the dotted design.  The patterned flowers were cut out in whole.  The pink flowers were cut out around selected petals.  I watercolored the centers of the smaller pink flowers with Ruby Red reinker.  Once it was dry I added Stickles.

blog113pandbcloseupwithwm.jpg

Flourishes Poinsettia and Boxwood – Set of 10 Stamps

blog113poinsettiaandboxwoodset.jpg

Flourishes Holiday Greetings – Set of 19 Stamps

blog113holidaygreetingsset.jpg

The second card uses the new “Sleigh Ride” set.

blog113sleighridecloseupwithwm.jpg

So where’s the sleigh?  Well I just couldn’t resist those cute little miniature images.  I made a scene, sparkled it up with my Stardust Clear Glitter Pen and some Stickles and framed it with a metal tag.

blog113sleighridewithwm.jpg

I finished the card with some dotted May Arts ribbon and Kaiser rhinestones.

Flourishes Sleigh Ride – Set of12 Stamps

blog113sleighrideset.jpg

Last month Flourishes offered a discount on the new releases – this month they’re offering you an even better deal! From now through Monday, October 13, get 10% OFF YOUR ENTIRE ORDER!!! So, now is the time to load up on that great Basic Grey paper and matching brads, or perhaps some luscious ribbon.  To get the discount you must put this code in the promotion code box at checkout: RSC88  Now, because you have to put that code in the promotion code box, you will not be able to enter the code for which design team member inspires you.  So…just send Flourishes an e-mail at [email protected] and they will reward your favorite designer!

To see more cards or projects made with this week’s new releases, check out the other Flourishes Design Team and Friends of Flourishes blogs:

Barb Schram

Faith Hofrichter

Julie Koerber

Linda Duke

Leslie Miller

Cindy Lawrence

Joan Bardee

——————————

Poinsettia Card

Stamps: Flourishes Poinsettia and Boxwood and Holiday Greetings

Papers: Whisper White, Basic Grey Two Scoops DP

Inks: Ruby Red Classic and Reinker, Handsome Hunter Classic, VersaMark

Accessories: Clear Embossing Powder, Stickles, Gold Cording, Aquapainter, Heat Gun

Winter Wonderland Card

Stamps: Flourishes Sleigh Ride

Papers: Real Red, Whisper White

Inks: Versafine Onyx Black, Bashful Blue Classic, Bashful Blue, Real Red, Yoyo Yellow, Only Orange, Certainly Celery Markers, Stardust Clear Glitter Pen, White Gel Pen, Copic Multiliner 0.1

Accessories: Cuttlebug, Dotted Swiss Embossing Folder, Metal Tag, Snowflake Brad, Kaiser Rhinestones, May Arts Dotted Ribbon, Stickles, Blender Pen


© COPYRIGHT © and FTC Declaration

All content on my blog is COPYRIGHT © 2008-2024 Susan Roberts. Please don't copy any of my stuff for publication, design or contest submission. I declare that I sometimes promote and/or endorse products that I currently receive or have received either for free or at a discount. That said, I won't ever recommend anything that I don't personally enjoy using or feel is a quality product.
© 2020 Rainy Day Creations Suffusion theme by Sayontan Sinha