Mar 012012

This card was made to play along in this week’s “Over the Edge” challenge at Our Creative Corner.  The idea was to have just one or two feathers TOTAL on the entire card, but as you can see, someone got carried away in the moment!!  LOVE!

Was this ever fun!!

Now this was some Happy Crafting! Thanks for dropping by today!

——————————

Stamps: Flourishes Irish Blessing; SU Patterned Party
Papers: PTI Select White and New Leaf
Inks: Archival Brilliance Graphite Black; Memento Tuxedo Black; Copic:
Accessories: May Arts Lace; Shamrock Rhinestones; Feathers; Nestabilities Ovals Dies; SU Stripes Embossing Folder

Recently I cleaned and organized all my crafting goodies.  In so doing a gold ink dauber turned up.  So weird.  I have no recollection of ever even buying this sweet thing.  But once I found it and saw how it sparkled, I had to give it a try.

This week’s challenge at Our Creative Corner is to “make a project with a Christmas tree on it”.  So using my new found dauber, I made two!

And here are some close ups.

Look at that shimmer!

The sketch for this second card was inspired by Splitcoaststampers Sketch Challenge #357.

I LOVE this stuff!

What treasures one can discover just by cleaning! 

Happy Crafting!

——————————

Card1
Stamps: PTI Tree Trimming Trio and Merry Little Christmas
Papers: Select White and Pure Poppy; Cosmo Cricket Odds & Ends DP
Inks: SU Handsome Hunter and Old Olive; Delta PureColor
Accessories: Fleur de Lis Ribbon; Rhinestones; PTI Tree Die

Card2
Stamps: PTI Tree Trimming Trio and Merry Little Christmas
Papers: Select White; Graphic 45 An ABC Primer Collection DP
Inks: Memento Tuxedo Black; Copic (outline tree); Ranger Distress Old Paper; Delta PureColor
Accessories: Grosgrain Ribbon; Rhinestones; 1/2″ Circle Punch; PTI Tree Die

Nov 242011

Check out the gorgeous colors on this inspiration photo over on Our Creative Corner.  I played along in their challenge with my Thanksgiving card.

Hope everyone is having a wonderful day.

Happy Thanksgiving!!

——————————

Stamps: PTI Gobble Gobble

Papers: PTI Fine Linen; My Mind’s Eye Six by Six All Spice DP

Inks: Memento Rich Cocoa; Copics:

Accessories: Rhinestones; Organdy Ribbon; Crocheted Lace; EK Success Falling Leaves Edger Punch

SO much to be thankful for….

One of my son’s birthdays is coming up, so this week’s challenge at Our Creative Corner fit in perfectly with the need to make him a card.

I love this old truck image.  It reminds me so much of the pickup that my DH drove in high school when we were dating… you know… back in the olden days!  Had fun coloring it with Copics.

And growing up in Washington State, who didn’t have an apple tree or two in their yard!  I remember the Red Delicious apples my dad grew.  They were HUGE, seriously, the size of cantalopes.  The weight of the apples would bend the branches so low.  He would put poles under them to hold them up to keep the fruit from resting on the ground.  He loved his apples and would eat them everyday.  He didn’t like the peel though and could wind around and around the apple with a paring knife to make one long peel.  As a little girl I delighted in watching him do this.  Wonderful memories of simpler times…

Happy Birthday, Gary!

——————————

Stamps: SU Countryside and On Your Birthday

Papers: PTI Select White and Pure Poppy; My Mind’s Eye Stella Rose Gertie

Inks: Memento Tuxedo Black; SU Night of Navy; Copics:


Accessories: Ribbon

As the guest designer over at Our Creative Corner, I made this “Fancy Folds” card for this week’s challenge.

This was super easy and quick to make and has such a fun surprise as you open it!

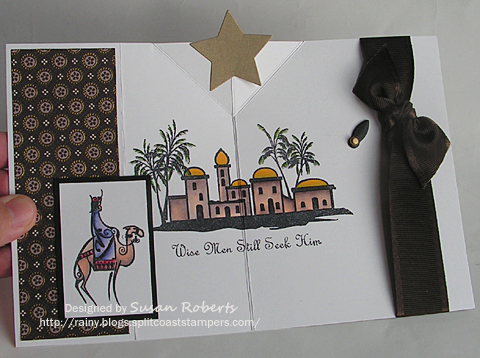
When the card is closed the pop-up star is completely concealed.

As the card is opened it begins to rise.

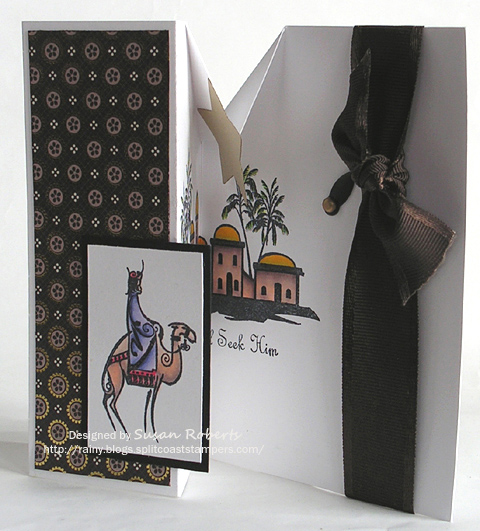
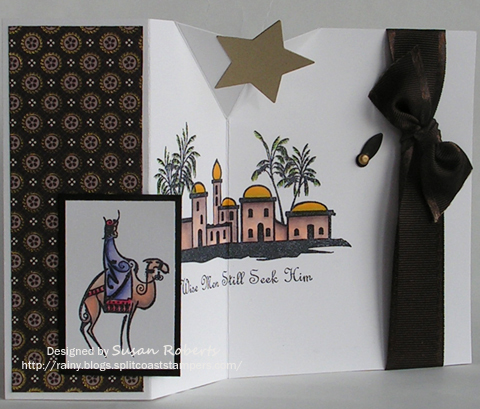
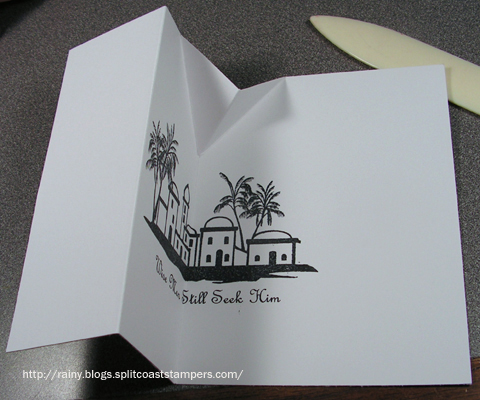
Here is the card fully open.

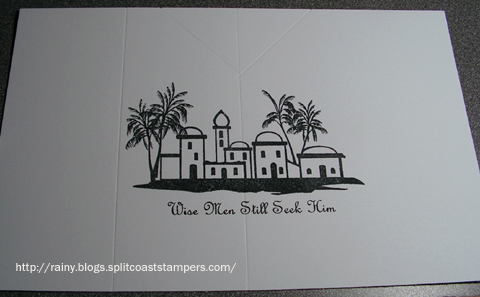
Before doing any of the scoring for this card, I first stamped the inside image.  This prevents any problems with trying to stamp over a score line which can distort a stamped image.  Since 2-1/8″ will show on both sides when the card is closed, I made sure that the image and sentiment were stamped at least that distance from either side of the card.

This design uses a standard sized card base of 5-1/2″ x 8-1/2″ with the center scored at 4-1/4″ and an additional score at 2-1/8″ to the left of the center score.

On the center score line, measure 1-1/2″ down and lightly mark the fold.  Then measure 1-1/2″ to the left and right at the top of the score line and lightly mark it.  Then score from the top marks to the center mark.

Fold the card and pinch the top 1-1/2″ on the center score forward.  The 2-1/8″ score, to the left of the center fold, is folded forward.  It may sound confusing, but a picture is worth a thousand words.  It’s really easy-peasy.

Make sure that when you adhere your star or flower or whatever you want to pop-up, that it is attached only on the left hand side of the fancy fold.

Also, check out this great TUTORIAL.  I was inspired by it almost two years ago and have been wanting to try it ever since.  Thanks so much for sharing it, Bonnie!

Have a great weekend.  Happy Crafting!

——————————

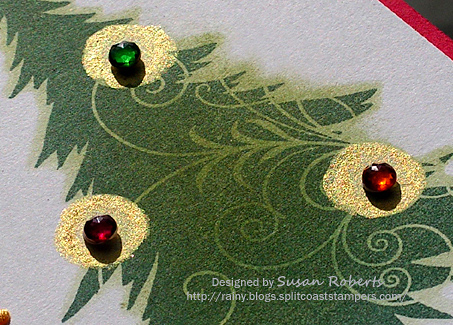
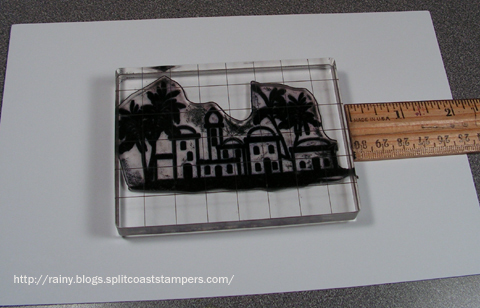
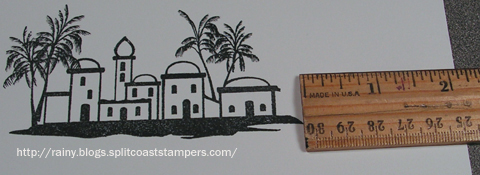
Stamps: Flourishes City of David

Papers: PTI Select White and Basic Black; SU Gold; SEI Rochester DP

Inks: Memento Tuxedo Black; Copics:


Accessories: Spellbinders Stars Five Nestabilities; May Arts Satin Edged Grosgrain Ribbon; Photo Anchor; Brad

Sep 022011

This card is for a couple of challenges.  The first is a color challenge over at Our Creative Corner to use Black, Gray and Red.  The second is this week’s challenge #104 at Stampin’ Sisters in Christ.  It is a challenge to choose at least three elements from a list of possibilities.  I chose to use some ribbon, a button and the image is popped up.  The embossed design has some “swirls” in it, so that might qualify as a fourth choice.

To give a little extra interest to the die cut beaded circle, I gently shaped/folded the “beads” upwards around the image.  Sorta makes it look like a flower with the little petals hugging it!

There’s still a little time left for you to play along in these challenges.  They were both a lot of fun.  Hope your weekend is a great one.  Happy Crafting!

——————————

Stamps: SU Cherish Friendship and Something Sweet

Papers: PTI True Black and Select White; SU Basic Gray

Inks: Memento Tuxedo Black; Copics:

Accessories: Ribbon; Button; Sizzix Ornate Frame #2 Embossing Folder; Nestabilities Classic Circle and Beaded Circle Dies

Jul 282011

It’s no secret that I love my embossing folders.  Well in playing around with them today, I tried something that was (at least for me) something new.  I created a quick tutorial to show you what I did.  But first here’s the card I made.

This card fits into a couple of different challenges out there in blogland this week.  First is the Sketch Challenge over at Waltzing Mouse Stamps.  The butterfly was made with one of the tree images from their “Teeny Trees” set.  The other challenge can be found at Our Creative Corner.  The challenge is called “All the B’s”.  There are four elements that must be included on your project: Black, Bling, Buttons and Bows.

The black and bow elements are obvious, the bling includes lots of brads and frame anchors and the buttons are the leaves.  I clipped off the plastic loop on the back of the buttons to allow them to lay flat on the card.

Now to the embossed kissing thing that was so fun!  I started with a couple of different inks, a solid image stamp and Cuttlebug’s Textile Embossing Folder.

I inked up a small area of the embossing folder with the darker of the two inks, Memento’s Tuxedo Black.

Then after inking the solid image stamp with the lighter ink (in this case SU’s Really Rust), I stamped (kissed) it directly onto the inked area of the embossing folder.

Here is the result.

Then I immediately stamped it onto the cardstock.

The entire process was repeated until I had a butterfly.  It could have just as easily been a large blossom or even a funky tree!

I can hardly wait to try this with some of my other embossing folders!

Thanks for dropping by today.  Happy Crafting!

——————————

Stamps: Waltzing Mouse Teeny Trees

Papers: Papertrey Ink Vintage Cream and True Black; SU Gable Green

Inks: Memento Tuxedo Black; SU Really Rust; Gel Pen

Accessories: Cuttlebug Textile Embossing Folder; Velvet and Lace Ribbon; Stitched Grosgrain Ribbon; Prima; Leaf Loop Buttons; Photo Anchors; Brads; SU Window Punch and 1/4-Inch Circle Punch

It’s a white party over at Our Creative Corner!  That’s right.  The challenge is to make a card or project using only white products.

To give an all white creation some interest, a tip suggested at OCC is to “enhance with textures and patterns.”  Embossing, pearls and lace, scalloped patterned vellum and a white rose all came together for this card.

This was so fun!  What a great challenge!

Happy Crafting!

——————————

Stamps: SU Teeny Tiny Wishes

Papers: Papertrey Ink Select White and Vintage Cream; Vellum

Inks: SU Sahara Sand

Accessories: Pearl and Lace Ribbon; Jolee’s Boutique Pearl and Lace Bow; Cuttlebug Textile Embossing Folder; SU Vintage Flower Adornment and Scalloped Border Punch

Jul 042011

This card was made to wish everyone a Happy 4th of July!  And it fits perfectly for Our Creative Corner’s Challenge today which was to “make a last minute 4th of July card or project”.


So here’s to a safe and happy day.  Thanks for dropping by.

HAPPY 4th OF JULY!!

——————————

Stamps: Our Daily Bread Designs ‘God Bless America’; Flourishes ‘Patriotism on Parade’; Artistic Outpost ‘My Knight’

Papers: Papertrey Ink Select White and True Black

Inks: Memento Tuxedo Black; SU Real Red and Basic Black Markers; Copics:


Accessories: Star Brads; Striped Grosgrain Ribbon; Starred Satin Ribbon

This week’s challenge at Our Creative Corner is to “create a card, 3-D project, scrapbook page, etc… around an afternoon tea/tea party theme.”  I wanted to use Flourishes “Coffee with Friends” stamp set, but wasn’t sure what to do until I saw the Clean and Simple Challenge at Splitcoaststampers.

I used the fun colors in the inspiration picture of the “stacked” bibs for my “stacked” teacups!  And by keeping it clean and simple, this one card qualifies for both challenges.

The teacups were colored with Copics.  The designer paper was also colored with some of the same Copics to get an exact match to the cups.  It’s subtle and easy peasy but effective!  (The paper on the left is the original striped designer paper.  The paper on the right has had the Copic markers added to some of the stripes.)

The challenges around web-land often help give me a starting point.  I love playing along in them.

Thanks for dropping by today.  Happy Crafting!

——————————

Stamps: Flourishes Coffee with Friends; Stampin Up Day of Gratitude

Papers: Papertrey Ink Select White and Enchanted Evening; My Mind’s Eye Stella Rose Gertie Collection Designer Paper

Inks: Memento Tuxedo Black; Copics:

Accessories: Martha Stewart Eyelet Lace Edger Punch; Rick Rack; Satin Ribbon; Prima; Brad

© COPYRIGHT © and FTC Declaration

All content on my blog is COPYRIGHT © 2008-2024 Susan Roberts. Please don't copy any of my stuff for publication, design or contest submission. I declare that I sometimes promote and/or endorse products that I currently receive or have received either for free or at a discount. That said, I won't ever recommend anything that I don't personally enjoy using or feel is a quality product.
© 2020 Rainy Day Creations Suffusion theme by Sayontan Sinha