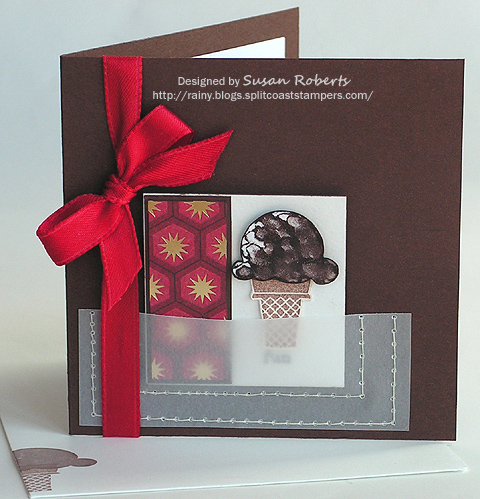
Splitcoaststamper’s Clean and Simple Challenge today was to use “Red, Black and White” on a card or project.  Since I’m still trying to get a little head start on some Christmas cards, this is what I created.

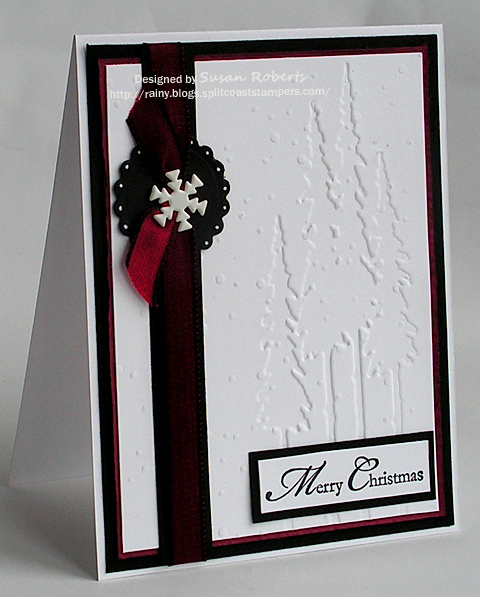
Dry embossing is one of my favorite ways to add some unique and fun interest to a card.

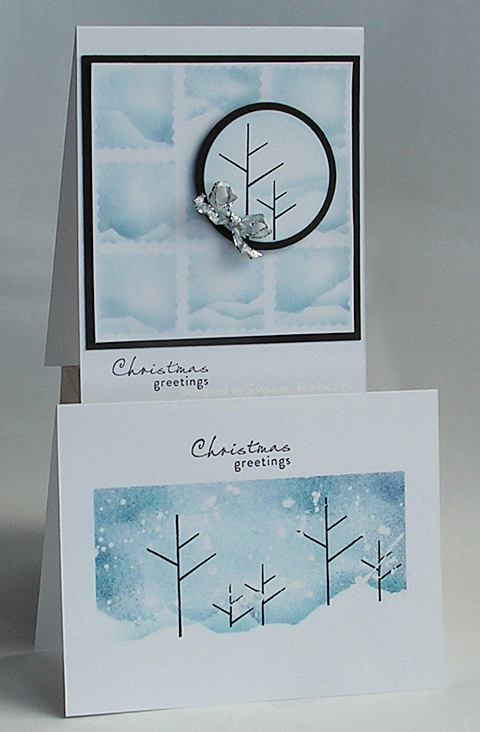
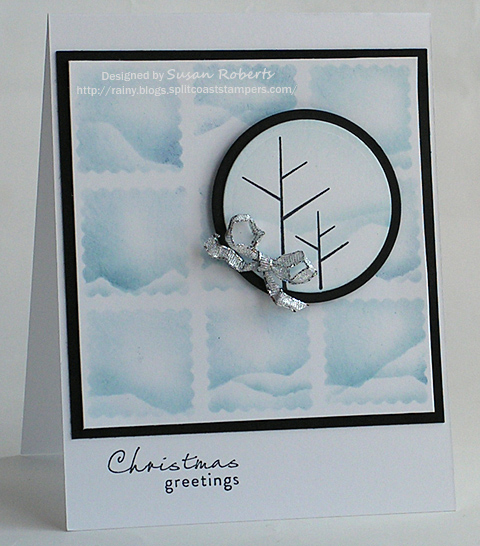
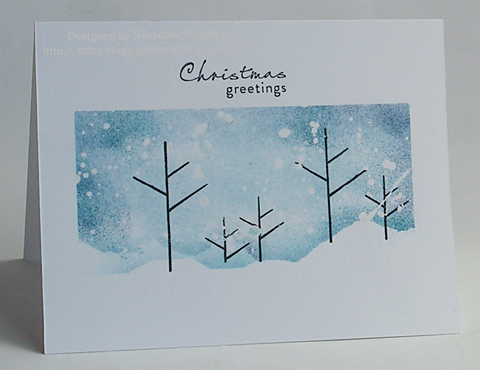
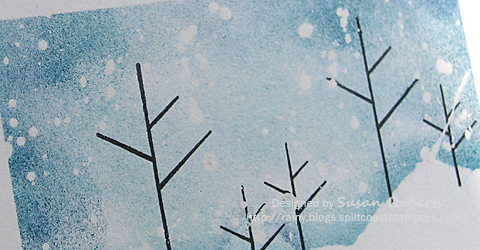
On this card I embossed the cardstock twice using two different embossing folders.  The orientation of the two embossed designs is reversed.  The “Snowflakes” pattern shows the “positive” or “out” embossing and the “Tall Pines” pattern shows the “negative” or “in” embossing.

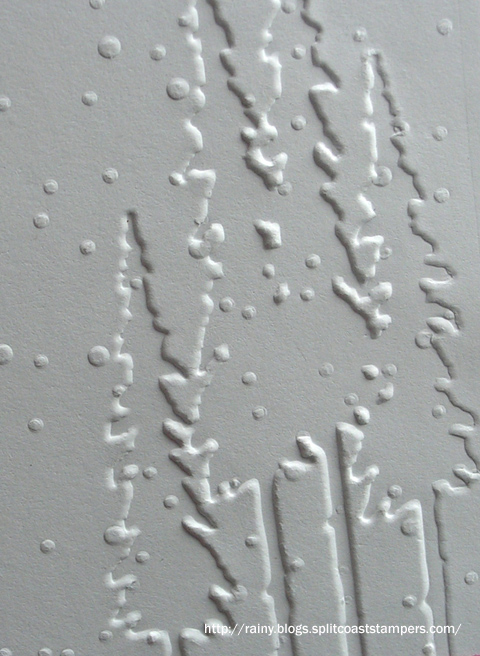
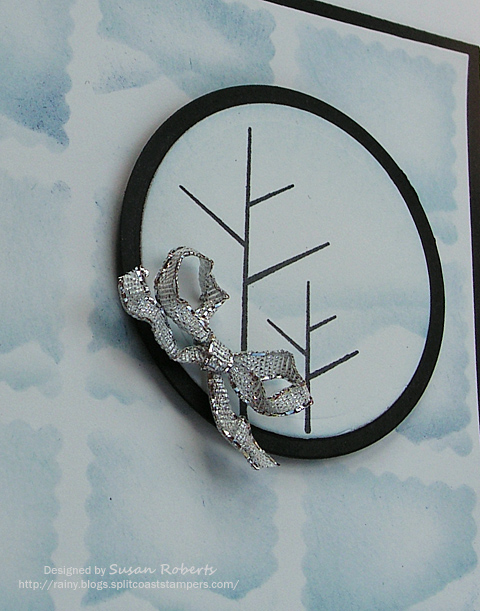
This was so much fun that I wanted to try using a single embossing folder with both the “in” and the “out” embossing on a single design.  Here is what the “Tall Pines” folder looks like with an “In and Out” combination.

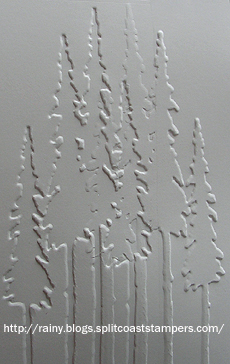
This is one of the embossing folders from the “Pop Culture” collection.

This is from the “Just My Type” collection.

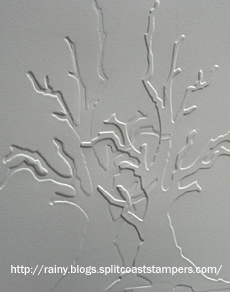
Here is Sissix’s “Branch Tree”.

Here is another pattern from the “Pop Culture” collection.

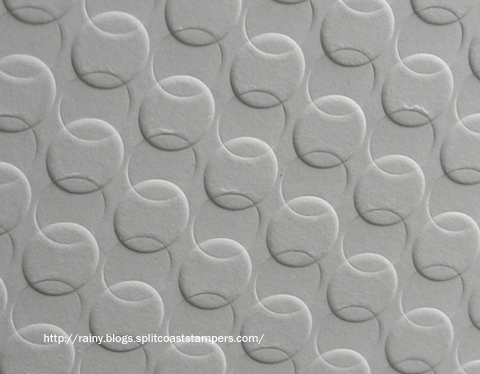
This one may be my favorite.  It uses the “Seeing Spots” embossing folder.

Isn’t that.. 

And finally, here is the popular “Swiss Dots” embossing folder.

I had such a blast experimenting with some of my folders.
Thanks for dropping by today.  Happy Crafting!

——————————

Stamps: SU ‘A Cardinal Christmas’

Papers: Papertrey Ink Select White, Scarlet Jewel and True Black

Inks: Memento Tuxedo Black; White Gel Pen

Accessories: Cuttlebug and Sissix Embossing Folders; Nestabilities Lacey Circles; Snowflake Brad; Organdy Ribbon


This card combines this week’s Waltzingmouse Sketch Challenge and Splitcoaststampers’ Clean and Simple (CAS) Challenge.

Waltzingmouse is celebrating one year of weekly sketch challenges.  So for their sketch this week, you are to choose any sketch from over the past year.  I chose Sketch #36.

The CAS Challenge was to make a “Tall and Thin” card rather than the traditional A2 size.  This card measures 6-1/4″ x 3-1/2″.  It fits perfectly into a letter sized envelope.

The inside has just enough space for a short and sweet message.

Thanks for dropping by today!

Update on the Southern Arizona fires:

My son Jeff and family have been evacuated from their home.

Here is a YouTube Video that he took right before they left.

He said the fire has been reported to have flames up to 200′ high, and the winds are up to 50 mph.  The local favorite restaurant has burnt to the ground.  Homes and businesses are being lost, and lives are being turned upside down.  Prayers for these folks are appreciated.  They need rain!!

——————————

Stamps: Waltzingmouse ‘Teeny Trees’

Papers: Papertrey Ink ‘Select White’

Inks: Memento ‘Tuxedo Black’; SU ‘Garden Green’ and ‘Taken with Teal’

Accessories: Nestabilities Classic Circles; Gingham Ribbon; SU Ice Cream Parlor Grosgrain Ribbon and Buttons

My son, Jared, and his girlfriend, Elise, recently returned from a 2 or 3 week vacation in Europe/Asia/Middle East.  While in Istanbul they decided they wanted an ice cream cone.  Jared is filming while Elise makes her purchase.  Too funny.

YouTube video

So I couldn’t resist making a silly magnet/card for Elise.

The main magnet is made with a Twinchie.

The ice cream scoop is also a magnet so that it can be removed from the cone. hehe

Ellen Hutson’s Art Magnetic Masking Material was used on the ice cream scoop as well as the back of the Twinchie.

Okay.. just silliness, I know.  But it’s all in good fun.  And the best part, it actually works as a magnet!  lol

Happy Crafting!

—————————–

Stamps: SU Sweet Scoops and Everyday Flexible Phrases
Papers
: Papertrey Ink Select White and Dark Chocolate; Twinchie; K & Company Christmas Cheer Gold Star Foil DP
Inks
: SU Creamy Caramel and Close to Cocoa Markers; Copics:

Accessories
: Essentials by Ellen: Art Magnetic Masking Material; Satin Ribbon; Thread and Sewing Machine

___________________________________________________________________________

AND ON A SERIOUS PERSONAL NOTE:
My son Jeff, who just started his dental practice in Sierra Vista this week, may have to evacuate.  He and his family just arrived last week and had gotten unpacked when one of the southern fires began to threaten them.  Poor Arizona.  It does have it’s challenges.  Prayers going out to all those whose lives are being turned upside down.

Photo by Dean Knuth/Arizona Daily Star
“The fireline moves towards the city.. near Sierra Vista, AZ.”

Jun 132011

This year in designing  my Christmas cards the words “Clean and Simple” have become my mantra.  Don’t know how long it will last before the embellishments and layers, etc. start finding their way back into the designs, but for now I’m off to a pretty good start!

The top card was made for the Clean and Simple Challenge on Splitcoaststampers. Today’s challenge is a sketch.

There was a lot of masking done here, but I so love the effect of snowy hills.

The second card is a one layer card using only the card base.  There are no embellishments.  Doesn’t get much more CAS than that!

It uses masking fluid which was flicked on the card before sponging.

I had never heard of masking fluid until I saw this post on Heather Telford’s blog.  I loved it so much and have been wanting to try it ever since.

Thanks for stopping by today.  Happy Crafting!

——————————

Card 1

Stamps: Waltzing Mouse Teeny Trees

Papers: Papertrey Ink Select White and True Black

Inks: Memento Tuxedo Black; SU Not Quite Navy and Night of Navy

Accessories: Nestabilities Classic Circles and Classic Scalloped Squares; Metallic Silver Ribbon; Masking Paper

Card 2

Stamps: Waltzing Mouse Teeny Trees

Papers: Papertrey Ink Select White

Inks: Memento Tuxedo Black; SU Not Quite Navy and Night of Navy

Accessories: Masking Fluid; Masking Paper

Jun 112011

It’s June and time for some weddings!

One of my favorite tips for a wedding card is to repurpose the invitation itself.  After all, you know the bride will love the colors and designs.

And in this case deciding the color(s) for the flowers was made especially easy… the bride obviously loves purple!

Works for me! 

Thanks for dropping by today.  Happy Crafting!

——————————

Stamps: Verve Miracles Blossom and Wishful Elegance

Papers: PTI Select White; SU Night of Navy; Wedding Invitation

Inks: SU Elegant Eggplant; White Gel Pen; Copics:


Accessories: SU Eggplant Grosgrain Ribbon; Nestabilities Labels 10, Kaiser Rhinestones; Silver Satin Ribbon from Invitation

Looks like dad will be getting a few shirts and ties for Father’s Day… again!  LOL


There is a darling shirt and tie card on p.154 of  the current SU catalog.  Not being a demonstrator, I have no idea if SU has a template for this card, so I worked up my own A2 sized design.

Shirt Tutorial

1. Begin with a standard A2 sized card base (cut to 11″ x 4-1/4″, scored in half so that the card opens from the bottom).

2. On card front, measure 1″ down from the fold and draw a line across the width of the card.

3. Mark fold at 1-1/4″ from either side.  Mark on 1″ line at 7/8″ from either side and at center (2-1/8″).  (Marks “on fold and 1″ line should be made slightly below the fold and above the 1” pencil line, respectively.)

4. Cut to the 1-1/4″ marks on the fold line and the 7/8″ marks on the pencil line.  (Cut directly on the fold and pencil line, respectively.)

5. Fold the point of the top outer corners to the 2-1/8″ center mark right above the pencil line.

6. Close the card and trace and cut out the outline on the back of the card of the area created by the folded down collar. (Cut slightly outside of the pencil lines to ensure that none of the card back is visible from the front when the card is closed.

You should end up with a card base that looks like this!

That’s it!  Of course, you can add stitching or round the corners, button down the collar or whatever!  If you want to add a patterned paper to the shirt front, it should measure 4″ x 4-1/4″.  (This will leave an 1/8″ card base border.)

Tie Template

Hope you have some fun with these!

Happy Crafting!

——————————

The GREEN shirt:
Papers
: PTI Select White; SU Handsome Hunter; Memory Box Ethan and Bella DP
Accessories: SU Ice Rhinestone Square Brad

The YELLOW shirt:
Papers: SU Barely Banana and Blueberry Crisp DSP
Accessories: SU Bitty Buttons

The RED shirt:
Papers: PTI Pure Poppy; My Mind’s Eye Stella Rose Hazel DP; Basic Grey Jovial DP
Inks: Black Gel Pen
Accessories: Corner Rounder Punch

The WHITE shirt:
Stamps: Teeny Tiny WishesOnly a portion of the stamp was used for the tie clip.  Since part of the sentiment was so close to the part that I wanted, I covered it with scotch tape before applying the ink.  This assured me that no ink would sneak onto the unwanted section.  The tape is, of course, removed before stamping.

Papers
: PTI Select White; SU Brushed Gold; Basic Grey Boxer DP
Inks: SU Basic Black Marker
Accessories: Small White Button Brads; Corner Rounder Punch


© COPYRIGHT © and FTC Declaration

All content on my blog is COPYRIGHT © 2008-2024 Susan Roberts. Please don't copy any of my stuff for publication, design or contest submission. I declare that I sometimes promote and/or endorse products that I currently receive or have received either for free or at a discount. That said, I won't ever recommend anything that I don't personally enjoy using or feel is a quality product.
© 2020 Rainy Day Creations Suffusion theme by Sayontan Sinha