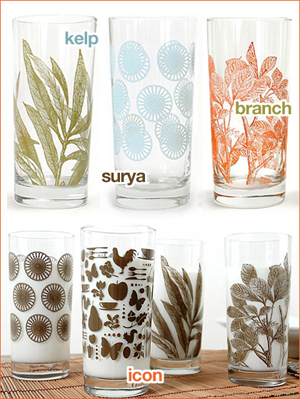
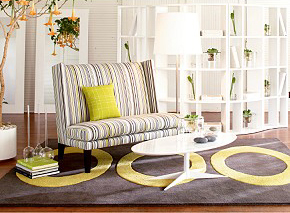
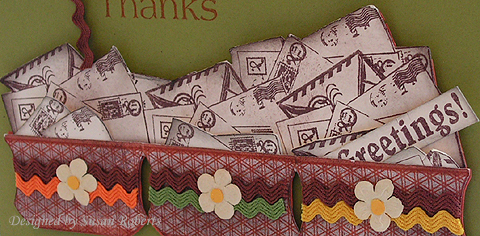
Beate’s Inspiration Challenge today was the perfect chance to use my new SU! set called “Eastern Influences”.  Here is the inspiration photo.

1blog109bic25.jpg

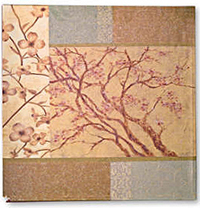
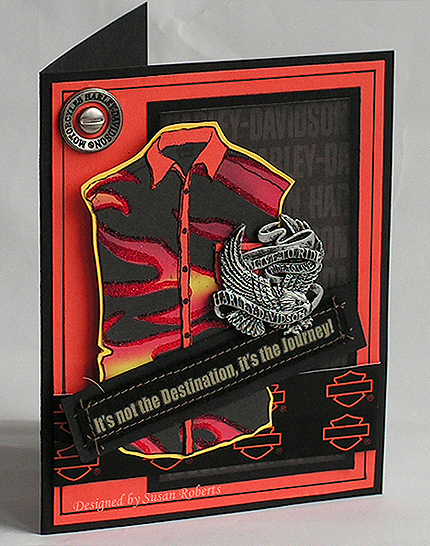
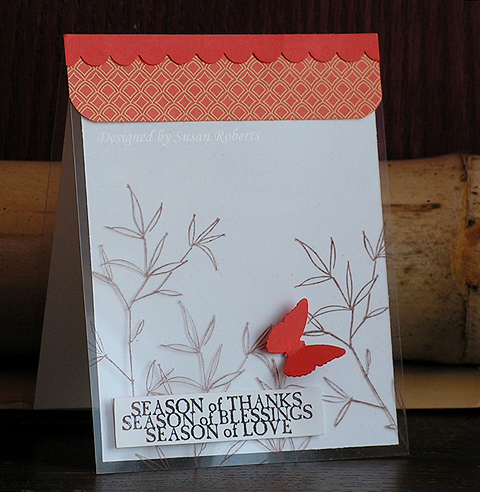
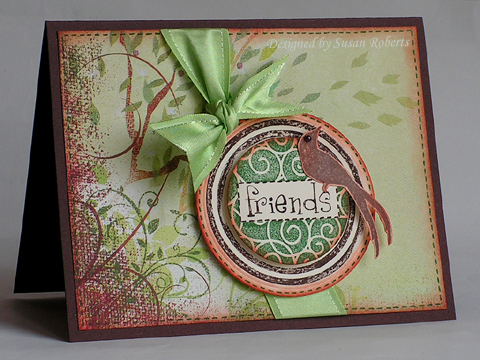
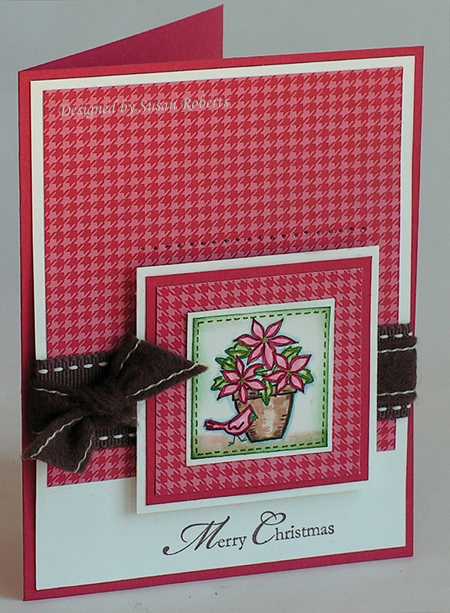
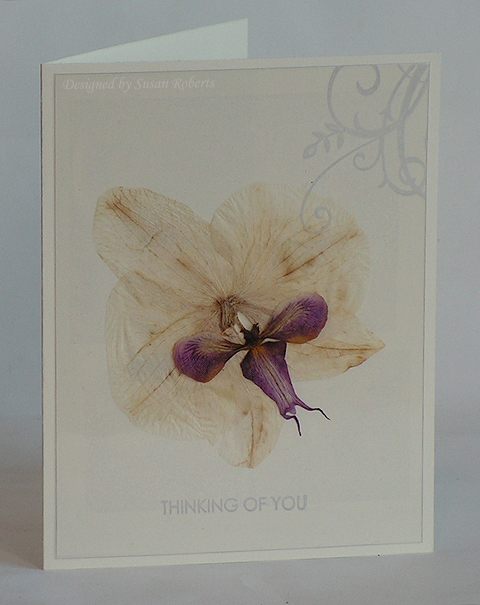
And here is the card I made that was inspired by it.

blog109withwm.jpg

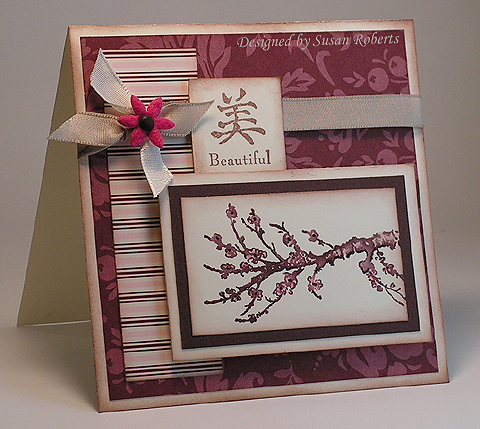
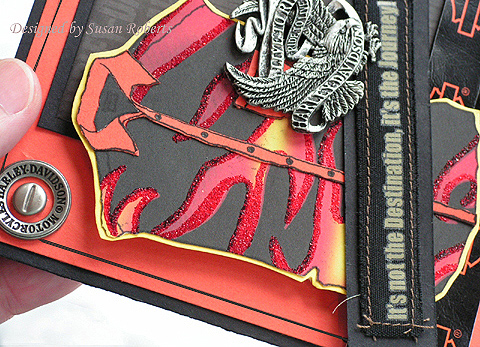
The image was made by coloring directly onto the rubber with markers and then spritzing with water before stamping.  After stamping the flowers were colored in with a Pretty in Pink marker.

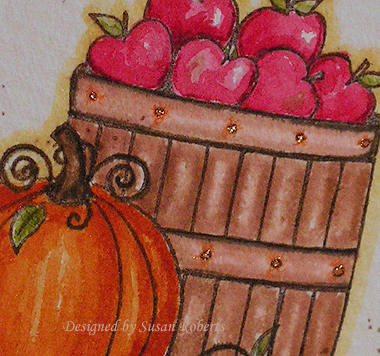
I wish that SU! made brown brads.  With each new catalog I search to see if they have finally decided to carry them.   But they still don’t, so I make my own.

blog109bradstuff.jpg blog109bradcloseup.jpg

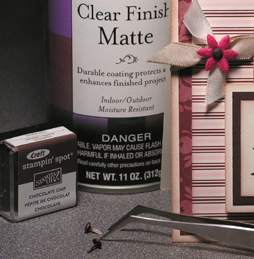
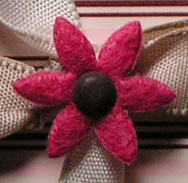
Using the antique brass brads and a pair of tweezers, I push them into my Chocolate Chip Craft stampin’ spot.  Then I quickly and lightly spray them with Clear Finish.  I push them into the stampin’ spot again then use my heat gun to dry them.  I love the matte finish it creates.  But I’m still hoping that the next new catty will be the one!

See what the other challenge team members have created today using this beautiful photo as their inspiration.

Jennifer Buck
Charmaine Ikach
Silke Ledlow
Danielle Lounds
Dawn McVey

Hope you get a chance to play, too.

——————————

All products are made by Stampin’ Up!.
Stamps:  Eastern Influences
Papers: Very Vanilla, Chocolate Chip, DSP Parisian Summer
Inks: Close to Cocoa Classic; Chocolate Chip Craft; Close to Cocoa, Chocolate Chip, Bravo Burgundy, Pretty in Pink, Blush Blossom Markers
Accessories: Taffeta Ribbons in Kraft and Very Vanilla, Brad, Flower Fusion

blog108closeup.jpg

Had some fun yesterday playing with the “Menswear” set from Flourishes.  I actually felt a little guilty cutting off perfectly good sleeves.  You would have thought it was a real shirt that I was altering!

Here is the card I made yesterday.

blog108withwmoriginal.jpg

Well have you ever made a card and decided that you wanted to add just one more little detail?  That’s what I did this morning with this card.  I wanted to add/draw a black line around the border of the orange background.  So I did.  But there was a little problem that was totally driving me nuts.  Since the sentiment panel was already there (yes I should have removed it before drawing the line) it was hard to draw a line the entire distance on the left side of the card.  So I did it in two steps.  Unfortunately I didn’t get both lines at the same angle.  D’oh.  I tried to ignore it but ended up trying to fix it.  BIG MISTAKE!  lol

blog108finalwithwm.jpg

Oh my, I had to add a Harley symbol “leather” ribbon to cover up the goof.  It made the bottom of the card too heavy.  It felt unbalanced so I added the brad.  I got the brad too close to the corner.  Had to move it in which of course left a visible gaping hole.  So I added the hardware ring.  Now the top of the card was too heavy.  So I added a second ribbon.  Was this ever going to end!?!  LOL  Well for better or for worse I ended this journey!  Do you ever have one of those kind of days?

Before I go I wanted to share a scrapbook page that I did a couple of years ago.

blog108scrappage.jpg (Click photo to enlarge.)

I originally started this hobby with the intent of scrapbooking.  Well this was my first page.  I’ve only done three pages since!  The layout is a CASE of a page that I saw on display at Ben Franklin.  That’ my DH and his biker buddies on their ride to the Grand Canyon.  Aren’t they adorable!

——————————

Stamps: Flourishes “Menswear”
Papers: SU! Tangerine Tango, Yoyo Yellow, Basic Black; EK Success Harley DP; Flame DP Unknown
Inks: Versafine Onxy Black; Copic Black Multiliner
Accessories: EK Success Hardware, “Leather” Ribbon, Fabric Sentiment

Had some fun today as I played along in Beate’s Inspiration Challenge.  Here is the inspiration piece this week.

blog107bic24simringlassware.jpg(Click to enlarge photo.)

And here is the card that I made for it.  I thought the Crystal Clear Card Stock would work well to give the feel of glass as there is so much of it in the inspiration piece.

blog107withwm.jpg

All of the stamping is done on the front of the clear card stock.  The white insert is completely blank.  It is attached with adhesive to the clear card stock only under the designer paper panel at the top of the card.

There are so many possibilities and different ways to go with this inspiration piece.  I’m excited to see how the other design team members interpreted it.  You can check out their creations with me on their blogs here.

Jennifer Buck
Charmaine Ikach
Silke Ledlow
Danielle Lounds
Dawn McVey

Hope you can play along in Beate’s challenge today, too!

——————————

Stamps: SU! Embrace Life and Harvest Home
Papers: SU! Whisper White, Tangerine Tango, DSP Haiku; Crystal Clear Card Stock
Inks: Timber Brown Stazon
Accessories: SU! Scallop Border Punch and 3/16th” Corner Rounder; Martha Stewart Butterfly Punch

Today, Sunday, September 21st, is World Alzheimer’s Day.  Recently Carolyn King’s (Cammie) grandmother passed away from the effects of this devastating disease.  And now in remembrance of her grandmother, Carolyn has illustrated a stamp set called “Whimsical Autumn”.  It has been released with Gina K. Designs.  The remarkable thing here is that Carolyn is giving 100% of her proceeds from the sale of this stamp set to the Alzheimer’s Association in honor of her grandmother..  So with that in mind I just had to purchase this adorable set.  Here is the card I made with it.

blog106withwm.jpg

I first stamped the pumpkin image, masked it and then stamped the basket of apples.  The images have been painted using reinkers.

The Flourishes Design Team as well as the Friends of Flourishes Designers have come together to support Carolyn in this effort.  We have all purchased the set and are sharing our work today on our blogs.  Check them out and see what everyone has done.  And, if you can, purchase Carolyn’s set, too, to further help in the cause.

Cindy Haffner
Cindy Lawrence
Leslie Miller
Julie Koerber
Faith Hofrichter
Barb Schram
Laura Fredrickson
Jan Marie Caruso
Sharon Doolittle
Nancy Kirk

Oh and one other thing..  Be sure to stop by Carolyn’s blog today.  She has one of the biggest ever blog candy giveaways worth over $1000!!  And it’s all in honor of World Alzheimer’s Day.

blog106closeupwithwm.jpg

——————————

Stamps: “Whimsical Autumn”, SU! Itty Bitty Backgrounds
Papers: Pumpkin Pie, Rose Red, Whisper White, Watercolor, Basic Grey “Ambrosia”
Inks: Timber Brown Stazon, Blush Blossom, Creamy Caramel, Close to Cocoa, Chocolate Chip, Barely Banana, Pumpkin Pie, Really Rust, Old Olive, Always Artichoke, Rose Red, Spica Orange Pen, Copics Multiliner
Accessories: Stitched Grosgrain Ribbon, Leaf Punch, Masking Tape

When I saw this challenge for a NO LAYERS card over on Splitcoaststampers, my first thought was clean, simple, elegant.  Right?  Well… no.  It didn’t happen that way at all.

blog105withwm.jpg

Sometimes I seriously wonder what is wrong with me.  Maybe it was the fact that it was a “dirty” challenge that this card ended up being so messy?  But in any case I think I followed all the rules and restrictions.  At least I didn’t see it stated anywhere in the challenge that the card had to be “clean” (even if that was the intent!).  The card base is the only card stock used.  I did do some embossing across the bottom of it and also on the inside.  I tore off a lot of the front of the card to expose the spiderweb embossing.  And there was some masking done across the bottom and for the moon.  I sponged on all the blues.

Hey I guess the bottom line is I did have fun!  *chuckle*  If you want to see what the other Dirty Girls and Alumni did with this challenge you can check out the DCNL908 SCS gallery here.

——————————

Stamps: SU! House of Haunts
Papers: Whisper White
Inks: Versafine Onyx Black; SU! Bashful Blue, Not Quite Navy, Night of Navy
Accessories: Cuttlebug, Embossing Folders “Spider Web” and “Frills”, Hemp Twine, Black Gel Pen, Stardust Clear Glitter Pen, Masking Tape

Sep 182008

What does JustRite have?  How about some new images, new sizes, new shapes, oh my!  On today’s card I used one of JustRite’s new and larger circle stampers.  The wooden stamper along with the border and center that I used are from the Harmony Classic Circle Stamper II Stamp Ensemble.  This stamper has a 2-5/16th” diameter!

blog104withwm.jpg

The border image was stamped on card stock and then die cut and embossed using the Circle Nestabilities.  I punched out the center with a 1-3/4″ circle punch and mounted it with dimensionals onto the stamped border.  That sweet bird is from Flourishes newly released “Birds and Vine” set.  A Kaiser pearl was placed on the bird to keep an eye on things.  (Sorry couldn’t resist.)  The wonderful May Arts satin ribbon was added for a touch of *yummy* along with the beautiful Memory Box “Sprout” designer paper.

If you haven’t had a chance to see the new products from JustRite, be sure to visit Flourishes and check them out!  They are there under “Stampers Toys”.

——————————

Stamps: JustRite “Harmony Classic Circle Stamper II Stamp Ensemble”; Flourishes “Birds and Vine”
Paper: SU! Chocolate Chip, Very Vanilla; Memory Box “Sprout”
Ink: SU! Classic Garden Green, Chocolate Chip, Really Rust and Markers Garden Green, Chocolate Chip
Accessories: May Arts Satin Ribbon, Kaiser Pearl, Circle Nestabilities, Cuttlebug, 1-3/4″ Circle Punch

Sep 172008

I so love Michelle Zindorf’s style.  She makes the most unique and stunning cards.  So for my card today I decided to try following one of her many fantastic tutorials.  The one I chose can be found here.  I changed (or should I say omitted) some steps to make it more beginner friendly!  lol  Thank you, Michelle!

blog103withwm.jpg

I used a tree image from one of Flourishes most recently released sets, “Forest of Trees”.  I also used Flourishes “Flourished Elements” and “Flourished Words” sets.  That yummy ribbon is by May Arts.

blog103closeupwithwm.jpg

And finally I just had to post a close-up-taken-in-the-sunlight picture of the Flower Soft product that can be purchased at Flourishes.  This stuff is so cool and adds so much texture and interest.  Plus it’s so easy to use.  (But be sure to turn off all fans before opening up the package.  It’s really light and fluffy.)  Nancy Kirk, one of Flourishes owners, has made a video demonstrating this product.

——————————


Stamps: Flourishes “Forest of Trees”, “Flourished Elements” and “Flourished Words”
Paper: SU! Whisper White and Really Rust
Ink: SU! Soft Sky, Not Quite Navy, Ruby Red, Really Rust, More Mustard, Old Olive, Chocolate Chip (marker), VersaMark
Accessories: May Arts Satin Ribbon; Flower Soft, Glue; Clear Embossing Powder; White Gel Pen


blog102bic23piece.jpgYay!! Yesterday I got to play with my new Stampin’ Up! toys. What fun I had. *big grin*  I was able to make three cards all of which are SUO (Stampin’ Up! Only).

The first card was made for  Beate’s Inspiration Challenge #23.  This room was the inspiration piece.  And here is the card that I made for it.

blog102bic23withwm.jpg

I used two of my new stamp sets, “Nature Silhouettes” and “On Your Birthday”.  I also used some of SU!’s new Designer Series Paper “Manchester”.

To see more cards made for Beate’s BIC#23 visit her other inspiration design team’s blogs:

Jennifer Buck
Charmaine Ikach
Silke Ledlow
Danielle Lounds
Dawn McVey

Now I couldn’t wait to use my new “Alpine” Ribbon Originals.  Oh don’t you just love this chocolate chip felt ribbon complete with stitching.
blog102christmaswithwm.jpg

I combined it with the new 1″ wide chocolate chip grosgrain ribbon.  Two more new sets, “A Flower for All Seasons” and the beautiful Merry Christmas sentiment from “A Cardinal Christmas” were used.  “Holiday Treasures” is some of the most beautiful designer paper… EVER!!  Yup I used some of that, too.

The third card today uses the new set “Starring You”.

blog102birthdaywithwm.jpg

This card is made with the new In Color “Baja Breeze”.  Wow I love this color!  The designer paper is the new “Patterns”.  The new 1-3/4″ circle punch was used for the black circle behind the main image/sentiment.  The stars were stamped with SU!’s “Classic Backgrounds”.  Although this is not a new set, it was the first time I have used it.  To make the little star embellishment I stamped a single star on some whisper white card stock.  Then I took the small star punch, centered the stamped star and punched it out.

Oh yay!  It was a fun day!!  Hope you get some stamping time in, too!!

——————————

BIC#23 Card

Stamps: Nature Silhouettes, On Your Birthday
Papers: Very Vanilla, Basic Black, Yoyo Yellow, Manchester DSP
Inks: Really Rust Classic and Marker, Jet Black Stazon
Accessories: Kraft Taffeta Ribbon, Very Vanilla 5/8″ Grosgrain Ribbon, Flower Fusion, Brads, 1/4″ Circle Punch

Christmas Card

Stamps: A Flower for All Seasons, A Cardinal Christmas
Papers: Whisper White, Ruby Red, Chocolate Chip, Holiday Treasures DSP
Inks: Classic Garden Green, Markers Garden Green, Certainly Celery, Old Olive, Petty In Pink, Ruby Red, Blush Blossom, Creamy Caramel, Close to Cocoa, Chocolate Chip, Yoyo Yellow, Bashful Blue
Accessories: Alpine Felt Ribbon Originals, 1″ Chocolate Chip Stitched Grosgrain Ribbon, Paper Piercer

Birthday Card

Stamps: Starring You, Classic Backgrounds
Papers: Baja Breeze, Basic Black, Whisper White, Baja Breeze-Patterns DSP
Inks: Jet Black Stazon
Accessories: Black Hemp Twine, Photo Corners Punch, Star Punch, 1-3/8″ Circle Punch, 1-3/4″ Circle Punch

Here is a card using Flourishes newly released set “Mixed Greetings”.  Huge congratulations to Leslie Miller for coming up with the wonderful concept for this set!  It’s SO versatile!!

blog101mixedgreetingswithwm.jpg

To get my huge pile of envelopes I stamped the envelopes image several times at slightly different angles and used some Eclipse masking tape here and there.  It was then cut out.  I stamped the basket image three times, cut them out and then applied the ric-rac, a prima and a tiny dot of Summer Sun card stock to each of them.  The baskets were popped up on dimensionals.  The pile of envelopes and the greetings sentiment were then tucked inside and also popped up with dimensionals.

blog101mixedgreetingscloseupwithwm.jpg

The main sentiment is from Flourishes “Many Sentiments”.  What fun this was and so quick and easy.

Here are the three sets released this week at Flourishes.

blog99fllc3-sept-releases-copy.jpg

And just one last reminder about Flourishes  “New Release Bundle”  deal.   You can purchase all the new sets for 10% off!  This offer is good through September 17th.  The three new sets this month are “Birds and Vine”, “Forest of Trees” and “Mixed Greetings”.   Also if you want to see more cards made with this week’s new releases, be sure to visit the other Flourishes design team member’s blogs.

Linda Duke
Faith Hofrichter
Julie Koerber
Leslie Miller
Barb Schram

——————————

Stamps: Flourishes “Mixed Greetings” and “Many Sentiments”
Papers: SU! Old Olive, Really Rust, Very Vanilla, Summer Sun
Inks: SU! Chocolate Chip, Really Rust
Accessories: Eclipse Masking Tape; Ric Rak; Primas; Hole Punch

——————————

In yesterday’s post I talked about the Vellum Glue Dots that weren’t really “dots” at all but rather sheets of adhesive that you transfer to an object that you want to adhere.  Well I had a few questions about it.  So rather than try to explain it further, I decided that a picture was worth a thousand words.  So here is a picture of a sheet.  You can see the area of “sticky”.  You just place the sheet on an object (like acetate) and rub the back of it, and the sticky transfers over to that object.

blog101vellumgluedots.jpg

Now on yesterday’s card you really could not see the adhesive at all.  However I did another card using the clear card stock that had a plain Very Vanilla background.  The adhesive is slightly visible, but still does not look too bad.  Here is the card I made.  I used an orchid that my son’s girlfriend grew and dried and then gave to me.  This past week I learned that a very dear friend just lost her mother to Alzheimer’s.  This card is for her as I truly have been thinking of her, her dad and her whole family so much this week.

1blog101withwm.jpg

I know I’ve mentioned this a lot before, but I love Fridays!  My youngest son’s 17th birthday is tomorrow.  We may have something a little rowdy planned!  lol  The ONLY thing he wanted for his birthday was tickets to the “Gymnastics Superstars” at the Tacoma Dome later this month.  He has a total crush on that little darling Shawn Johnson and isn’t afraid to admit it!  *chuckle*  Well together we searched Ticketmaster and Ebay and couldn’t find any good seats.  And then a few days ago, on a whim, I checked Ticketmaster again totally not expecting to find anything.  BUT… woohoo… I got him two tickets… 5th row… smack dab in the middle of the center section!!  It may be the 5th row but he is going to be in 7th heaven!!  Don’t you just love it when things like that happen!

Hope everyone has a happy and fun weekend.

——————————

Stamps: SU! “Baroque Motifs” and “Essence of Love”
Papers: SU! Very Vanilla; Crystal Clear Card Stock
Inks: White Stazon
Accessories: Orchid, Vellum Glue Dots (Sheet)

Today’s card is stamped with another new release from Flourishes called “Forest of Trees”.

blog100forestoftreeswithwm.jpg

To make this card I tore a strip of Eclipse masking tape and covered the lower half of the whisper white card stock.  Then I sponged the top half of the card with Bashful Blue, Ballet Blue, Almost Amethyst and Sage Shadow.  Once sponged I removed the masking tape and stamped a sentiment from Flourishes “Peace” set and one of the new tree images from “Forest of Trees” several times with Versafine “Onyx Black” ink.  This image was then adhered to the black card base.  I then embossed the Crystal Clear Card Stock (acetate) using a Cuttlebug and the Swiss Dot embossing folder.  I used Vellum Glue Dots to adhere the acetate to the front of the card.  (The vellum glue “dots” are actually not dots at all but are an adhesive in a sheet form that you simply transfer from the sheet to the object you want to adhere.)  Lastly a bow using May Arts ribbon was added.

Here are the three sets released this week at Flourishes.

blog99fllc3-sept-releases-copy.jpg

Oh and just a reminder about Flourishes  “New Release Bundle”  deal.   You can purchase all the new sets for 10% off!  This offer is good through September 17th.  The three new sets this month are “Birds and Vine”, “Forest of Trees” and “Mixed Greetings”.   Also if you want to see more cards made with this week’s new releases, be sure to visit the other Flourishes design team member’s blogs.

Linda Duke
Faith Hofrichter
Julie Koerber
Leslie Miller
Barb Schram

——————————

Stamps: Flourishes “Forest of Trees” and “Peace”
Papers: SU! Whisper White and Basic Black; Crystal Clear Card Stock
Inks: SU! Bashful Blue, Ballet Blue, Almost Amethyst and Sage Shadow; Versafine “Onyx Black”
Accessories: May Arts Ribbon; Eclipse Masking Tape; Cuttlebug and Swiss Dots Embossing Folder; Vellum Glue Dots (Sheet)

© COPYRIGHT © and FTC Declaration

All content on my blog is COPYRIGHT © 2008-2024 Susan Roberts. Please don't copy any of my stuff for publication, design or contest submission. I declare that I sometimes promote and/or endorse products that I currently receive or have received either for free or at a discount. That said, I won't ever recommend anything that I don't personally enjoy using or feel is a quality product.
© 2020 Rainy Day Creations Suffusion theme by Sayontan Sinha