blog149calendarfebruarycloseupwithwm.JPG

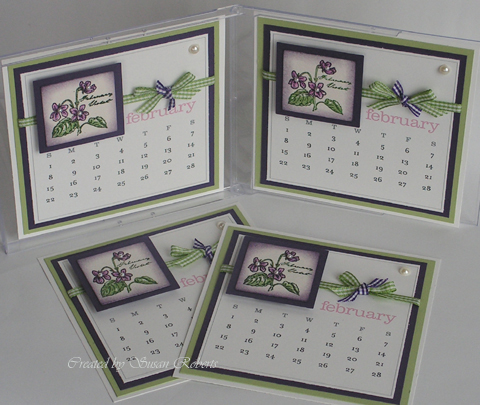
Well it’s almost February and month two of my year long project to make each of my sisters a calendar.  And…  I’m still on schedule!!!  *chuckle*   Yup, the February pages are finished, mailed and should be arriving in my sisters’ mailboxes today.

blog149calendarfebruarygroupwithwm.JPG

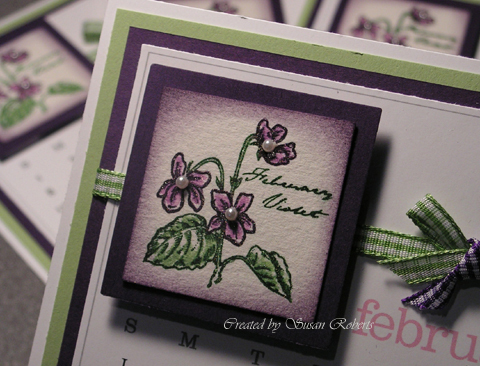
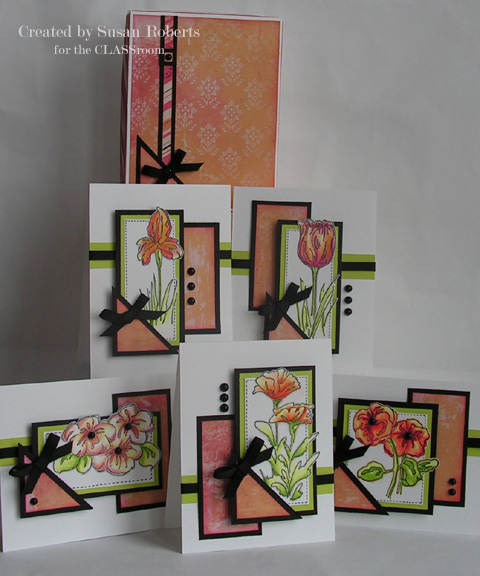
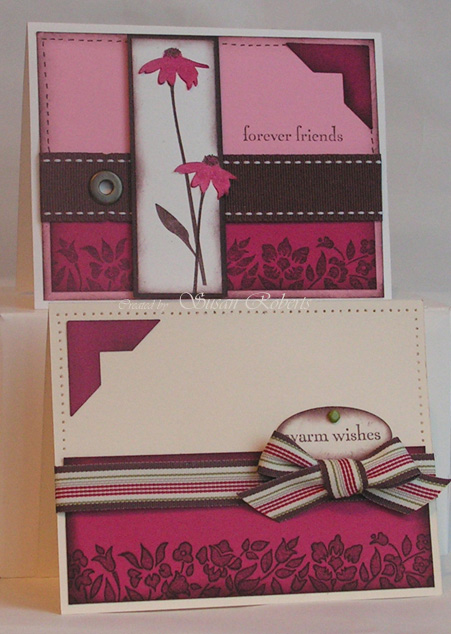
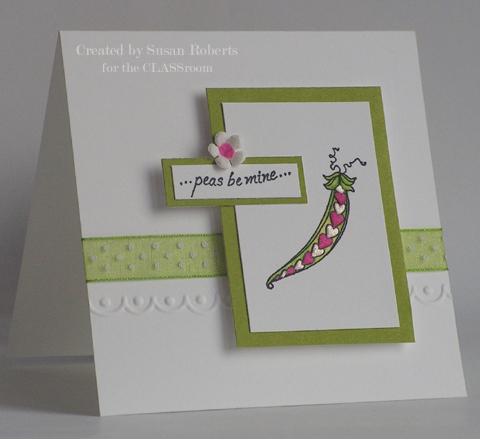
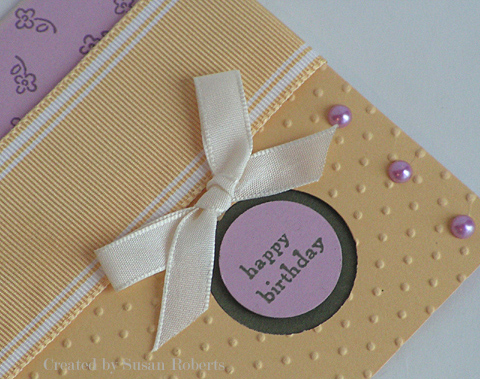
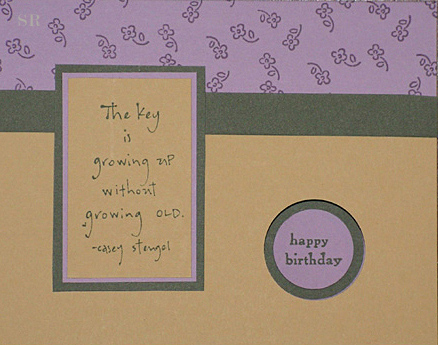
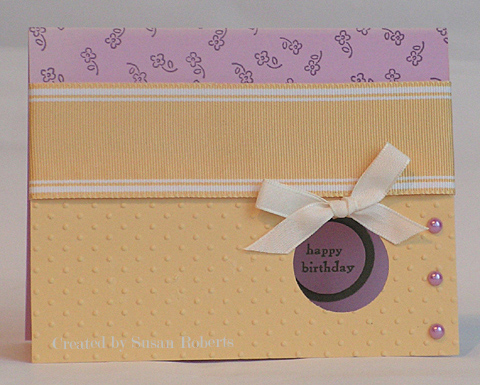
Each floral image is outlined with my Stardust Glitter Pen.  I just love that thing!

blog149calendarfebruarycloseupsparklewithwm.JPG

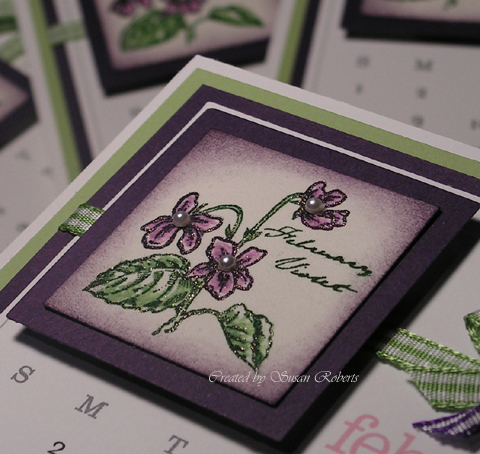
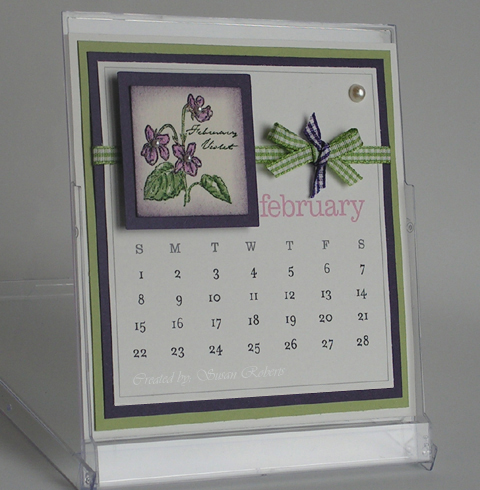
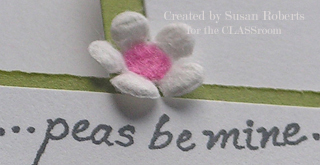
Kaiser flatback pearls from Flourishes are added to the flowers and corner.  The calendar is a download from A Muse.  Happy February!!

blog149calendarfebruarywithwm.JPG

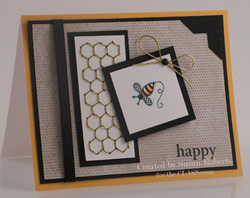
Stamps: SU! “Flower of the Month”

Papers: SU! Whisper White, Elegant Eggplant, Certainly Celery, Watercolor

Inks: SU! Elegant Eggplant, Pale Plum, Lavender Lace, Garden Green, Certainly Celery, Stardust Glitter Pen

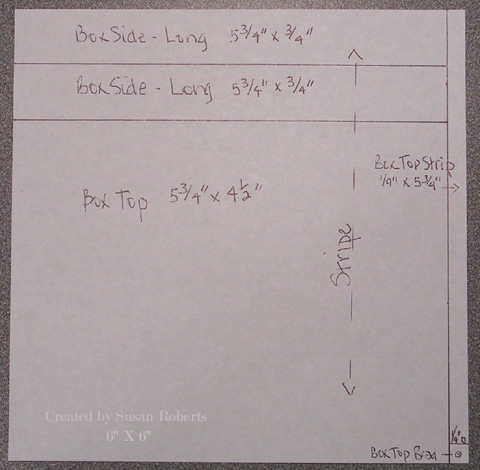
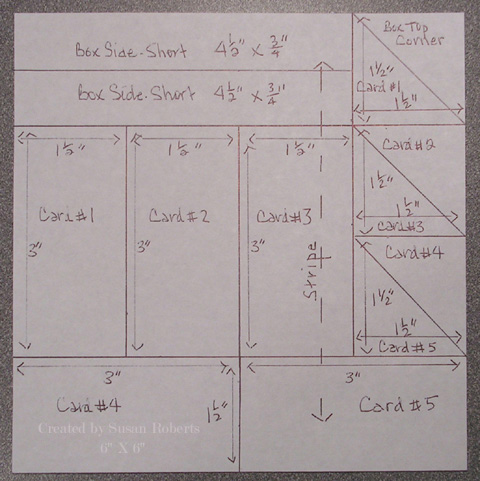
Accessories: Square Punches 1-9/16″ and 1-7/8″, Gingham Ribbons, Flatback Pearls, Calendar Download from A Muse, Computer/Printer, CD Case

The new Shady Tree Studio floral images that were recently released are so beautiful, and I couldn’t decide which one I wanted to craft with first.  So, I chose all 5 and made a set complete with a matching gift box.  (Sometimes indecision can be a fun thing!)

blog149classroom4boxset1withwm.JPG

When you use designer paper (dp) do you often end up with lots of little bits and pieces of it which are then generally wasted.  Well, to prevent any waste, I came up with a template not long ago that uses 2) 6″X6″ pieces of dp.  This works well with all of the 6″X6″ paper pads available now.  And all of the pieces of dp used on the box and the 5 Shady Tree cards came from those 2) 6″X6″ pieces.

Here are the templates.

blog149classroom4template1withwm.JPG

blog149classroom4template2withwm.JPG

I used ALL of the paper on both of the 6″X6″ pieces of paper.  Even the little 1/4″ square was used on the box with the brad.

I have used this template before but made 6 cards with it rather than just 5.  Instead of having corner pieces on the cards, I had 6) 3″ X 1-1/2″ panels.  So only 2 corner pieces remained with that template.

Hope you can join me over at the CLASSroom for lots more pictures and details about the cards.

Thanks so much for dropping by today!! smileythankswithflowerani.gif


I just had to play along in the Inspiration Challenge this week at Splitcoaststampers.  Everyone was to get their inspiration from one of the many Lang Calendars available.  Oh my there were some beautiful calendars.  I so enjoyed just browsing through them.  I may have to return to their site again only this time with my VISA!!  lol  I made a couple of cards using Stampin’ Up! products only.  I used a page from the “Vintage Design” calendar found here for my inspiration.

blog148withwm.JPG

On the bottom card only, I used my marker and outlined the floral border.  It defined the image, but took away some of the softness.  I couldn’t decide which look I liked best, so there’s one of each!  Do you have a preference?

blog148closeupwithoutoutline.JPG

blog148withoutline.JPG

Have a wonderful weekend.  Happy stamping!smileycat1ani.gif

——————————

All products are Stampin’ Up!

Stamps: Inspired by Nature, Beautiful Borders

Papers: Whisper White, Chocolate Chip, Rose Red, Pretty In Pink

Inks: Chocolate Chip, Rose Red, Marker

Accessories: Chocolate Chip Stitched GG Ribbon, Ribbon Originals Alpine Ribbon, Antique Brass Jumbo Eyelet, Always Artichoke Brad, Oval Punch, Photo Corners Punch, Piercing Tool and Template

Yup it’s the 20th and time for another Splitcoaststamper’s Dirty Challenge.  This month’s challenge is all about “feeling” the love… anything with texture.  It must be a Valentine’s project or card, and NO RED is allowed!!  Here is the card I made for it.

blog147withwm.JPG

My textures include the scalloped embossing and the pink Fun Flock.  The flocking is applied to both the darling Karen Lockhart “Peapod of Hearts” image and the little white prima.  The sentiment is also a Karen Lockhart stamp.  “Peapod of Hearts” is the Stamp of the Month over at Ellen Hutson’s, LLC.  And at the CLASSroom I have a few hints about playing with Fun Flock.  Hope you can join me there.

blog147flowerwithwm.JPG

 ——————————

Stamps: Karen Lockhart’s ‘Peapod of Hearts’ and ‘Peas Be Mine’ sentiment

Papers: Neenah ‘Solar White’; Memory Box ‘Parsley’

Inks: Memento ‘Tuxedo Black’; Copics (YG000, YG03, YG06); Stardust Glitter Pen

Accessories: Fun Flock; Prima; Ribbon; Cuttlebug and ‘Frills’ Embossing Folder

Jan 172009

Not long ago a good friend of mine moved back to the Seattle area after having spent a few years away in Alaska.  When she learned that I had taken up stamping, she told me of a friend of hers there who made her own stamps.  I thought that was so cool.  So of course I had to check them out!

blog146happystampingbiz.JPG

This card was made for the Inspiration Challenge #163 over on Splitcoaststampers.  I was inspired by a PB Teen catalog picture found here.  The background was sponged.  I colored directly on to this beautiful Fireweed stamp with markers before stamping.  White highlights were added with a gel pen.

It’s always so fun to find a new line of stamps.  There are some really unique images and sentiments at Happy Stamping, too.  Thank you, Jill!

——————————

Stamps: Happy Stamping ‘Fireweed’ and ‘Fireweed Word’; SU! ‘Inspired by Nature’

Papers: SU! Whisper White, Real Red, Chocolate Chip

Inks: SU! Real Red, Chocolate Chip, Garden Green, Bordering Blue; Versafine ‘Onyx Black’; Clear Star Glitter Pen; Gel Pen

Accessories: SU! Whisper White Taffeta Ribbon, Paper Piercer and Template

“Oh it is so much fun to be at Ellen’s studio and rummage through her supplies!!  *insert gleeful giggle here*  I had never used Liquid Pearls before.  So when I saw them sitting there, I knew I was going to have to give them a try.”  ~me~

blog145classroom2withwm.JPG

Have you ever tried Liquid Pearls?  Come over to the CLASSroom and check out my adventures with them.  The bride is a Karen Lockhart image, and the sentiment is from Mona Lisa Moments’ “Wedding Centers” set.

Happy Stamping!smileyrainingnotani.gif

And she is BIG.. 8lbs. 6oz..  Now that is not huge unless you are an 85lb. mom!!  But all are doing well including my son the new daddy.

blog144katelynbirthday.JPG

Here is a picture of the proud mom and dad.

blog144katelynwithmomanddad.JPG

blog144jeffkimber.jpg

WTG Kimber!!!

Today I have some exciting news to share!  Ellen Hutson has invited me to join her team at  the CLASSroom!!  I first met Ellen last summer in Chicago at CHA.  She is just the sweetest kindest person ever.  Little did I know then that Ellen and I live just a few miles from each other.  But since that time, after it was discovered we were neighbors, I visited Ellen at her studio.  And what fun it was!  It was truly a kid in a candy shop experience! lol  And now I get to play there, too!!

blog143classroom1awithwm1.JPGSo today is my first post at the CLASSroom.  I would love for you to join me there.  I have some details and tips on this card made with Karen Lockhart’s cute IB Baby Bee image.

Happy Stamping!smileyrainingnotani.gif

blog142hbrevised3withwm.JPG

Does it ever happen to you?  A card or project looks great in your head, but when you try to translate it to a real life creation it falls way short of your vision.  Well I have a whole box in my craft room dedicated to just such disappointments…  I can’t quite throw them away, but something about them just isn’t right.  So they get tossed into “the box”.  Well in an attempt to do a little house cleaning today, I pulled out a couple of these rejects from long ago to see if I could salvage them.

blog142hboldwithwm.JPG

This was one of my very first attempts at card making.  Here is what it looks like now.

blog142hbrevised1withwm.JPG

I completely removed the sentiment and the green strip of card stock replacing it with some wide grosgrain ribbon.  The bottom section was embossed with the Swiss Dots EF.  Some Kaiser flatback pearls were added as well as a taffeta bow.  The next photo shows it slightly open so that you can see how the sentiment is actually popped up with a dimensional on the inside of the card.  It peeks through the hole punched on the front.

blog142hbrevised2withwm.JPG

I’m much happier about this card now!  Phew!

The second card wasn’t quite as desperate, so the changes are more subtle.

blog142cupcakeoldwithwm.JPG

It just needed a little more interest.  I sponged around the green card stock to rough up the torn edge and help “pop” the panel.  The ribbon was changed and a knot added.  The flame got some glitter and a little more shading was added around the candle base.

blog142cupcakerevisedwithwm.JPG

Yup, I like this one now, too.

Now if you are like me and have one of “those boxes”, give this a try.  Sometimes coming back to a card or project after leaving it for awhile really helps enable me to see what it is that it needs to become that vision I had for it in the first place.

Happy stamping!smileyrainingnotani.gif

Well anyone who has ever played Chicken Foot knows that these are NOT the dominoes you want to get stuck with!!  (Low score wins).

blog141withwm.jpg

This is a fun new set from Stampin’ Up! called “Game Night”.  I thought the domino image needed a 3-D look.  So when cutting it out, I left part of the card stock on the top and right side, cut a couple of angles on it and drew in a very small line to try and achieve a feeling of depth.

blog141closeupwithwm.JPG

Every year my sisters and DBIL get together (they all live in the same city) and play Chicken Foot to bring in the New Year.  I wasn’t there this time, but I thought about them.  Hope they had fun and didn’t get anything that looked like the above!

Thanks for stopping by.  I so appreciate it!  And I would love to hear about your family’s New Year’s Eve traditions, too.

——————————

All products used on this card are from Stampin’ Up! except for the designer paper.

Stamps: Game Night

Papers: Very Vanilla, Real Red, Basic Black; “Vegas Icons” DP by Reminisce

Inks: Basic Black

Accessories: GG Ribbon, Silver Cording, Silver Brad, Small Tag Punch


© COPYRIGHT © and FTC Declaration

All content on my blog is COPYRIGHT © 2008-2024 Susan Roberts. Please don't copy any of my stuff for publication, design or contest submission. I declare that I sometimes promote and/or endorse products that I currently receive or have received either for free or at a discount. That said, I won't ever recommend anything that I don't personally enjoy using or feel is a quality product.
© 2020 Rainy Day Creations Suffusion theme by Sayontan Sinha