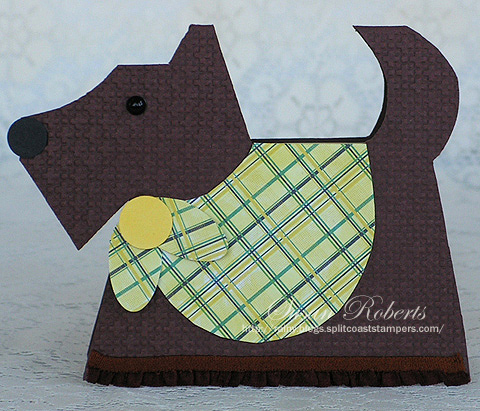
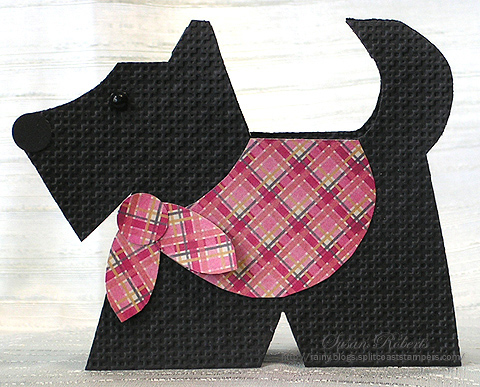
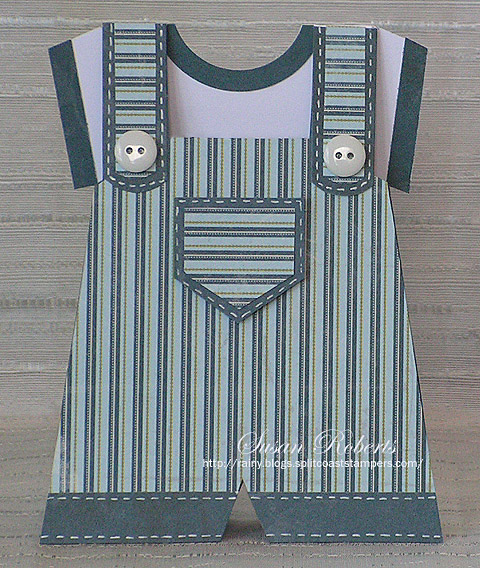
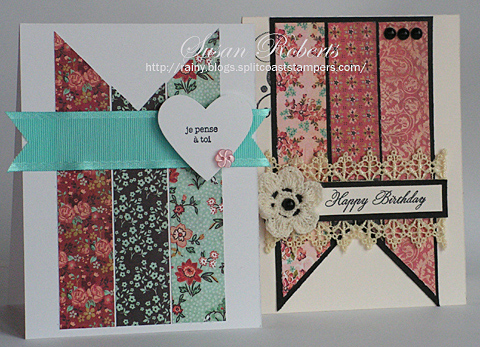
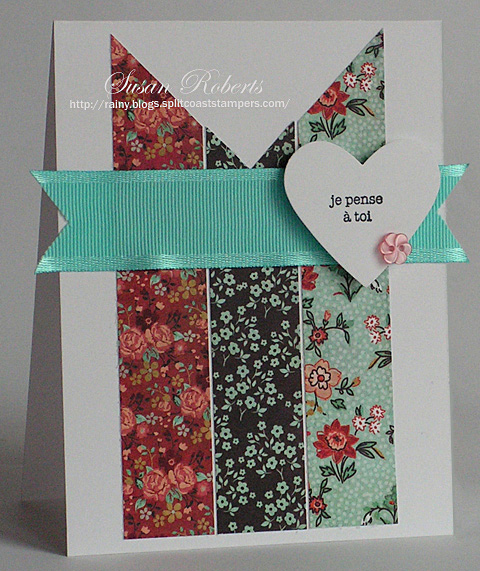
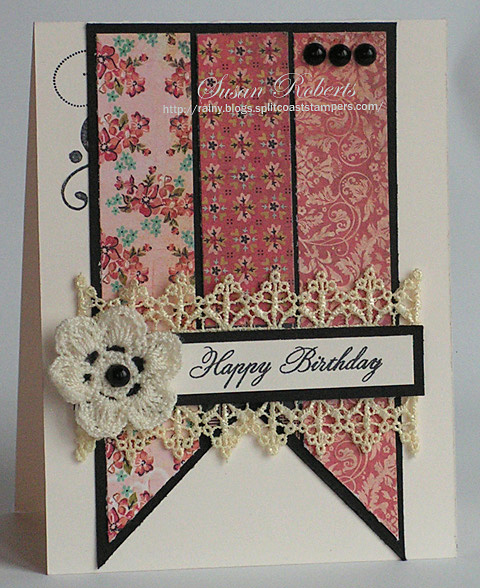
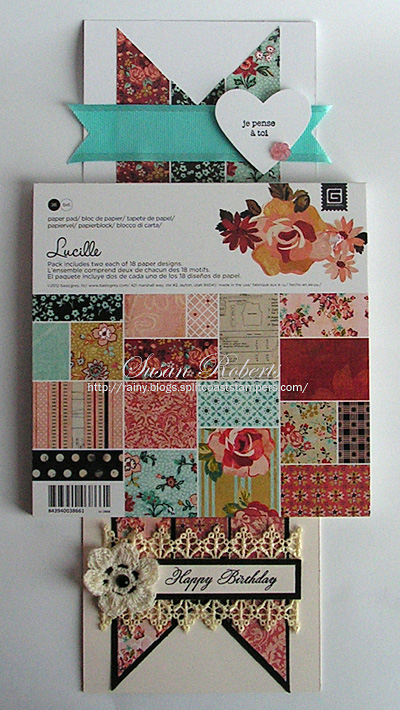
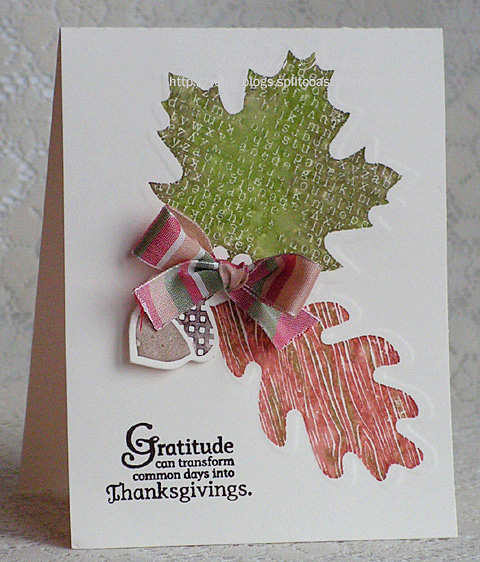
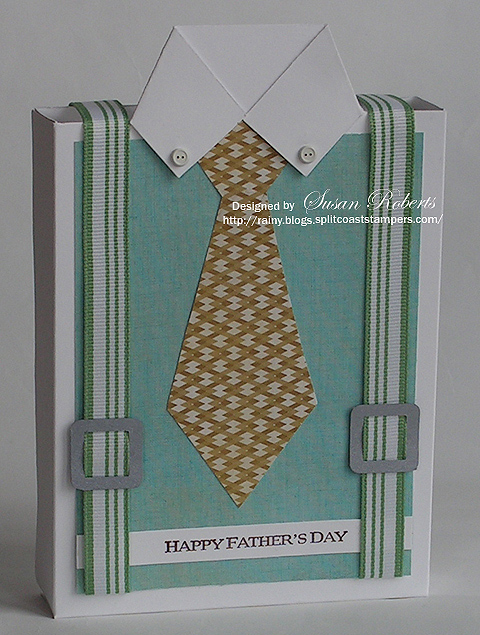
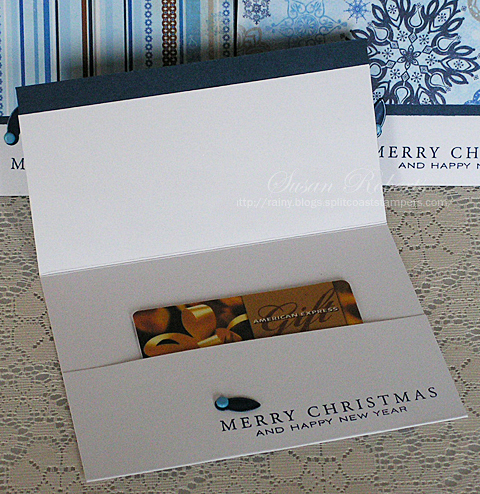
Here is a quick and easy gift card holder design.  I’ve made these for Christmas giving, but a birthday or other occasion sentiment could just as easily be stamped and different patterned papers used.

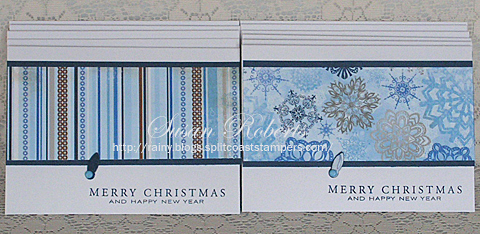
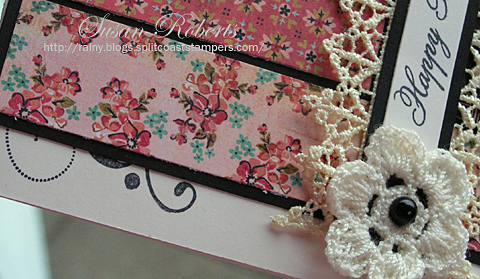
Speaking of stamping, one of my most favorite stamping tools is my Stamparatus.  The sentiment on all of these cards had to be positioned only one time.  I could then stamp all the cards so fast and so easily with perfectly aligned/straight sentiments.  I’m not a Stampin’ Up demonstrator any more, but I still recommend this tool.  Love it!

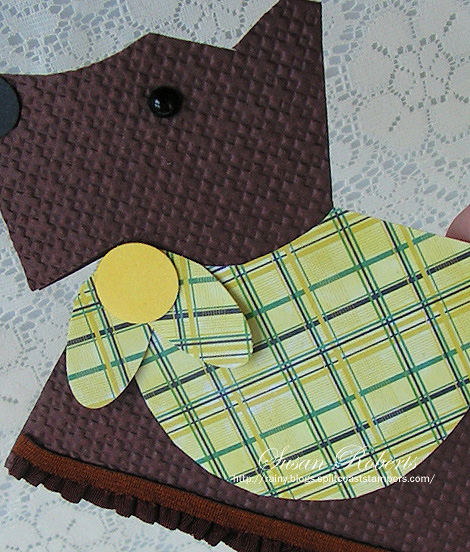
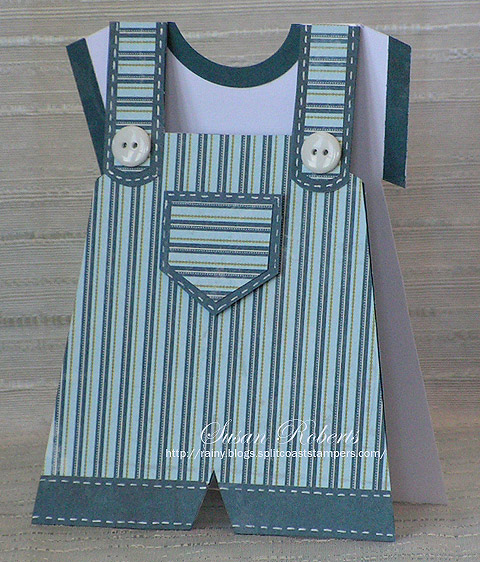
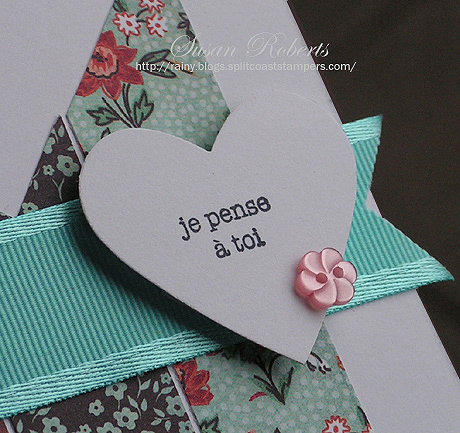
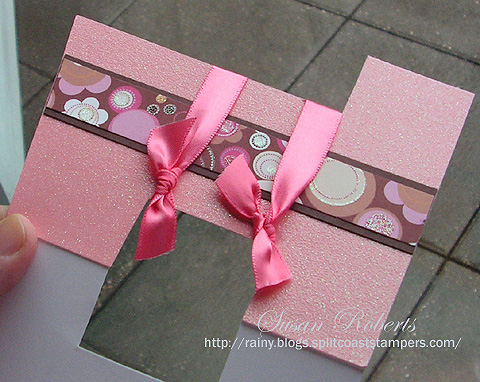
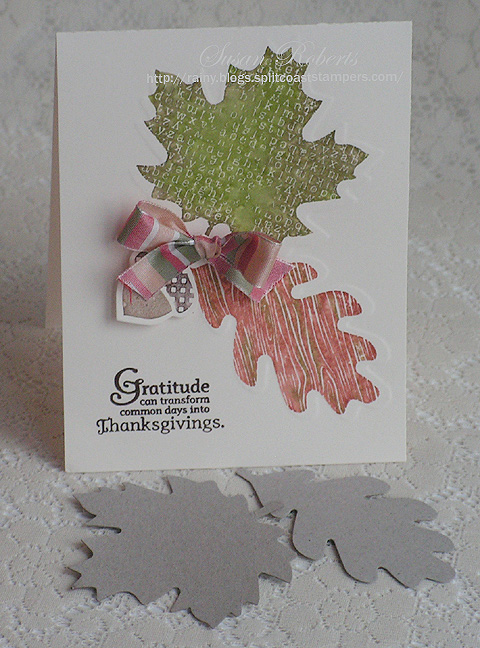
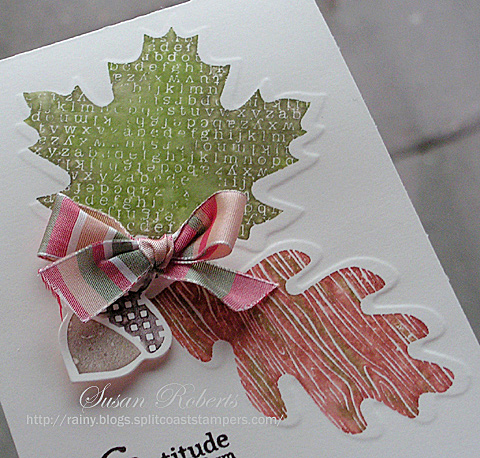
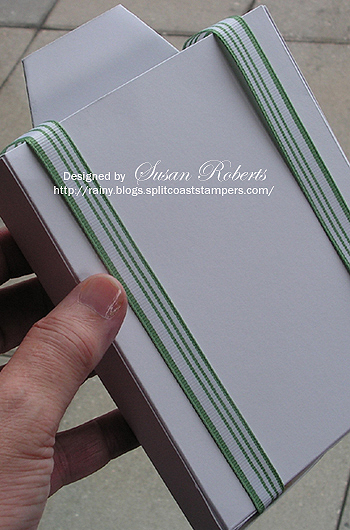
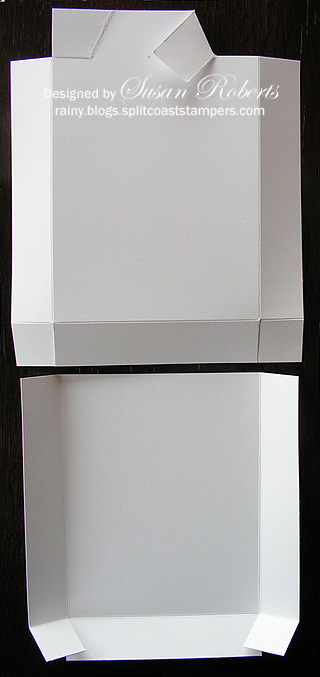
A metal tab holds the card closed.  To open the card, just turn the tab.

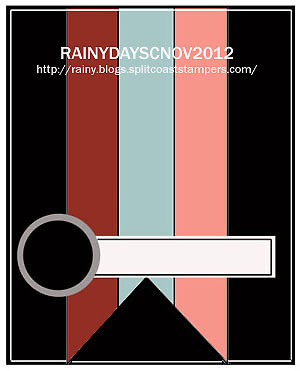
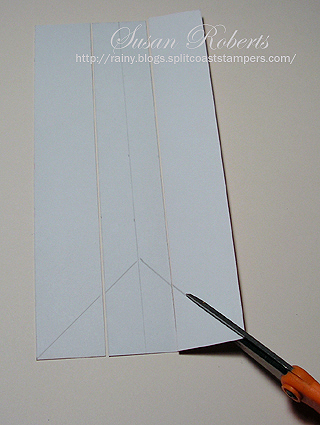
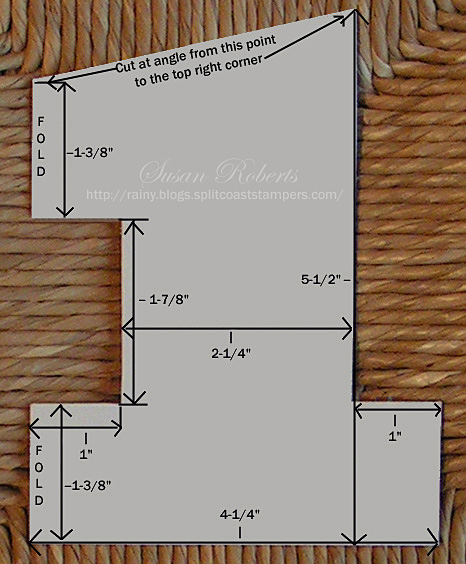
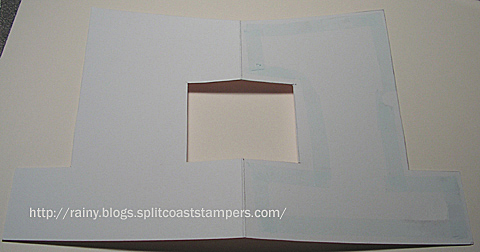
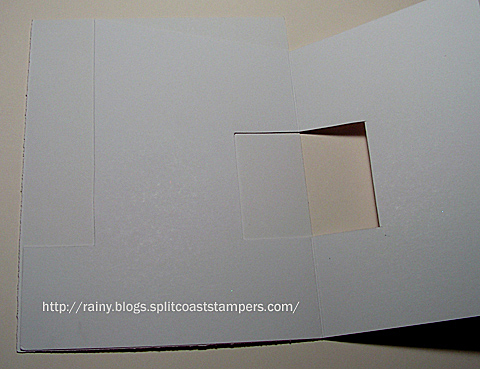
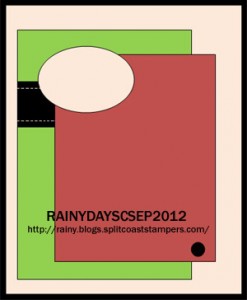
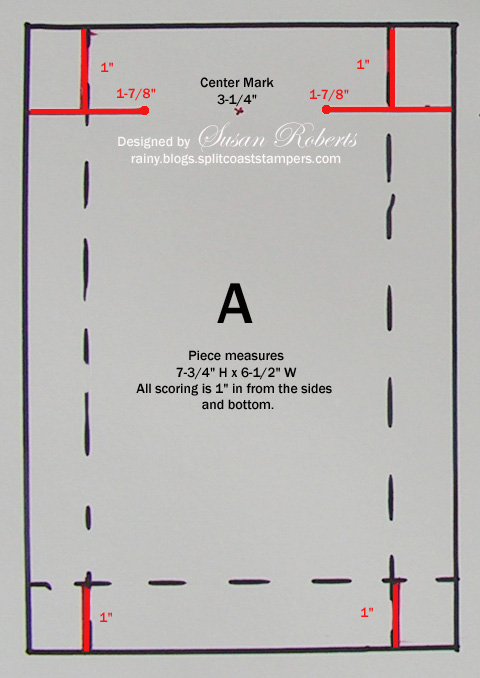
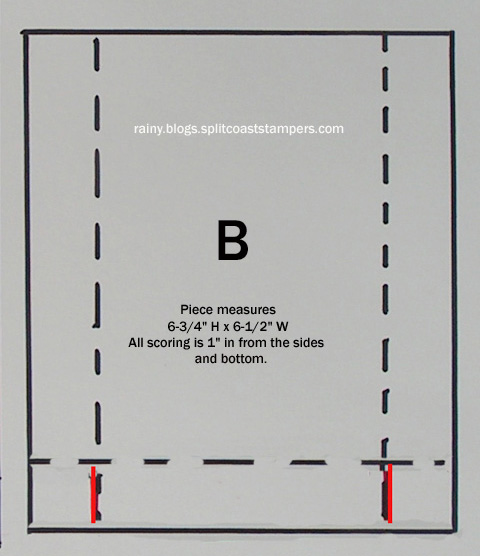
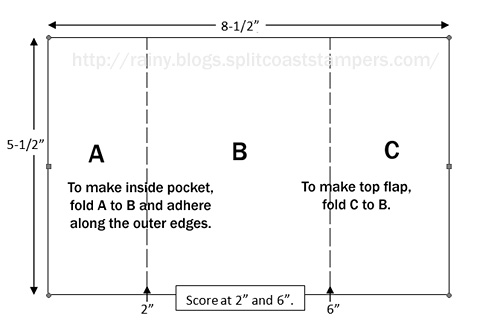
Here’s a template if you want to give it try.

Oh and if you do decide to make this card holder design, be sure to attached the brad and tab before taping the sides of the card holder pocket.  (Believe me as I speak from experience, it’s much harder to put on the brad after the sides have been taped!)

Happy Crafting!
——————————

Challenges:

Splitcoaststampers FS740

Craftyhazelnut’s Patterned Paper April Challenge: Use Patterned Paper

Love to Craft LTCCB #57: April Anything Goes

Merry Little Christmas MLCCB#33 – April Anything Christmas Goes

Addicted to Stamps and More Challenge #402 – Christmas

——————————

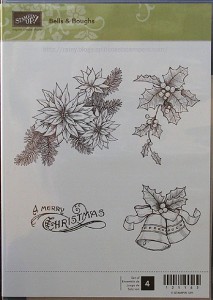
Stamps: PTI “Tree Trimming Trio”

Papers: PTI Select White and Enchanted Evening; BoBunny “Powder Mountain” Designer Paper

Inks: SU Night of Navy

Accessories:  Metal Photo Corners and Brads

I’ve been published in Paper Crafts Magazine, and my card even made the cover!

I have a template for the shirt and tie card HERE.  I also have a template to make the shirt and tie into a little tote HERE. Hope you’ll check them out.  They are easy and super fun to make.

Happy Crafting!


White Shirt:

Stamps: Crafty Secrets Clear Art Stamps “Favorite Fellas”

Papers: Paper Trey Ink “Select White” card stock; Basic Grey “Oxford”; SU “Brushed Silver”

Ink: Memento Tuxedo Black

Accessories: Memory Box Button Brads

Blue Shirt:

Papers: Paper Trey Ink “Spring Rain” card stock; Authentique “Blissful”

Accessories: Rhinestone Brad

Yellow Shirt:

Papers: Paper Trey Ink “Lemon Tart” card stock; My Mind’s Eye “Oliver”

Accessories: Rhinestone Brad


Oct 072013

It’s another Doggie Card.  This one is for my granddaughter who just turned 2.  She absolutely LOVES dogs.

Embossing gives some great texture to the dog.

The fold is at the top and is reinforced to make it a little stronger.  The inside is finished as well.

.

Brooke’s favorite color is yellow.

Amazingly, considering the amount of patterned papers that I have, I couldn’t find any yellow plaid paper in my stash.  So a suitable plaid with a light background was found and then colored with a Copic Marker.  Problem solved.

I recently made a similar card for another granddaughter.  However, I followed the TEMPLATE completely on this one.  Instead of notching out some legs, a ruffled ribbon was adhered across the bottom of the card.

There is a fun challenge right now to make a shaped card.  There’s still lots of time to play along.  Click on the Badge to take you to the challenge!


Shape it Up
(make a shaped card)

Happy Crafting!
—————————-

Papers: PTI Dark Chocolate, True Black and Lemon Tart; My Mind’s Eye “Oxford Lane” Designer Paper

Inks: Copic Marker

Accessories: Kaiser Pearl; Maya Road Ruffled Ribbon; SU ‘s Square Lattice Embossing Folder and Oval Punch; EK Success 1/2″ Circle Punch and 5/8″ Circle Punch

Jul 062013

Recently we made a quick trip to Vegas, but it wasn’t for the usual sort of Vegas activities that come to mind.  It was instead to visit with one of our sons and his family in their new home and to celebrate their youngest daughter’s first birthday.  Here is the card I made for the occasion.

A piece of white cardstock was added to the inside for a sentiment.

After cutting away so much of the fold for this design the card seemed a little fragile, so reinforcements of black cardstock were added to the fold on the inside.

If you are interested, here is the Template for this fun creation.

Happy Crafting!
Hope everyone had a great 4th!

——————————

Stamps: Hero Arts Happy Birthday (Inside); Inkadinkado Paw (Inside)

Papers: PTI True Black and Select White (Inside); My Mind’s Eye “A Happy Heart” Designer Paper

Inks: SU Basic Black (Inside) and Sahara Sand (Inside)

Accessories: Kaiser Pearl; EK Success 1/2″ Circle Punch; SU “Square Lattice” Embossing Folder and Small Oval Punch

Jul 012013

It’s been awhile!  The month of May and June were busy busy busy!!  We put our house up for sale and planned to relax for a couple of months waiting and hoping for that right buyer.  Much to our surprise, the house sold in 4 days!  We had to immediately find a place for all of our “stuff” and get it moved out.  But even so, moving had to wait a bit because May also produced the most exciting event of all… the birth of our first grandson!  So, of course, a trip to Arizona for 8 days of holding pure sweetness was in order.

Here is the card I made for little Lincoln.

Here is the TEMPLATE for this oh-so-cute design.

I finished the inside, too.

And now the star of the show.. Lincoln all brand new and beautiful.

Kate is so good to her new little brother.

Oh Happy Day!!
——————————

Stamps: SU Teeny Tiny Wishes (Inside)

Papers: PTI Select White; Authentique “Loyal” Designer Paper

Inks: Memento Tuxedo Black (Inside); White Gel Pen

Accessories: Buttons; Nestabilities Classic Circle Dies

It’s time for November’s Rainy Day Sketch Challenge!  Here is this month’s sketch.  It was inspired by this darling card over at Diane Zachman’s blog, “Paper Cookies.”

I made a couple of cards, too, to show the sketch in action.  lol

The first card shows the sketch rotated 180 degrees.

Love CAS designs, and I love the simplicity of this heart and sentiment with it’s sweet little button.

The second card shows the sketch with an orientation like the drawing.

I also love the vintage look with lace and pearls and a crocheted doily flower.  A little flourish peeks out from behind the designer papers.

To make the pennant shaped panel, I cut three coordinating pieces of designer paper and lined them up side by side with the pattern side face down.  The center of the middle strip was marked.  Taking a square piece of cardstock, I placed it at the bottom of the strips with one of the corner points placed on the center mark high enough that the outside bottom corners of the strips were also covered by the square.

I marked the “V” and cut.

The blog candy this month is a brand new 6×6 pad of Basic Grey’s “Lucille” designer paper.  It is one of the most beautiful selection of papers I have ever seen!  All of the designer paper used on both of my cards are from this collection.  It will be sent to a randomly drawn winner from those who play along in the challenge.

To play just leave a link to your creation in the comments section.  A winner will be drawn on December 1st giving you a little over 2 weeks to participate in the challenge.  Oh and please make sure that the link you leave goes to the specific card you are entering and not to your blog or gallery in general.  Hope you can find some time to play!

Happy Crafting!
—————————-

Card 1:

Stamps: SU Voeux mignons
Papers
: PTI Select White; Basic Grey “Lucille” Designer Paper
Inks
: Memento Tuxedo Black
Accessories
: May Arts Satin Trimmed Grosgrain Ribbon; SU Button and Heart Punch

Card 2:

Stamps: SU Flowering Flourishes; PTI Birthday Basics
Papers
: PTI Vintage Cream and True Black; Basic Grey “Lucille” Designer Paper
Inks
: Memento Tuxedo Black
Accessories
: KaiserCraft Pearls, Recollections Crocheted Flower; Lace


Edited 12/01/12:  This post is now closed for comments.

Sep 272012

My but a year goes by quickly!

Made this card for one of my newest little granddaughters whose big day is today.  Hopefully it is fairly kid safe with no little rhinestones and bits just in case she eats it!

Making shaped cards is always fun!  I made a template with the measurements to help anyone who may wish to make “one” too!

Here is a quick tutorial of how the designer paper (dp) was put on the front of the card.

Adhesive was placed on the front of the card base.

This was then adhered to the back of the dp making sure to line up the fold on the card base with the edge of the dp.

Finally, I trimmed off all excess dp.

There is still a little time left to play along in my September Sketch Challenge.  An SU stamp set is being offered as some candy!!

Happy Crafting!
——————————

Papers: PTI Select White and Dark Chocolate; DCWV The Glitter Mat Stack

Accessories: PTI Satin Ribbon

Sep 242012

This card was made for a couple of challenges this week.  The first is this week’s CAS-ual Fridays Challenge to make a clean and simple project inspired by autumn.

The other challenge is the “Less Is More” Challenge Week #86 to combine and use 3 past challenges.  The weeks I chose were: #15-Embossing, #55-Punches and Dies and #84-One Layer Foliage.  The embossing was achieved by using my leaf die , which coordinates with these beautiful leaf images, to cut some cardboard leaves.  These leaves were then used to emboss the card base.  I used this technique on another card, but on that card I stamped the image first and then embossed.  This time I embossed the leaves first and then stamped the coordinating image.  Both methods seemed to work just fine.

The same die was used to cut the acorn.

The water color look of the images was made by inking up the stamps using different colored markers and then spritzing them with water before stamping.

The Stampin’ Up “Bells & Boughs” stamp set is the blog candy in connection with my Sketch Challenge for September!

If you haven’t seen my Sketch Challenge, check it out HERE.  There is still lots of time to play along!!

Thanks for “dropping” by today!  hehe

Happy Crafting!
——————————

Stamps: SU Wonderfall and Day of Gratitude

Papers: PTI Vintage Cream

Inks: SU Really Rust, Old Olive, Close to Cocoa and Chocolate Chip

Accessories: SU Rustic Retreat Ribbon; Sizzix Big Shot Autumn Accents Die

Sep 122012

Today’s cards are for this week’s Less Is More Challenge.  The cards needed to be one layer and were to feature “Foliage.”  Texture was given by adding score lines and embossing to the card bases.

Since the only embellishment was a sparkly ribbon, a little interest was created by dotting each of the berries with a white gel pen.

Here is the second card.

A closeup shows the added score lines and embossing on this card as well.

The embossed leaf shape was made by cutting a cardboard template with the leaf die that coordinated with the stamp.  After stamping the image, the leaf template was placed on the cardstock matching it up to the image.  It was then run through my Cuttlebug.

I was having so much fun, that I made one more card with the holly and berry image.  It is dressed up just a bit more with a sparkly brad, some paper piercing and a bright red card base, so it does not qualify for the Less Is More Challenge this week.  But it was fun, nonetheless!

Thanks for dropping by today.  Happy Crafting!!

——————————

Holly Cards

Stamps: SU Bells & Boughs and Teeny Tiny Wishes

Papers: PTI Vintage Cream and Pure Poppy

Inks: SU Always Artichoke and Close to Cocoa; White Gel Pen; Copics:

Accessories: Ribbon (from Michael’s); SU Square Lattice Embossing Folder; Martha Stewart Scoring Board; Brad; Corner Punch; Piercing Template; Paper Piercing Tool

Leaf Card

Stamps: SU Tweet Leaves and Apple Blossoms (sentiment)

Papers: PTI Select White

Inks: SU Always Artichoke, Old Olive, More Mustard, Pumpkin Pie, Really Rust and Chocolate Chip

Accessories: Grosgrain Ribbon; Martha Stewart Scoring Board; SU Autumn Accents Die


For Father’s Day last year I designed a shirt and tie card. Well using this same idea, I’ve created a shirt and tie tote.  This will be filled on Father’s Day with a sweet surprise.  However, this tote will comfortably hold 3 or 4 moderately embellished A2 sized cards with envelopes, if you’d rather that than chocolate!

I love suspenders, but I’ve never been able to convince my DH to wear them.  Wonder if he’ll even notice them on this little creation. Kinda hard to miss ’em?  They carry all the way down the back of the tote as well.

Following is a tutorial for the tote, but first I wanted to announce the winner of my Sketch Challenge.  I was SO excited that some of you played along!!!  How cool is that.  I didn’t use a random generator this time, but instead just wrote your names on some slips of paper, put them in a bowl, closed my eyes and picked one.  Congrats, Carol L!  I’ll get that gorgeous Graphic45 paper out to you asap!

INSTRUCTIONS FOR A FATHER’S DAY TOTE

Step 1

Cut 2 pieces of cardstock A and B.

Piece A  =  7-3/4” x 6-1/2”

Piece B  =  6-3/4” x 6-1/2”

Step 2

Piece A – Score in 1” from both long (7-3/4”) sides.  Score in 1” from one of the short (6-3/4”) sides.
(This side will now be referred to as the bottom of Piece A and the opposite short side will be referred to as the top.)

Piece B – Score in 1” from both long (6-3/4”) sides and 1” from one of the short (6-1/2”) sides.
(This side will now be referred to as the bottom of Piece B.)

Step 3

Piece A – Measure down 1” from the top and 1-7/8” from both sides and lightly mark this spot.  From 1” down on the sides, cut in 1-7/8” to that mark.  Cut down 1” from the top on both score lines.  This will completely cut away a 1” square from both corners of the top.  Cut up 1” from the bottom on both score lines.

Piece B – Cut up 1” from the bottom on both score lines.

Cutting lines are in RED.

Step 4

Follow the instructions on THIS TUTORIAL to make the collar and tie.  Note, however, that the “center” should be marked at 3-1/4” (not 2-1/8” as given in Step 3 of the card tutorial.)

Decorate and embellish each piece as desired.

Step 5

Assemble the tote by folding all the scored lines in the same direction and towards what will be the inside of the tote.  Adhere A and B together on the overlapping side and bottom pieces.  Make sure that Piece A is on the outside of Piece B.

Happy Crafting!

——————————

Stamps: Inkadinkado Happy Father’s Day

Papers: PTI Select White; SU Silver; My Mind’s Eye “Indie Chic ‘Nutmeg'”

Inks: SU Chocolate Chip

Accessories: Button Brads, Grosgrain Ribbon; Buckle Punch

© COPYRIGHT © and FTC Declaration

All content on my blog is COPYRIGHT © 2008-2024 Susan Roberts. Please don't copy any of my stuff for publication, design or contest submission. I declare that I sometimes promote and/or endorse products that I currently receive or have received either for free or at a discount. That said, I won't ever recommend anything that I don't personally enjoy using or feel is a quality product.
© 2020 Rainy Day Creations Suffusion theme by Sayontan Sinha