Jan 242012

My DBIL had a birthday this past week.  This is his card.

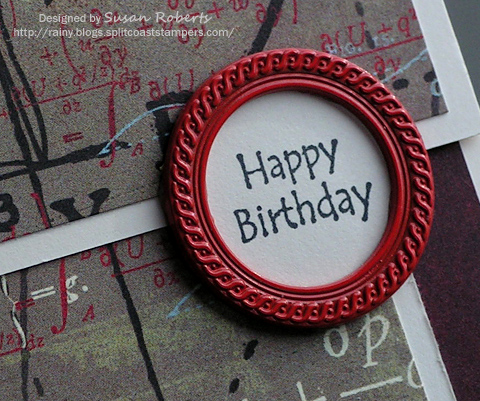
This DP is perfect for Paul who is one smart guy.  He retired a few years ago, after a successful career at the Hanford Nuclear Facility working with those little things called atoms.  Anyway, math is definitely up his alley!  Thought he would get a kick out of this paper.

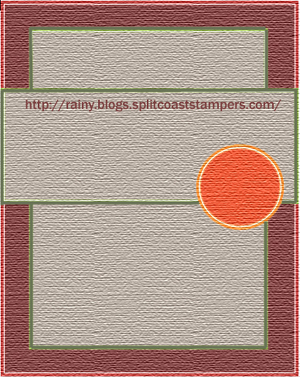
Had fun drawing up a sketch that would show off this Basic Grey Oxford DP.

This circular metal frame was added for some texture and more dimension.

So, no matter how you do the math, hope you had a great day, Paul!

——————————

Stamps: (Unknown Sentiment Stamp)

Papers: PTI Vintage Cream; Basic Grey Oxford Designer Paper

Inks: Memento Tuxedo Black

Accessories: 1″ Circle Punch; Metal Circle Frame

Sep 212011

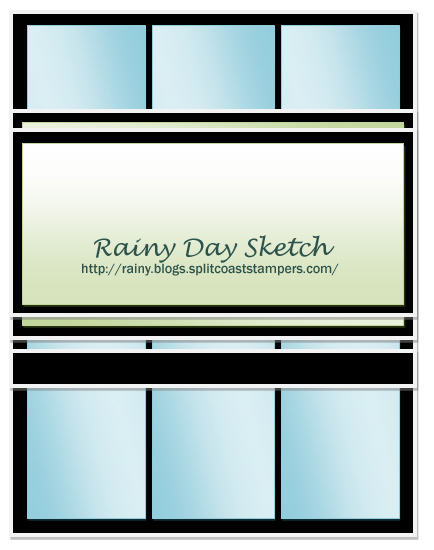
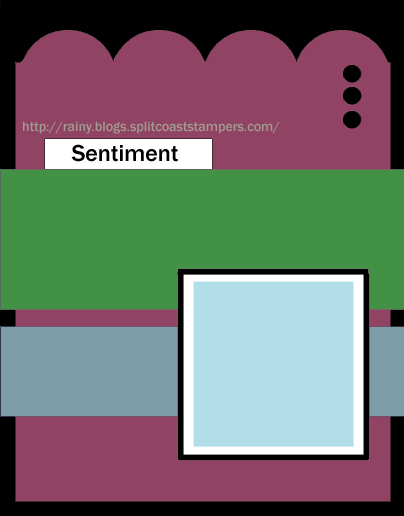
Paper.  Oh how I love it!  I recently bought three of Authentique’s new designer paper bundles and just had to create a sketch to show them off.  Here it is.Card Base: 4-1/4″ x 5-1/2″
Base for DP: 4″ x 5-1/4″
DP Panels: 1-1/4″ x 5-1/8″
Sentiment Panels and Borders: 4-1/4″ x 2-1/2″
4″ x 2-1/4″
4-1/4″ x 2″
4″ x 1-3/4″

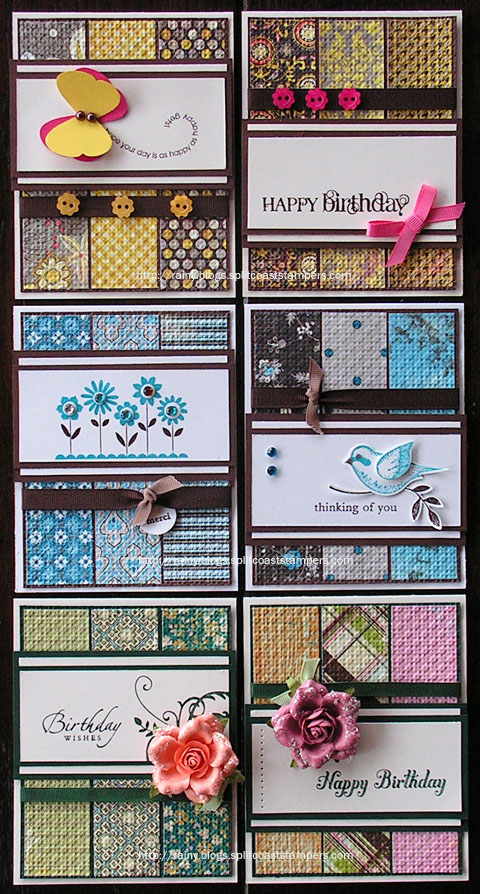
And here are the cards!

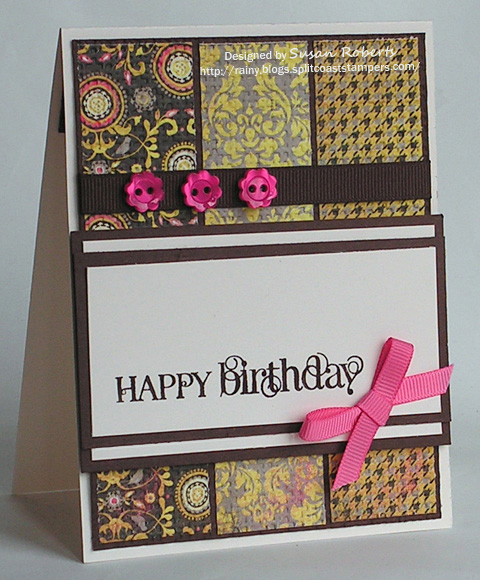
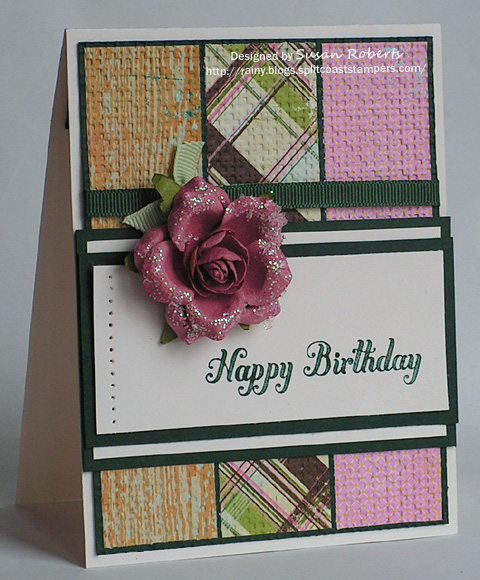
Look at all that scrumptious dilly-icious designer paper (dp)!!  The panels were all embossed to add some great texture and to tie the different strips together into one cohesive piece.

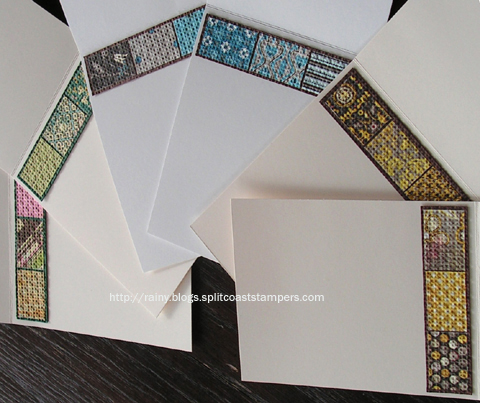
After cutting each strip for the front of the cards, there was a small piece leftover.  I added each of these to the inside of the corresponding cards.  There was no waste of this precious perfect paper!

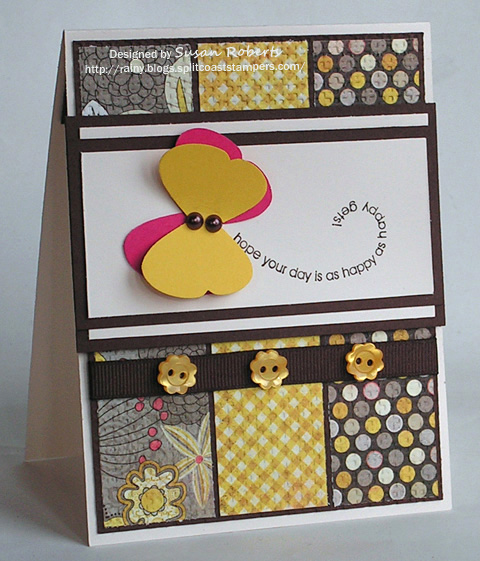
Here are the individual cards with their recipes listed directly below them.


Stamps
: SU Flight of the Butterfly
Papers
: PTI Vintage Cream and Dark Chocolate; SU Yoyo Yellow and Melon Mambo; Authentique Blissful DP
Inks
: SU Chocolate Chip
Accessories
: Flatback Pearls; Buttons; Grosgrain Ribbon; SU Butterfly Punch; SU Square Lattice Embossing Folder


Stamps
: SU Curly Cute
Papers
: PTI Vintage Cream and Dark Chocolate; Authentique Blissful DP
Inks: SU Chocolate Chip
Accessories
: Buttons; Grosgrain Ribbons; SU Square Lattice Embossing Folder


Stamps
: SU Hello Blossoms and Voeux mignons (Teeny Tiny Wishes)
Papers
: PTI Select White and Dark Chocolate; Authentique Journey DP
Inks: SU Tempting Turquoise and Chocolate Chip
Accessories
: Rhinestones; Grosgrain Ribbons; 3/4″ Circle Punch; SU Square Lattice Embossing Folder


Stamps
: SU Language of Friendship and Three Little Words
Papers
: PTI Select White and Dark Chocolate; Authentique Journey DP
Inks: SU Tempting Turquoise and Chocolate Chip
Accessories: Rhinestones; Grosgrain Ribbons; SU Bird Builder Punch; SU Square Lattice Embossing Folder


Stamps
: SU Baroque Motifs and Sincere Salutations
Papers
: PTI Vintage Cream and Pinefeather; Authentique Splendid DP
Inks
: SU Handsome Hunter; Copic G29
Accessories
: GG Ribbons; Prima; SU Square Lattice Embossing Folder

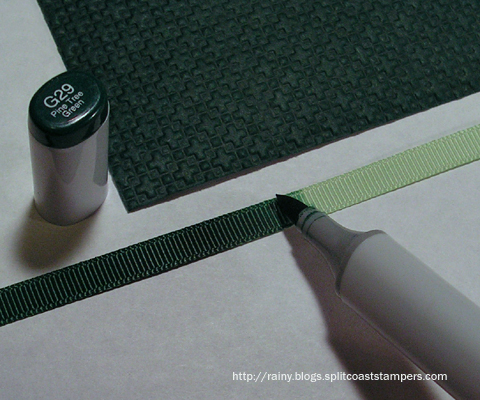
For both the above and below cards, a Copic marker (G29) was used on SU Certainly Celery grosgrain ribbon to match the PTI Pinefeather cardstock.


Stamps
: SU Bring on the Cake
Papers: PTI Vintage Cream and Pinefeather; Authentique Splendid DP
Inks
: SU Handsome Hunter; Copic G29
Accessories
: GG Ribbons; Prima; Paper Piercer and Template; SU Square Lattice Embossing Folder

Thanks for dropping by today.  If you decide to play with this sketch, I would love to see what you have created.  Please leave me a link and SHOW ME THE PAPER!! *grin*  Happy Crafting!

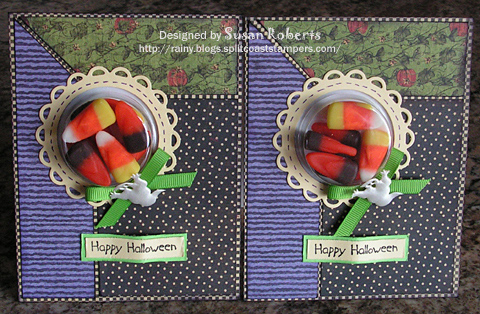
Here are the cards that I made for my granddaughters for Halloween.

These sweet girls just melt my heart.

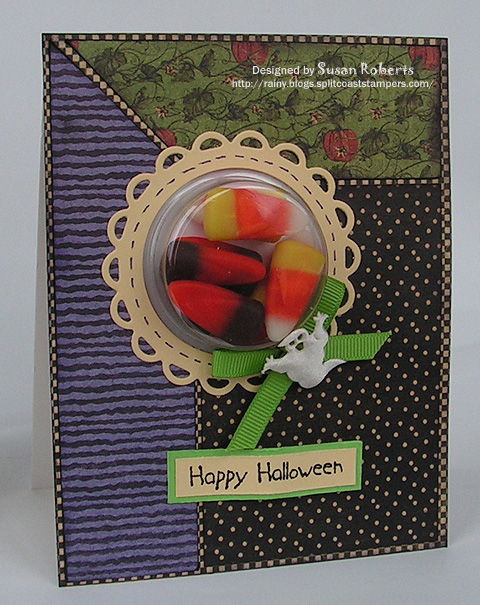
After drawing up a sketch, I made the cards for the twins.
Last year these treat cups were used for their birthday cards, too.

But there was no way to get to the candy without destroying the cards.  So this time I made sliders to access the candy.  I used this great tutorial for them.  Thank you, Cindy!

I took some pictures along my journey making these sliders, as well.

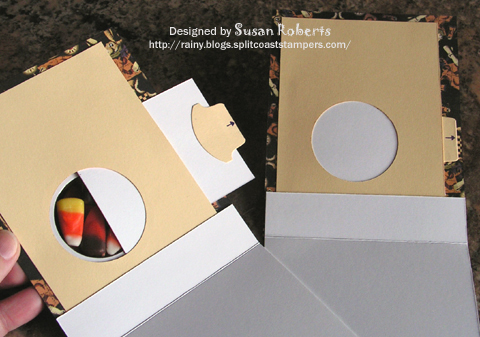
The card fronts were made according to the sketch.  Using one of the Circles Nestabilities, circles were cut in the card fronts.  The card fronts were then used as templates to mark the position of where to cut the circle in their backing.
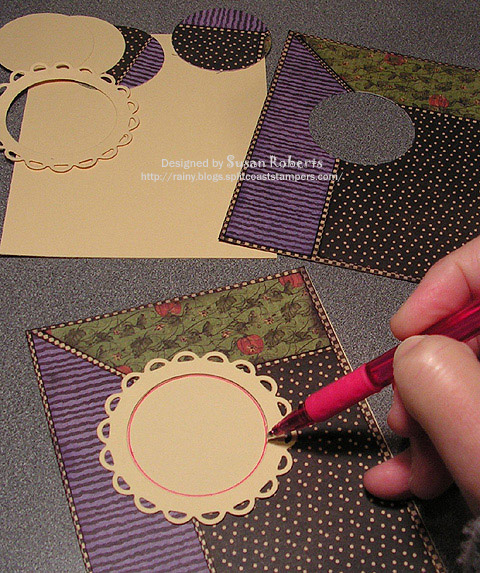
The backings were trimmed leaving a wider border on the side where the slider tabs would be.
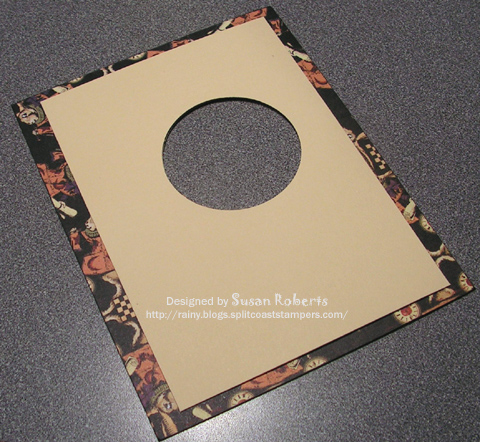
I made sure that the sliders were large enough to cover the holes when fully closed.
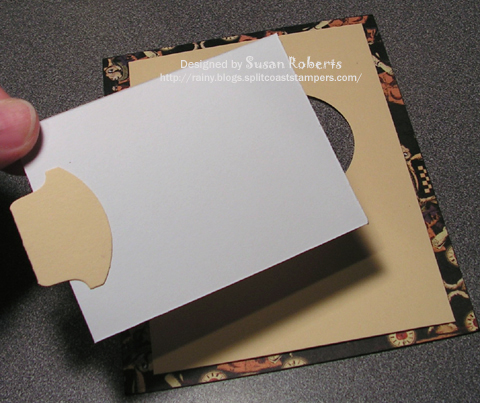
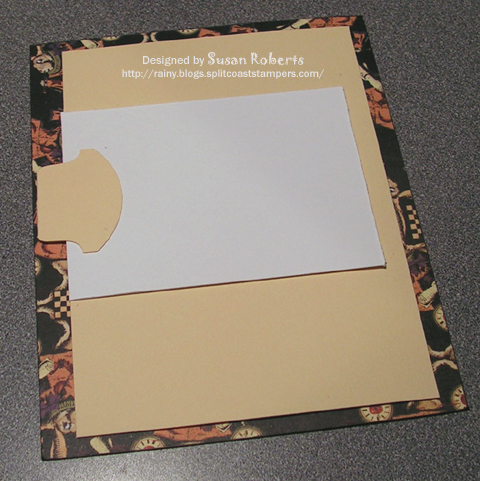
When the tape was placed on the backings, I was careful to leave enough room for the sliders to function properly without coming in contact with any adhesive.
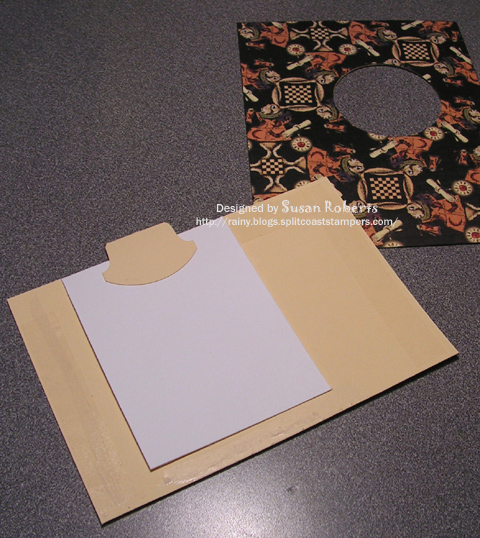
Before adhering the backings in place, the cups were put into the card fronts.
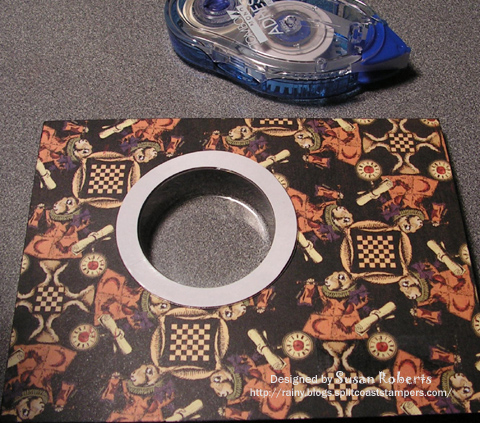
The backings were then adhered to the card fronts.
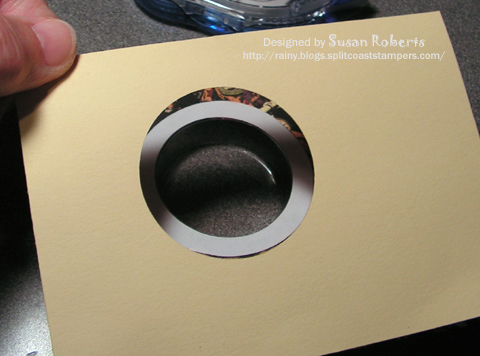
Card bases with a 1″ front were made and adhered to the card fronts.  The candy was placed in the treat cups and the sliders were put into place.
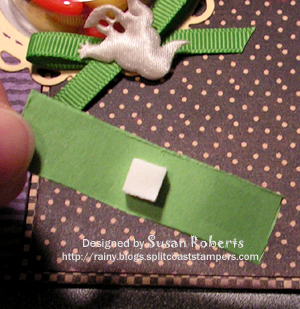
The sentiment panels were bent to form a wave.  A small foam tape square was placed on the center back, and regular adhesive was placed on each side.  (The foam tape will keep the “bump” in the sentiment panels once they have been adhered to the card fronts.)
And here is little Kate’s card.
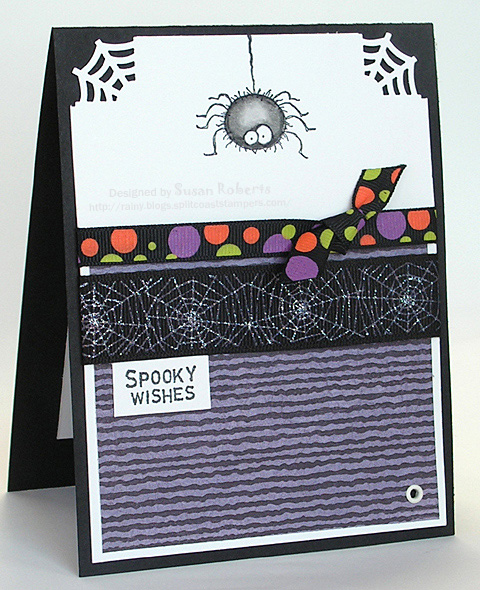
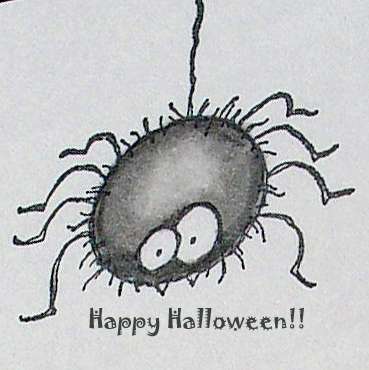
The spider was colored with Copics.
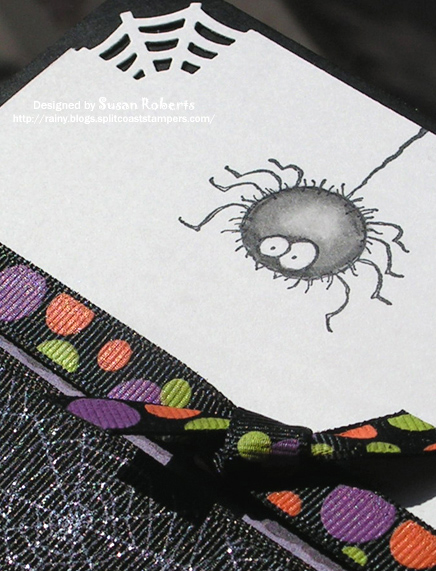
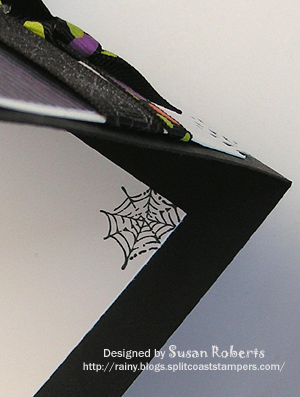
It took no time at all, but gave a little touch of fun to stamp a quick spiderweb to the inside of the card.
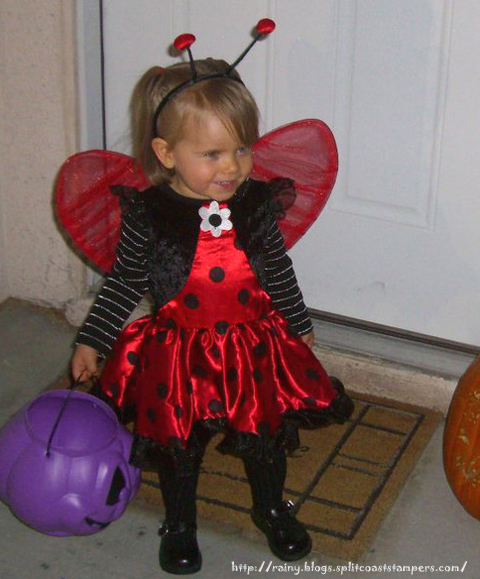
Here is my little ladybug Kate all ready to go trick or treating.
Hope everyone has a safe and..
——————————

Twins’ Cards:

Stamps: American Art Stamp “Halloween”

Papers: PaperTrey Ink “Select White”; SU “Barely Banana” and “Green Galore”; Graphic 45 “Hallowe’en in Wonderland” Collection

Inks: SU “Basic Black”

Accessories: Nestabilities “Classic Circles” and “Lacey Circles”; SU Tab Punch; GG Ribbon and Satin Ghost; SU Treat Cups; Candy Corn 🙂

Kate’s Card:

Stamps: SU “Booglie Eyes”; American Art Stamp “Spooky Wishes” Michael’s Dollar Bin Spider Web

Papers: PaperTrey Ink “Select White” and “True Black”; Graphic 45 “Hallowe’en in Wonderland” Collection

Inks: Memento “Tuxedo Black”; Copics: T0, T3, T7

Accessories: Martha Stewart “Spiderweb” Corner Punch; Eyelet; GG Ribbons from Michael’s

blog274sketch.jpg

I love drawing sketches, however, a little confession… I have a really hard time following them exactly.  Here is the card I made with this sketch.

blog274cardwithwm.jpg

Looks like the sketch was followed pretty closely, no?  Well, I changed the sketch to follow the card.  ha!  I tried to follow a similar sketch that I had made.  It was the intent to follow it, but an extra little piece snuck in somehow so…  I changed the sketch!  heheh  Is it possible to cheat if its your own sketch?  lol

blog274closeupwithwm.jpg

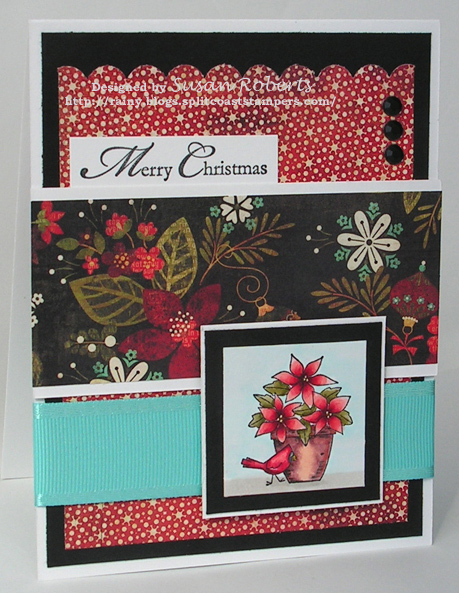
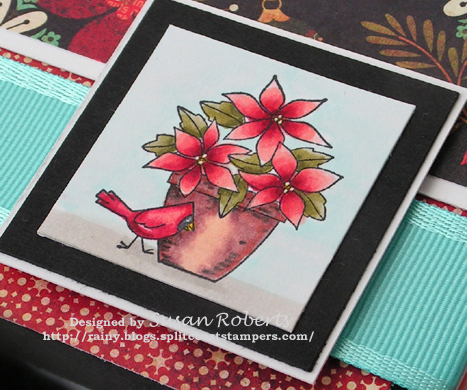
The images in this SU! set “A Flower for All Seasons” are all so sweet and fun to color.  The centers of each Poinsettia were dotted with a white gel pen to match the flowers on this new “Jovial” Christmas paper from Basic Grey.  And the horizontal lines were drawn on the flower pot to add shading.

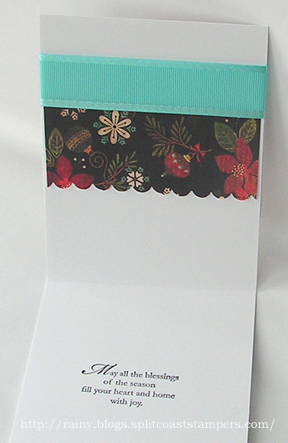
Carrying the ribbon all the way around the card base panel and adding a touch of the patterned paper on the inside really helped to dress up the card.  (And speaking of ribbon… this new May Arts 1″ Grosgrain with a Satin Edge is FABULOUS!!)

blog274insidewithwm.jpg

Another Christmas card completed to add to the pile (which needs to be much much larger if there are to be enough cards to send out this year).  Workin’ on it!

Thanks for dropping by today.  If you decide to try the sketch, I would love for you to leave a link here so that I can take a peek.  It’s always so fun to see what someone else does with them.
Happy Crafting!

Hi, Jill.  Do the Puyallup! clipcowani.gif

——————————

Stamps: SU! “A Flower for All Seasons” and “A Cardinal Christmas” (sentiment)

Papers: Papertrey Ink “Select White” and “True Black”; Basic Grey “Jovial” DP

Inks: Memento “Tuxedo Black”; White Gel Pen; Copics:

Poinsettia and Bird: r20.jpgr24.jpgr29.jpgr89.jpgy19.jpg

Leaves: yg911.jpgyg95.jpgyg99.jpg

Flower Pot: e0000.jpge00.jpge04.jpge08.jpgw9.jpg

Sky/Ground: bg000.jpgw1.jpgw3.jpg

Accessories: May Arts 1″ GG Ribbon with Satin Edge; Kaiser Rhinestones; SU! Scalloped Border Punch

I love drawing sketches, and today I thought I would share one with you that I actually used to make a card.

So here is the sketch:

sketch3.jpg

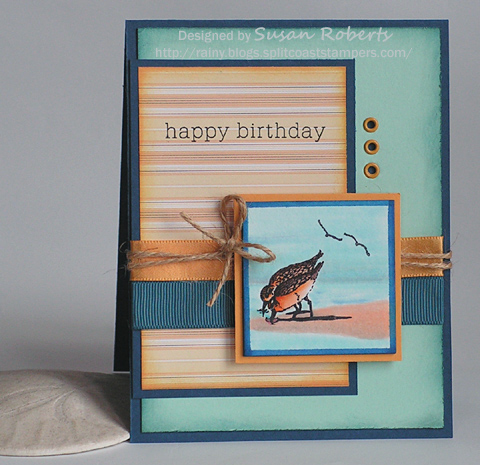
And here is the card I made using this sketch:

blog234withwm.jpg

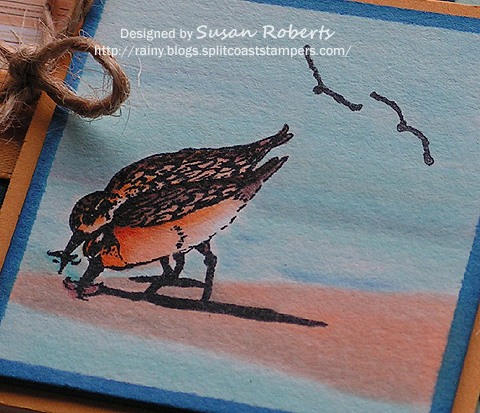
This “Shore Birds” image from Firecracker Designs by Pamela was given to me by Libby Hickson.  Isn’t it wonderful!  Thank you, Libby!!

blog234closeupwithwm.jpg

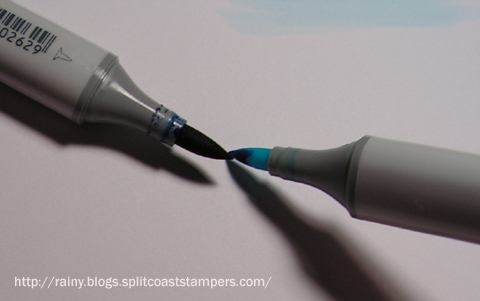
Using a Twinchie as the base for the main image and ocean scene, I first stamped the birds and colored them with Copics.  Next Copics were used to color in the sand, ocean and sky.  For the ocean, the B26 marker was touched directly onto the nib of the BG000 and BG02 markers before making the ocean strokes.

blog234copics.jpg

This automatically lightened and blended the B26 ink as it was drawn, but still allowed for a few accent areas on the water.

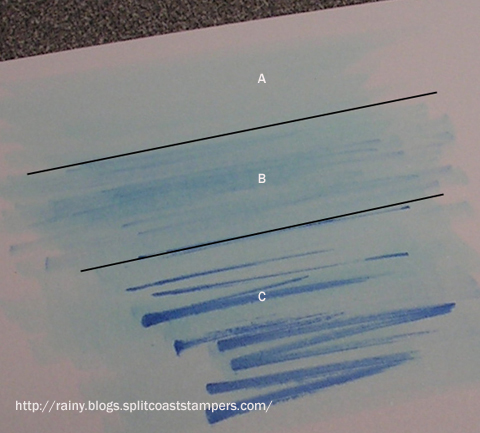
In the picture below “A” is the lighter marker only.  “B” is the result when B26 is touched directly to the nib of the lighter marker.  “C” is when both markers are colored independent of each other with no blending.

(I should mention here that this does not ruin your lighter marker in any way.  Once the darker ink is used up, the nib on the lighter marker will once again be completely back to it’s original color as it soaks it’s ink up from the barrel of the marker. :))
blog234colors.jpg

Lastly I used a B26 Copic marker and a ruler to draw a frame around the outside of the scene on the Twinchie and also to color the sides of the Twinchie.

If you feel so inclined, I hope you’ll give this sketch a try, too!  And please let me know.. I would LOVE to see your take on it!

Happy Crafting!

——————————

Stamps: Firecracker Designs by Pamela “Shore Birds”;  Kittie Kits “Cause a Scene #2”; Papertrey Ink “Birthday Basics”

Papers: “Twinchie”; Papertrey Ink Summer Sunrise, Aqua Mist, Enchanted Evening and “Father Knows Best” 6″ x 6″ DP

Inks: Memento “Tuxedo Black”; Papertrey Ink “Summer Sunrise”; SU! “Not Quite Navy”; Copics:

yr000.jpgyr04.jpge0000.jpge00.jpge04.jpge74.jpge771.jpg

b000.jpgb21.jpgb26.jpgbg000.jpgbg02.jpgbg05.jpg

c0.jpgc11.jpgw0.jpgw1.jpgw3.jpg

Accessories: Papertrey Ink 5/8″ GG Ribbon “Enchanted Evening” and 1/2″ Satin Ribbon “Summer Sunrise”; Eyelets; Twine

Probably my biggest addiction, even more than collecting actual stamps, is designer paper. PAPER!!! I love it!! But I find that I don’t use it because then it would be gone. D’oh. So I have begun to quarter my 12″X12″ sheets. This way I have FOUR… YES FOUR pieces of paper. I can let my little hoarding self use one or two of these pieces and still have some left!! Woohoo!! Well it works for me. LOL!!

blog158cardscloseupwithwm.JPG

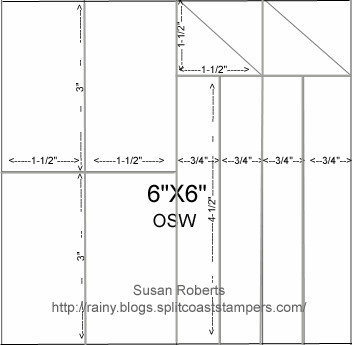
So that is where I started today, with a quartered piece of 12″X12″ designer paper.  To make sure that there was absolutely no waste of my precious paper, I created another 6″X6″ One Sheet Wonder (OSW) template.  I just love making these.  They also work, of course, for all of the 6″X6″ pads of designer paper available now.  And I created a sketch (which I almost followed!  lol) that can be used with the pieces from the OSW that will make into four cards.  Here’s the template for the OSW.

blog1586x6onesheetwonder1forsetof4withwm.jpg

I needed a couple of masculine birthday cards and a couple of wedding cards.  Since this was a double sided patterned paper, it worked out perfectly with the stripes on one side and the blue toile like floral on the other!  Plus my 10 Designer Centers & Borders from JustRite had everything I needed for sentiments all in one set!

blog158pieceswithwm.jpg

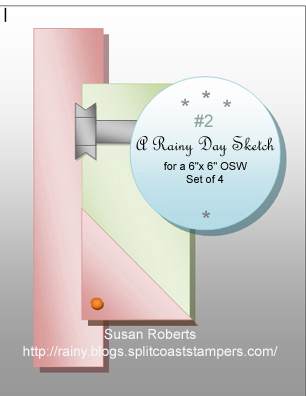
Here is the sketch.

blog1586x6onesheetwonder1sketchwithwm.jpg

If you decide to give this OSW/Sketch design a try, please let me know.  It would be so much fun to see what you have created!

blog158cardswithwm.JPG

Happy Crafting!!!

——————————

Stamps: JustRite 10 Designer Centers & Borders

Papers (all SU!): Whisper White, Baja Breeze (wedding only), Kraft and Chocolate Chip (birthday only),  DSP Parisian Breeze

Inks: SU! Chocolate Chip Marker

Accessories: Brads, SU! Photo Corner Punch, Cuttlebug, Swiss Dot Embossing Folder (wedding only), Argyle Embossing Folder (birthday only), SU! Taffeta and Satin Ribbon Rose (wedding only), SU! Rope Twine (birthday only)

What a fun challenge Julia has for us over on Splitcoaststampers today! She has challenged us to use our computers in making a card. So first using Word I drew up this little sketch.

1blogsketch1.jpg

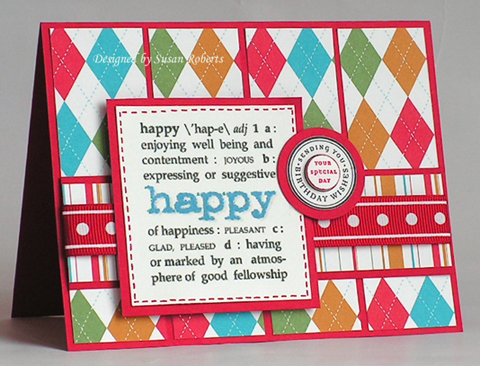
Then I made a card using it.

1blog18withwm.jpg

The sentiment was also done using Word (and Websters) and then printed out on card stock. The word “happy” is a font called “Adler” that I got from ScrapVillage.

If anyone wants to make a card using this sketch, please feel free to do so. Post a comment here with a link to your card. I would LOVE to see what you have come up with!

Happy Stamping!!

Stamps: Circle of Friendship
Paper: Real Red, Whisper White, East Coast Prep DP
Ink: Printer Ink, Real Red, Jet Black Stazon
Accessories: GG Ribbon, Circle Punches, Computer

© COPYRIGHT © and FTC Declaration

All content on my blog is COPYRIGHT © 2008-2024 Susan Roberts. Please don't copy any of my stuff for publication, design or contest submission. I declare that I sometimes promote and/or endorse products that I currently receive or have received either for free or at a discount. That said, I won't ever recommend anything that I don't personally enjoy using or feel is a quality product.
© 2020 Rainy Day Creations Suffusion theme by Sayontan Sinha