Apr 122012

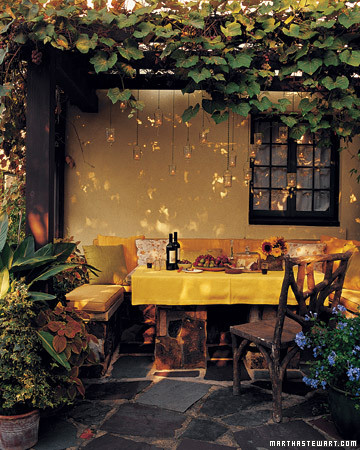
Last month my DH and I were in Mexico for a couple of weeks.  I packed some cardstock, my Copics and a few stamps so that I could stamp and color while enjoying the warm sun and ocean surf.  It was such fun!

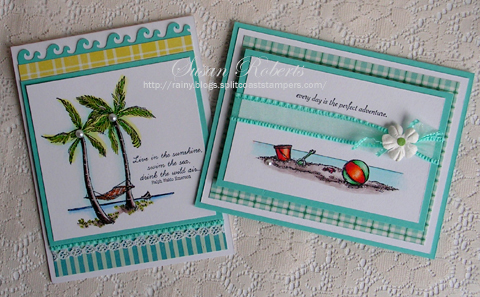
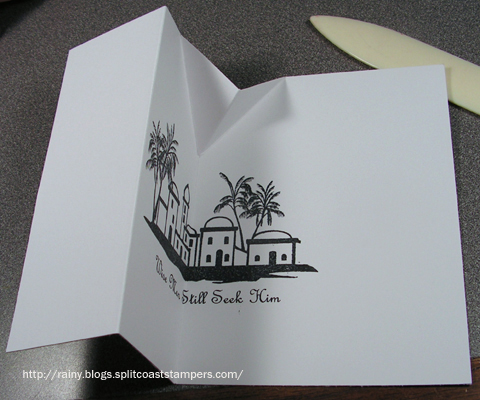
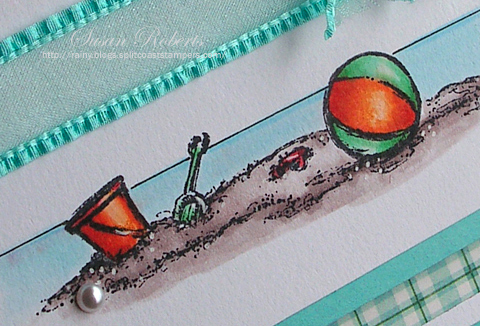
Both of today’s cards were created using scenes that I colored there.  The images are from Flourishes “Beach Life” set.

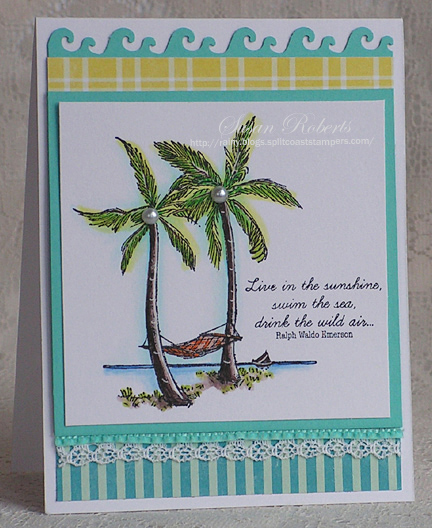
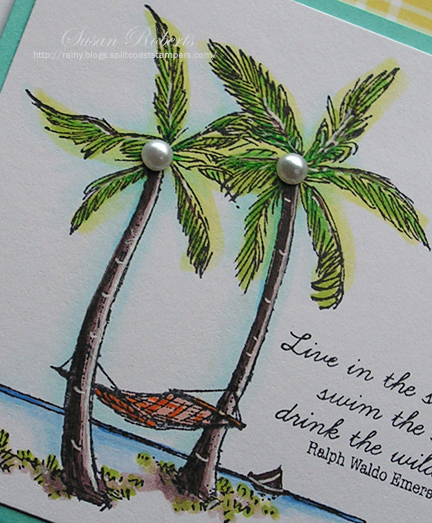
A white gel pen was used to accent the tree trunks.


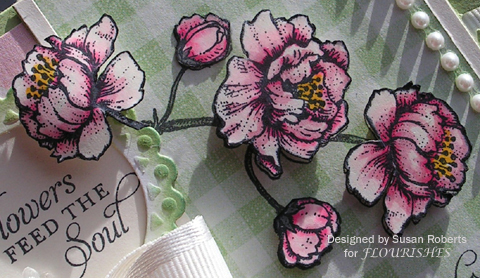
On this second card the flower center was made by splitting a small punched circle of cardstock in two.  This created a “fuzzy” texture where the layers were torn apart.

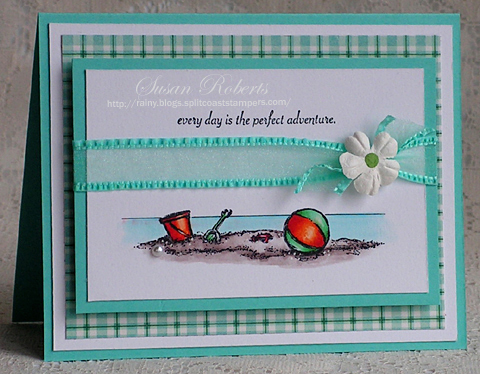
A black line was drawn with a Copic Multiliner for the horizon, and the sand was dotted using the white gel pen.

Surf’s Up!!  Happy Crafting!
—————————–

Card 1

Stamps: Flourishes “Beach Life”

Papers: PTI Select White and Hawaiian Shores; Echo Park “Happy Days” Designer Paper

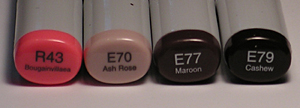
Inks: Memento Tuxedo Black; White Gel Pen; Copics:

Accessories: Pearls; Fiscars Waves Border Punch; Maya Road Ruffle Edge Ribbon; Lace

Card 2

Stamps: Flourishes “Beach Life” and SU “On the Grow”

Papers: PTI Select White, Hawaiian Shores and New Leaf; Echo Park “Happy Days” Designer Paper

Inks: Memento Tuxedo Black; White Gel Pen; 0.1 Copic Multiliner; Copics:

Accessories: Pearl; Organdy Ribbon; Prima

Mar 012012

This card was made to play along in this week’s “Over the Edge” challenge at Our Creative Corner.  The idea was to have just one or two feathers TOTAL on the entire card, but as you can see, someone got carried away in the moment!!  LOVE!

Was this ever fun!!

Now this was some Happy Crafting! Thanks for dropping by today!

——————————

Stamps: Flourishes Irish Blessing; SU Patterned Party
Papers: PTI Select White and New Leaf
Inks: Archival Brilliance Graphite Black; Memento Tuxedo Black; Copic:
Accessories: May Arts Lace; Shamrock Rhinestones; Feathers; Nestabilities Ovals Dies; SU Stripes Embossing Folder

As the guest designer over at Our Creative Corner, I made this “Fancy Folds” card for this week’s challenge.

This was super easy and quick to make and has such a fun surprise as you open it!

When the card is closed the pop-up star is completely concealed.

As the card is opened it begins to rise.

Here is the card fully open.

Before doing any of the scoring for this card, I first stamped the inside image.  This prevents any problems with trying to stamp over a score line which can distort a stamped image.  Since 2-1/8″ will show on both sides when the card is closed, I made sure that the image and sentiment were stamped at least that distance from either side of the card.

This design uses a standard sized card base of 5-1/2″ x 8-1/2″ with the center scored at 4-1/4″ and an additional score at 2-1/8″ to the left of the center score.

On the center score line, measure 1-1/2″ down and lightly mark the fold.  Then measure 1-1/2″ to the left and right at the top of the score line and lightly mark it.  Then score from the top marks to the center mark.

Fold the card and pinch the top 1-1/2″ on the center score forward.  The 2-1/8″ score, to the left of the center fold, is folded forward.  It may sound confusing, but a picture is worth a thousand words.  It’s really easy-peasy.

Make sure that when you adhere your star or flower or whatever you want to pop-up, that it is attached only on the left hand side of the fancy fold.

Also, check out this great TUTORIAL.  I was inspired by it almost two years ago and have been wanting to try it ever since.  Thanks so much for sharing it, Bonnie!

Have a great weekend.  Happy Crafting!

——————————

Stamps: Flourishes City of David

Papers: PTI Select White and Basic Black; SU Gold; SEI Rochester DP

Inks: Memento Tuxedo Black; Copics:


Accessories: Spellbinders Stars Five Nestabilities; May Arts Satin Edged Grosgrain Ribbon; Photo Anchor; Brad

It’s MY FINAL POST as Flourishes Limelight Designer.

Hope you’ll come on over and see what I’ve been up to!

Spring has sprung this week over on the Flourishes Blog, and Cherry Blossoms are blooming.  It’s my 3rd week as their Limelight Designer.  I would love to have you join me there.

Happy Crafting!

Today over on the Flourishes Blog is my second post as their February Limelight Designer!  I’ve been playing with their beautiful “Irish Blessing” set.  Hope you’ll join me.  Happy Crafting!

I’m so excited today to tell you that Flourishes has asked me to be their February Limelight Designer!  Hope you’ll drop on over to the Flourishes blog and see my first post here.  Happy Crafting!

Let the Good Times Roll!  LOVE that I’ve gotten to play in TWO Splitcoaststamper challenges this week!  This card is for their Inspiration Challenge #218 found here.  I used the first sample picture as my inspiration.

blog233ic218withwm.jpg

Mardi Gras is this month, and these fun images and sentiment are from Flourishes “Mardi Gras” set.

blog233ic218closeupwithwm.jpg

Portions of the parade leader’s leg and umbrella have been cut out.  I think it makes him look like he’s walking right out and off of the card!

Now I’ve never been to Mardi Gras, but I do know that pink is not one of the traditional colors for it.  But it’s one of my favorites, so there you go!  I have heard that anything goes… so surely some pink would be allowed!  hehe  I think just crafting about it is more my speed!

Good Times!  Happy Crafting!  GO COLTS!!

——————————

Stamps: Flourishes “Mardi Gras”

Papers: Papertrey Ink True Black, Sweet Blush and Raspberry Fizz; DP is 7 Gypsies “Flocked TOBAL”

Inks: Memento “Tuxedo Black”

Accessories:  Feathers; Glitter Brads

May 072009

From the moment I saw this fabulous chair from Flourishes “Chairs for You” set, I knew I had to have it.  And with paper piecing being such a favorite technique of mine,  I couldn’t wait to pair it with these wonderful Mini Papers by Jenni Bowlin.

blog172cardswithwm.JPG

I colored, paper pieced, cut out and then mounted each chair onto the card with dimensionals.

blog172card1withwm.JPG

blog172sideview1withwm.JPG

I love this beautiful wide May Arts Crochet Ribbon, too.  How could I not!?!  lol

blog172card2withwm.JPG

blog172sideview2withwm.JPG

The sentiment is also from the “Chairs for You” set.  It has been divided between the front and inside of the card.

blog172insidewithwm.JPG

A little sparkle was added to each chair with my Stardust Glitter Pen.  Gotta have my sparkle fix!

blog172closeup1withwm.JPG
blog172closeup2withwm.JPG

Here are the Copics I used to color in the chairs. The final colors of the chairs vary depending simply on the order in which the color was applied and the amount of each color applied.

blog172copics.jpg

And because the chairs are cutout and designer paper covers areas not colored in, it was SO EASY to color because I didn’t have to worry about going outside of any of the lines!  Doesn’t get better than that!!

Happy Crafting!

——————————

Stamps: FLLC “Chairs for You”

Papers: SU! Very Vanilla, Basic Black, Real Red; Jenni Bowlin Mini Papers

Inks: Memento Tuxedo Black; Copics; Stardust Glitter Pen

Accessories: May Arts Crochet Ribbon; GG Ribbon; Kaiser Flatback Pearls;

blog132bic33piece.jpgMartha Stewart sets the stage for Beate’s Inspiration Challenge #33 this week.  Aren’t these colors just yummy!  I used three different Flourishes sets on my card.  The leaves are from Flourishes “Autumn Flourishes” set.  The table and bowl are from “Summer on the Patio”, and the sentiment is from “Figs and Pomegranates”.  The ribbon is May Arts sheer 1″ width in chocolate.

blog132bic33withwm.jpg

The leaves were stamped first using Garden Green and VersaMark on Barely Banana card stock.  A VersaMarker was used to draw on the veins before clear embossing all the leaves.  I then sponged and sponged using several different colors ranging from yellows to black at the bottom.  The center was left a brighter yellow for the table and bowl.  The bowl was stamped, clear embossed and masked.  Then the table was stamped and clear embossed.  The lemons were colored with SU! markers.  A white gel pen was used for highlights.  The sentiment was also embossed and popped up on dimensionals.

Be sure to check out the other Inspiration Challenge Team’s blogs!

Charmaine Ikach

Danielle Lounds

Dawn McVey

Jennifer Buck

Silke Ledlow 

blog132bic33closeupwithwm.jpg

Flourishes is kicking off the holiday season and everything at Flourishes is JustRite!!  They want to make it easy for you to add to your wish list or buy for that special stamping buddy in your life.  So starting December 1st, everything JustRite in the Flourishes store will be 25% off!!  The Flourishes Design Team will be showing you lots of fun ways you can use these products, and we are giving away some goodies of our own!!  Here are the blogs to check out this week for some yummy candy!!

SundayFaith

Monday – me  (If you haven’t already, be sure to check out yesterday’s post to see all of my JustRite Blog Candy!!)smileyflowerani.gif

TuesdayCindy

WednesdayLaura

ThursdayFlourishes Newsletter

FridayLatisha

SaturdayJulie

SundayWinner’s Roundup on the Flourishes Blog

——————————

Stamps: Flourishes ‘Autumn Flourishes’, ‘Summer on the Patio’, ‘Figs and Pomegranates’

Papers: SU! Barely Banana, Chocolate Chip

Inks: SU! Chocolate Chip, Close to Cocoa, Yoyo Yellow, Summer Sun, More Mustard, Garden Green, Certainly Celery, Bashful Blue, Basic Black; VersaMark and VersaMarker; Black and White Gel Pens

Accessories: May Arts Ribbon; Leaf Charm; Paper Piercing Tool and Template; Clear Embossing Powder; Distressing Tool; SU! Photo Corner Punch

© COPYRIGHT © and FTC Declaration

All content on my blog is COPYRIGHT © 2008-2024 Susan Roberts. Please don't copy any of my stuff for publication, design or contest submission. I declare that I sometimes promote and/or endorse products that I currently receive or have received either for free or at a discount. That said, I won't ever recommend anything that I don't personally enjoy using or feel is a quality product.
© 2020 Rainy Day Creations Suffusion theme by Sayontan Sinha