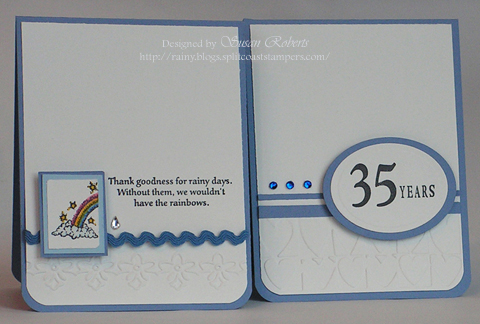
This week I am the Guest Designer on Splitcoaststampers Clean and Simple (CAS) Challenge!  The challenge is a sketch, and I made 3 cards using it.

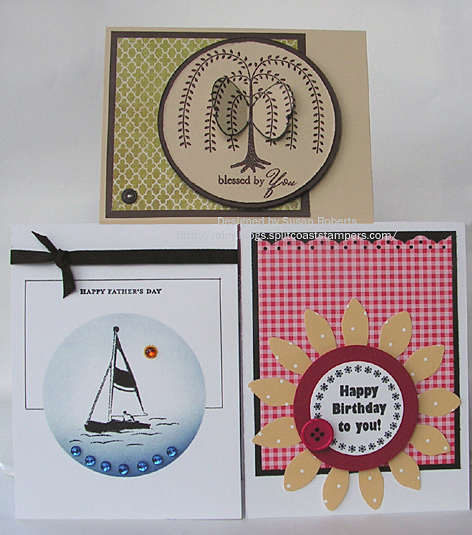
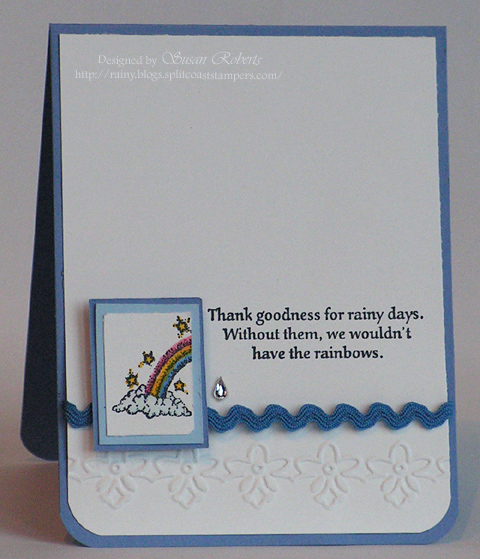
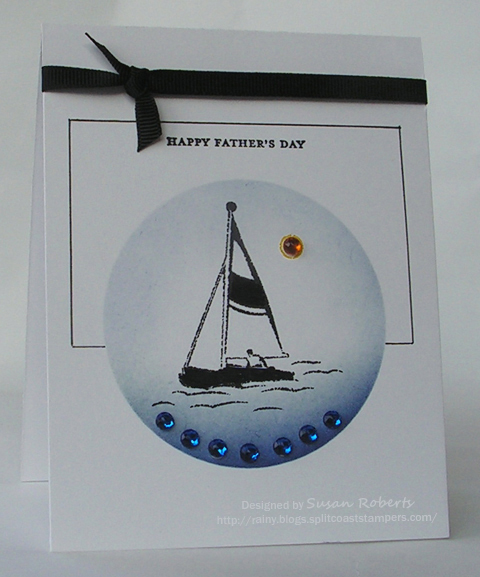
The Father’s Day card is a 1-layer card and was very CAS to make.

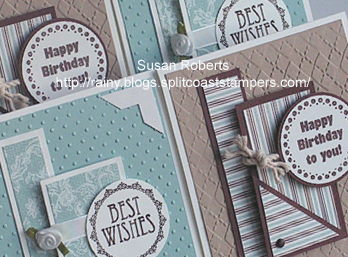
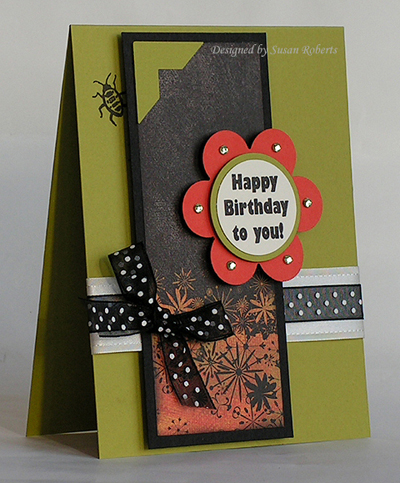
The daisy card, although having 5 layers, was still a very quick and simple card to make thanks to some Nestabilities and punches.

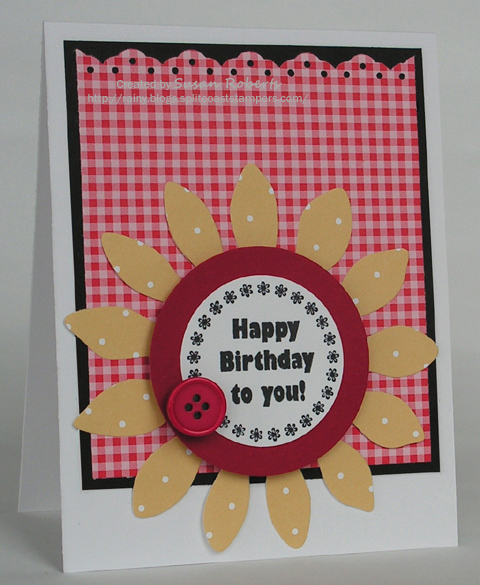
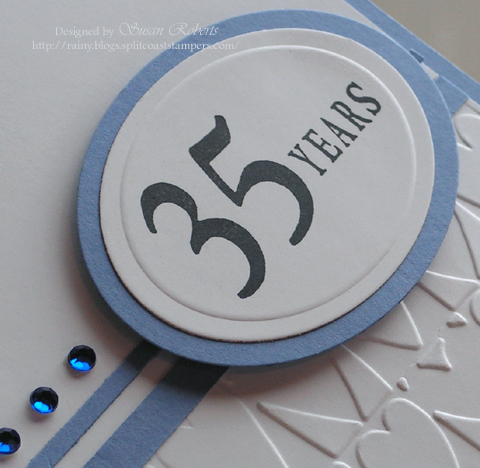
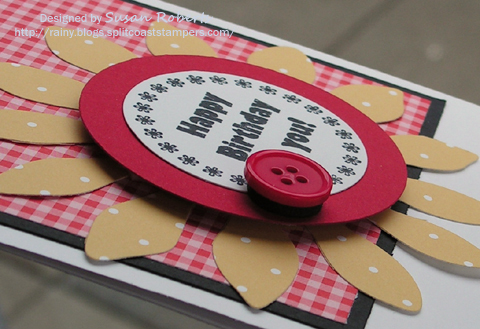
The button was mounted with a black foam tape circle so that the holes would look more pronounced.

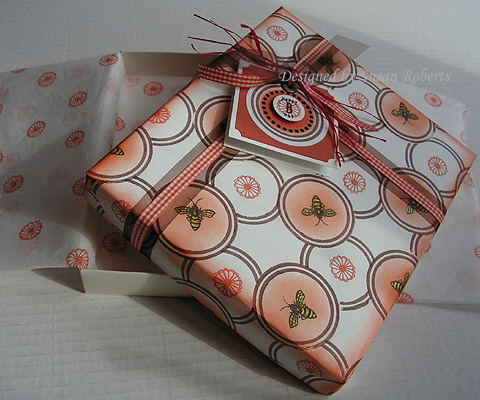
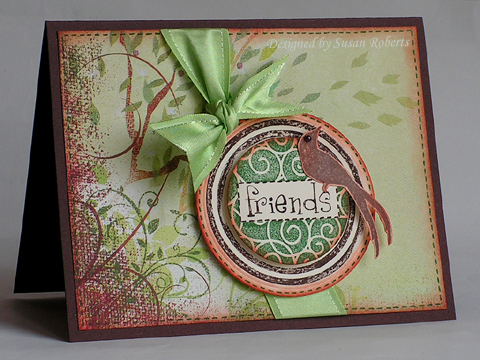
The final card uses one of my new Waltzing Mouse sets.  I have been wanting needing some of these wonderful stamps for quite some time and was excited when they arrived this past week!

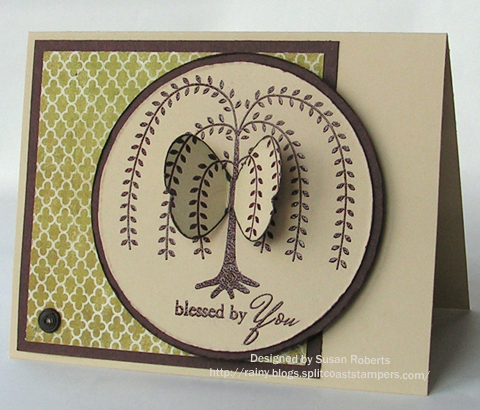
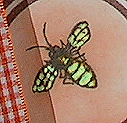
This was the most difficult card to make of the 3 only because it involved embossing.  The embossing powder always seems to make such a mess for me, so I don’t use it that often.  But, LOVE the results!  And I needed to stamp and emboss the image twice.. once for the main image and once for the punched butterfly.

It was SO fun to know in advance what the CAS challenge would be!  Thanks for giving me the opportunity this week to be a Guest Designer.

Happy Crafting!

——————————

Father’s Day Sailboat
Stamps: SU Uncharted Territory and Teeny Tiny Wishes
Papers: Papertrey Ink Select White
Inks: Memento Tuxedo Black; SU Bordering Blue, Ballet Blue and Night of Navy; Black Gel Pen; Copic 100-Black
Accessories: Circle Nestabilities; Grosgrain Ribbon; Rhinestones; Masking Paper
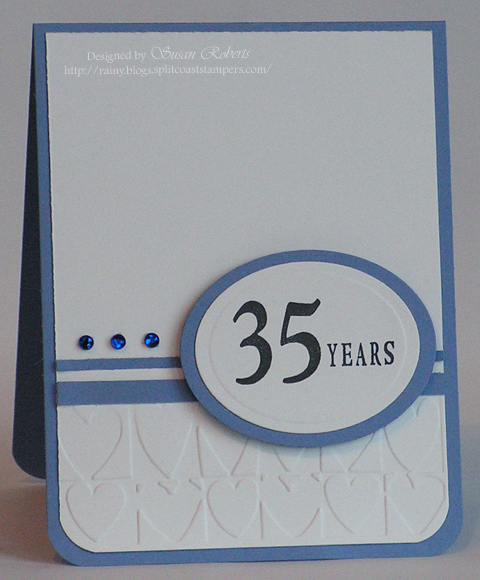
Daisy Birthday
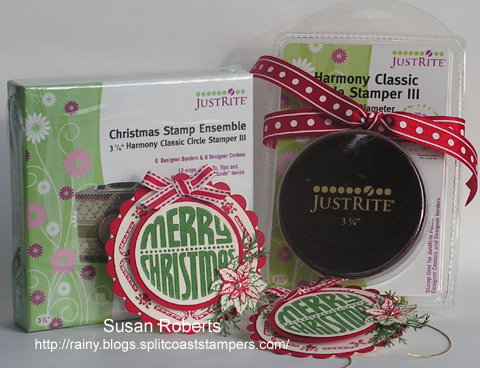
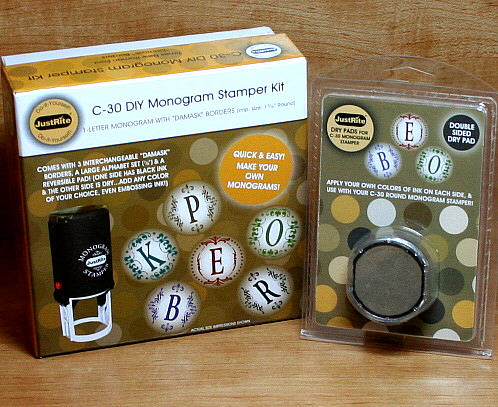
Stamps: JustRite Stampers Sentiment and Border
Papers: Papertrey Ink Select White, Pure Poppy and True Black; SU Pawsitively Prints II DSP
Inks: Memento Tuxedo Black
Accessories: Spellbinders Sunflower and Circle Nestabilities; SU Eyelet Border Punch; Button

Blessed by You
Stamps: Waltzing Mouse Blessed by You
Papers: Papertrey Ink Fine Linen and Dark Chocolate; Stella & Rose DP
Inks: SU Basic Brown and Always Artichoke; VersaMark
Accessories: Circle Nestabilities; SU Butterfly Punch; Brown Embossing Powder; Brad

blog207bothwithwm.jpg

I love Friday!  And today I got to play along in Sharon’s Stamp Simply Challenge ABC/123.  The challenge was to make “letters or numbers a focal point” of your project.  Well in a few weeks my DH and I will be celebrating our 35th wedding anniversary.  So I decided to make him a card… not that he would care if I didn’t, but it was fun anyway.

blog270card35withwm.jpg

I used JustRite’s Times New Roman Uppercase Font Set for the custom sentiment.

blog207closeup35withwm.jpg

I decided to make a second card with this simple layout.

blog207cardrainbowwithwm.jpg

I love this sentiment!  We all have those “rainy days”!  *grin*

blog207closeuprainbowwithwm.jpg

Here is the inside.

blog207insiderainbowwithwm.jpg

Here’s hoping that you have a wonderful Friday!  Don’t forget about Ellen Hutson’s World Card Making Celebration tomorrow!!

Happy Crafting!

blog207bothflatwithwm.jpg

——————————

Stamps: Rainbow – D231, Santa Rosa, CA; Viva Las Vegas Stamps Rainbow Sentiment; EK Success “Don’t Give Up”; JustRite “Times New Roman Uppercase Font Set”

Papers: Whisper White, Brocade Blue, Bashful Blue

Inks: Memento “Tuxedo Black”; Copics:

r43.jpgr46.jpgy19.jpgb23.jpgb26.jpgc1.jpgb000.jpg0.jpg

Accessories: Corner Rounder Punch; Cuttlebug “Frills” and “Heart Blocks” Embossing Folders; Rhinestones; Ric Rak; Oval Nestabilities

Probably my biggest addiction, even more than collecting actual stamps, is designer paper. PAPER!!! I love it!! But I find that I don’t use it because then it would be gone. D’oh. So I have begun to quarter my 12″X12″ sheets. This way I have FOUR… YES FOUR pieces of paper. I can let my little hoarding self use one or two of these pieces and still have some left!! Woohoo!! Well it works for me. LOL!!

blog158cardscloseupwithwm.JPG

So that is where I started today, with a quartered piece of 12″X12″ designer paper.  To make sure that there was absolutely no waste of my precious paper, I created another 6″X6″ One Sheet Wonder (OSW) template.  I just love making these.  They also work, of course, for all of the 6″X6″ pads of designer paper available now.  And I created a sketch (which I almost followed!  lol) that can be used with the pieces from the OSW that will make into four cards.  Here’s the template for the OSW.

blog1586x6onesheetwonder1forsetof4withwm.jpg

I needed a couple of masculine birthday cards and a couple of wedding cards.  Since this was a double sided patterned paper, it worked out perfectly with the stripes on one side and the blue toile like floral on the other!  Plus my 10 Designer Centers & Borders from JustRite had everything I needed for sentiments all in one set!

blog158pieceswithwm.jpg

Here is the sketch.

blog1586x6onesheetwonder1sketchwithwm.jpg

If you decide to give this OSW/Sketch design a try, please let me know.  It would be so much fun to see what you have created!

blog158cardswithwm.JPG

Happy Crafting!!!

——————————

Stamps: JustRite 10 Designer Centers & Borders

Papers (all SU!): Whisper White, Baja Breeze (wedding only), Kraft and Chocolate Chip (birthday only),  DSP Parisian Breeze

Inks: SU! Chocolate Chip Marker

Accessories: Brads, SU! Photo Corner Punch, Cuttlebug, Swiss Dot Embossing Folder (wedding only), Argyle Embossing Folder (birthday only), SU! Taffeta and Satin Ribbon Rose (wedding only), SU! Rope Twine (birthday only)

smileybdaycandleani.gifYup!!  Today is my ONE YEAR BLOG ANNIVERSARY, and I would love to celebrate with you!!!  I so appreciate all of you who have stopped by my blog over the last year.  Knowing that you take time from your day to read my blog and share a comment now and then has made blogging SO MUCH FUN!  So as a THANK YOU I have some blog candy to give away over the next three days!!

Let’s start the celebration today with a couple of goodies that were very generously donated by JustRite.

blog154blogoversary1justritecandywithwm.jpg

First is the Christmas Stamp Ensemble with 6 borders and 6 centers.  It’s never too early (or too late  LOL!!) to make a few Christmas tags or cards.  If you make a few every month then when the busy hustle and bustle of Christmas is upon you, you will already have them done leaving you more time to spend with family and friends!  And to go along with the Ensemble is the Harmony Classic 3-1/4″ Circle Stamper III.  This is a wonderful high quality wooden stamper that has a grid perfectly sized for the Christmas Ensemble’s borders and centers.

smileycomputer2ani.gifTo enter your name in the drawing for today’s blog candy simply leave a comment ON THIS POST.  This drawing will close on Tuesday, February 17th at midnight at which time I will draw a winner. GOOD LUCK and thanks for dropping by!!

——————————

blog118closeupwithwm.jpg
Details about the tags can be found here.

THIS POST IS NOW CLOSED TO COMMENTS.

1.  Post #46 – Wendy – Nov 24, 10:46 AM

“I would love to win this candy! I have been dying to try this system but the budget has been a little thin this year. What an awesome goodie you’re giving someone! Thank you so much for the chance to win.

Your boxes look like candles. I had to take a second look to be sure they were the same. LOL! Too cool!

Thanks again!”

2.  Post #188  – Deb Wood – Nov 25, 10:37AM

“WOW! Such amazing creations, so beautiful and thanks for the chance to win! Sorry I’ve been slacking, just haven’t geen feeling well. Off to the doc this afternoon, again!”

3.  Post #293 – Janette – Nov 28, 5:40PM

“My word – this is some amazing blog candy!  Thank you so much for the chance to win.  It would be a blessing to be picked.”

4.  Post #111 – Bonnie aka raduse – Nov 24, 9:26PM

“Wow! Gorgeous card & ornaments.”

—————————–

CONGRATULATIONS TO THE 4 WINNERS!!!

Wendy I will email you first to see which package you want.

Once I have heard back from Wendy, Deb, I will email you to let you know what the 3 remaining packages are.

Then, Janette, you can select from the remaining 2 packages.

Bonnie, I will email you as well to get your address in case it has changed since our CCRAK days.

FUN STUFF!!

As promised there is some wonderful JustRite blog candy today!  But first let me show you a couple of tags and a fun card I made using the JustRite “Sonnet Stamper-10 Designer Centers and Borders” Set.

blog131setwithwm.JPG

The card also uses Flourishes newly released set “Sleigh Ride”.

blog131cardwithwm.JPG

The lush gift boxes are spruced up a little more with tags and some May Arts ribbon.

8blog131closeup2withwm.JPG  8blog131closeup3withwm.JPG

Aren’t these tree ornaments cute!

blog131setopenwithwm.JPG

————————–

Stamps: Flourishes ‘Sleigh Ride‘; JustRite ‘Sonnet Stamper-10 Designer Centers and Borders’ Set

Papers: SU! Whisper White, Gable Green, Pink Passion

Inks: Brilliance ‘Graphite Black’

Accessories: May Arts Ribbon; Cuttlebug, ‘Snowflake’ Embossing Folder; Circle Nestabilities; Circle Punches 1-3/8 and 1-3/4 inches; Silver Cording; Metal Rings; Brad; Stickles

blog131closeup1withwm.JPG

Okay enough teasing.  Let’s get on with the blog candy!!!  smileyblinkingani.gif

——————————

Flourishes is kicking off the holiday season and everything at Flourishes is JustRite!!  They want to make it easy for you to add to your wish list or buy for that special stamping buddy in your life.  So starting December 1st, everything JustRite in the Flourishes store will be 25% off!!  The Flourishes Design Team will be showing you lots of fun ways you can use these products, and we are giving away some goodies of our own!!  Besides myself, Faith Hofrichter (Markie’s Mom) is also having some JustRite candy today.  Be sure to check the Flourishes Newsletter for the Winner’s Roundup List on Sunday, November 30th.

TO ENTER:  Just leave a comment here on THIS post.

The contest will close on Friday, November 28th at midnight PST.  I will use random.org to pick the winners.  #1 on the list will be given their choice of any of the 4 packages.  #2 on the list will be given their choice of any of the remaining 3 packages and so on.  The winners will also be announced here on Saturday, November 29th.

(The pictures and lists below of the JustRite packages were photographed and posted by Leslie Miller.  Leslie has graciously given me permission to use them here.)

Package #1

C-45 Monogram Stamp & Storage Box containing:

  • 1 C-45 Monogram Stamper with pad (black ink on one side, dry on the other)
  • 4 borders
  • 1 set of Medium & Large letters

Additionally, this first give-away package contains:

  • 2 double-sided dry pads
  • 1 double-sided two color dry pad
  • 1 Medium & Large Numbers set
  • 1 Small Letter set
  • 1 Damask Borders set
  • 1 Library Of, Kitchen Of, Desk Of Borders set

These are all for use with the C-45 Monogram Stamper.  Here’s a photo of the goodies:

blog131candypkg1.jpg

Package #2

C-30 Monogram Stamper Kit plus an extra double-sided dry pad.  The C-30 stamps a smaller image and can even be used with a 1 3/8″ circle punch.  The C-30 kit contains:

  • 1 C-30 Monogram Stamper with pad (black ink on one side, dry on the other side)
  • 3 damask borders
  • 1 large alphabet set

Here’s its photo:

blog131candypkg2.jpg

Package #3

Special Occasions Monogram Stamper Kit

This set is sized for the C-45 Monogram Stamper.  However, it can be used whether or not you have the Monogram Stamper because the kit includes a wood block mount.  Just mount your borders and letters on the block and ink with any pad.  This set features the Special Occasions font and contains:

  • 1 wooden stamp mount
  • 3 elegant borders
  • 1 large alphabet set
  • 2 medium alphabet sets

blog131candypkg3.jpg

Package #4

Curlz Monogram Stamper Kit

(Package #4, pictured below, works in the same manner as Package #3 — with or without the C-45 Monogram Stamper.)

This package contains:

  • 1 wooden stamp mount
  • 3 fun borders
  • 1 large Curlz alphabet set
  • 2 medium Curlz alphabet sets

blog131candypkg4.jpg

Many thanks to Flourishes for making this possible!!  Good luck everyone!!


Midnight 12/28/08:  THIS POST IS NOW CLOSED FOR COMMENTS


I just couldn’t resist these darling baking dishes while shopping the other day.  And well of course I had to make a couple of tags to go with them!

blog118withwm.jpg

So using my JustRite Christmas Stamp Ensemble and my Flourishes Poinsettia and Boxwood set, I did just that and made some matching tags.  Doesn’t that pretty little poinsettia make a perfect accent!  The circles were all cut using the Classic Circle Nestabilities.  The center sentiment was popped up on dimensionals.

blog118closeupopenwithwm.jpg

The holly and bells on the border were colored in with markers.  I also used my Nestabilities to cut the round card base.

blog118back.jpg

blog118nestie.jpg

A portion of the circle Nestabilities hangs over the fold on the card stock to create a card base.  (After I photographed this I realized it might be confusing because I used red card stock to show how I cut the card base with the die cut, but the actual card base on my tag is white.)

Flourishes Poinsettia and Boxwood – Set of 10 Stamps

blog113poinsettiaandboxwoodset.jpg

And now that I’ve photographed this I can slice up and eat the bread!  Well it’s actually sort of a fruit cake.  So confession time… I like fruit cake!  Yay, I think I’m in the minority there!  Well all the more for me!  hehe  I do plan on giving these as gifts, but before I do I will fill them with something that tends to be more universally popular like banana bread!

 Have a great day!

blog118closeupwithwm.jpg

——————————

Stamps: Flourishes Poinsettia and Boxwood; JustRite Christmas Stamp Ensemble

Papers: SU! Real Red, Garden Green, Very Vanilla

Inks: SU! Real Red and Garden Green Craft and Markers

Accessories: Classic Circle Nestabilities, Cuttlebug, McGill Pine Punch, Striped GG Ribbon, Gold Cording, Gold Brads


My project today features the Flourishes “All That Glitters” set.  The stamp I chose to play with is the beautiful bird ornament image.

blog114birdwithwm.jpg

Because of the delicate detailing on the different ornament images in this set, I think they are very flexible as to how you can use them.  Here I have simply stamped and heat embossed in gold on red card stock.  But these images could completely lend themselves to coloring from just a little to as elaborate as one desired.

At Christmastime gift wrapping at our house generally takes place in the room where all of the ribbons, bows, tags and wrapping papers are stored.  I thought that it would be fun to have a warning for the door for those times when everyone really must stay out!

blog114door.jpg

Now that my youngest is 17, something like this might actually work!  I wouldn’t have counted on it years ago, though.  In fact this would have probably had just the opposite effect!  “Oh look, Mom’s wrapping our gifts.  Let’s go help”  *chuckle*

To start I used Mod Podge on a chipboard door hanger.  I adhered this GORGEOUS Glittering Christmas paper to the hanger and then Mod Podged again right over the top of it.  The result was wonderful because the glitter still showed, but it was now permanently sealed to the paper instead of getting all over everything everywhere!

blog114withwm.jpg

I used my Circle and Scalloped Circle Die Cut Nestabilities to cut and make the holly and scalloped rings around the hole for the door handle.  The holly ring image is from the new JustRite “Christmas Stamp Ensemble”.  The lettering is from two different JustRite Fonts “Curlz” 50 pt. size and “Times Roman” 50 and 95 pt. size.  May Arts velvet ribbon and lots of Kaiser rhinestones along with some gold cording and a miniature bow (store bought.. sh-h-h-h-h don’t tell anyone) finish out the project.

blog114box6withwm.jpg

Oh yes and the box…  I made the box with PTI white card stock and adhered strips of the Glittering Christmas paper to the top and sides.  I love this little functional box.  It measures approximately 1-1/2″ X 2-1/2″ and is the same-ish size as the metal tag/frame on my yesterday’s “Sleigh Ride” card.  I am putting together a template and tutorial for it and hope to have it ready to share in a few days.

Flourishes All That Glitters – Set of 12 Stamps

blog114allthatglittersset.jpg

Last month Flourishes offered a discount on the new releases – this month they’re offering you an even better deal! From now through Monday, October 13, get 10% OFF YOUR ENTIRE ORDER!!! So, now is the time to load up on that great Basic Grey paper and matching brads, or perhaps some luscious ribbon.  To get the discount you must put this code in the promotion code box at checkout: RSC88  Now, because you have to put that code in the promotion code box, you will not be able to enter the code for which design team member inspires you.  So…just send Flourishes an e-mail at [email protected] and they will reward your favorite designer!

To see more cards or projects made with this week’s new releases, check out the other Flourishes Design Team and Friends of Flourishes blogs:

Barb Schram

Faith Hofrichter

Julie Koerber

Linda Duke

Leslie Miller

Cindy Lawrence

Joan Bardee

——————————

Stamps: Flourishes “All That Glitters”; JustRite “Christmas Stamp Ensemble”, “Font Set – Curlz”, “Font Set – Times Roman”

Papers: Flourishes “Glittering Christmas”; SU! Whisper White, Garden Green, Real Red; PTI White

Inks: SU! Real Red Craft, Real Red and Garden Green Markers; VersaMark

Accessories: JustRite 3-1/4″ Circle Wood Stamper; May Arts Velvet Red Ribbon; Kaiser Rhinestones; Cuttlebug; Circle and Scalloped Circle Die Cut Nestabilities; Gold Embossing Powder, Gold Cording, Imaginations Chipboard Door Hanger, Bow, Corner Rounder Punch (box flap); Mod Podge

I couldn’t make up my mind what to title this post so I just went with a little of everything!  LOL

This week Flourishes has asked their designers to feature the Peony set.  Chances are they wanted us to do a card or project with… well… the Peony image.  But I just couldn’t take my mind off of the bugs in this set.  I’ve mentioned before that I love the bee.  So I decided to combine the bee image with some of my JustRite Stamper’s Toys to make a gift card and wrapping paper.  Oh yes, I also used a small flower image from Flourishes Fantasy Floral Garden set to stamp the tissue paper.  Here is the finished project.

blog110wraptissuewithwm.jpg

blog110beecloseuph20.jpg

Using SU!’s Whisper White wrapping paper I stamped and masked and stamped some more with one of JustRite’s new borders in their 2-5/16″ Harmony Classic Circle II Stamp Ensemble.  And aren’t those bees cute!  I added Twinkling H2O’s in Lemondrop to give each bee a pretty shimmer.

blog110giftcardwithwm.jpg

For the gift card I also used the flower border from JustRite’s 1-5/8″ Curlz Monogram Stamper Kit.  It is embossed with black embossing powder.  The letters are Times Roman Font.

blog110gift1withwm.jpg Click on photos to enlarge. blog110gift2withwm.jpg

As much fun as I have had with the bee, the cute little beetle in the Peony set had not been inked.  That needed to change.  See him peeking out from behind the panel of the new Sparkle DP from Memory Box.  The sentiment is from JustRite’s Curlz Monogram Stamper Kit.  It is one of their new centers.

blog110cardwithwm.jpg

I know exactly who I’m going to give this card to.  My oldest son’s girlfriend LOVES bugs.  She has been on expeditions/grants to Costa Rico to study butterflies and the Amazon to study ants.  Well I have a deathly fear of spiders.  The good news is that whenever she is around, if a spider decides to appear, I can call on her and she will just go over to the thing, pick it up and put it outside!!!  So ya… she LOVES bugs and her birthday is next week.  This one’s for her.

A couple of weeks ago I mentioned that my 17 year old son wanted only one thing for his birthday and that was tickets to see Shawn Johnson in the “Gymnastics Superstars” at the Tacoma Dome.  I had managed to get him 5th row tickets in the center section.  I was very pleased with myself.  WELL…..  It was this past Saturday.  He came home floating on air.  It turns out that rows 1-4 are bleachers which they couldn’t set up because they had the gym floor elevated for the gymnasts.  So… HE WAS IN ROW 1!!!!  He told me that if he could have picked his seats out of the entire dome, he would have picked the ones he had.  How cool is that.  The balance beam was set up not even 10 feet from him!  When Shawn finished her routine she came over and high-fived him!!  So did Nastia.  The funniest thing was his comment about Shawn’s floor routine.  I guess after she finished with it, she once again came and high-fived him.  Well he said that she was “a little sweaty” after her routine.  So when she touched him he got some of her sweat on him.  I thought he was going to say it was kinda gross.  But no… his response?  “It was great!!!!”  Life is good.

blog110shawnjohnson.jpg
Shawn Johnson (above) and Nastia Liukin (below)
Tacoma Dome – September 27, 2008
blog110nastialiukin.jpg

——————————

Wrapped Box Project
Stamps: Flourishes “Peony”, “Fantasy Floral Garden”; JustRite “Curlz Monogram Stamper Kit 1-5/8″”, “Harmony Classic Circle II Stamp Ensemble 2-5/16″”, Times Roman Font
Papers: SU! Wrapping Paper, Really Rust, Whisper White; Tissue Paper
Inks: VersaFine Onyx Black; Memento Rich Cocoa; SU! Really Rust Classic and Yoyo Yellow, Summer Sun, More Mustard Markers, VersaMark
Accessories: LuminArte Twinkling H2O’s Lemondrop, May Arts Sheer Ribbon, Gingham Ribbon, Raffia, Cuttlebug, Nestabilities Circle Die Cut, Jumbo Eyelet, 1″ and 1/4″ Circle Punches, Ticket Corner Punch, Black Embossing Powder, Eclipse Masking Tape, Gift Box

Card
Stamps: Flourishes “Peony”; JustRite “Curlz Monogram Stamper Kit 1-5/8″”
Papers: SU! Kiwi Kiss, Tangerine Tango, Basic Black, Very Vanilla; Memory Box “Sparkle”
Inks: VersaFine Onyx Black
Accessories: May Arts Ribbons Polka Dot and Satin, Kaiser Rhinestones, Cuttlebug, Nestabilities Circle Die Cuts, McGill Super Giant Flower Punch, Photo Corner Punch

Sep 182008

What does JustRite have?  How about some new images, new sizes, new shapes, oh my!  On today’s card I used one of JustRite’s new and larger circle stampers.  The wooden stamper along with the border and center that I used are from the Harmony Classic Circle Stamper II Stamp Ensemble.  This stamper has a 2-5/16th” diameter!

blog104withwm.jpg

The border image was stamped on card stock and then die cut and embossed using the Circle Nestabilities.  I punched out the center with a 1-3/4″ circle punch and mounted it with dimensionals onto the stamped border.  That sweet bird is from Flourishes newly released “Birds and Vine” set.  A Kaiser pearl was placed on the bird to keep an eye on things.  (Sorry couldn’t resist.)  The wonderful May Arts satin ribbon was added for a touch of *yummy* along with the beautiful Memory Box “Sprout” designer paper.

If you haven’t had a chance to see the new products from JustRite, be sure to visit Flourishes and check them out!  They are there under “Stampers Toys”.

——————————

Stamps: JustRite “Harmony Classic Circle Stamper II Stamp Ensemble”; Flourishes “Birds and Vine”
Paper: SU! Chocolate Chip, Very Vanilla; Memory Box “Sprout”
Ink: SU! Classic Garden Green, Chocolate Chip, Really Rust and Markers Garden Green, Chocolate Chip
Accessories: May Arts Satin Ribbon, Kaiser Pearl, Circle Nestabilities, Cuttlebug, 1-3/4″ Circle Punch

© COPYRIGHT © and FTC Declaration

All content on my blog is COPYRIGHT © 2008-2024 Susan Roberts. Please don't copy any of my stuff for publication, design or contest submission. I declare that I sometimes promote and/or endorse products that I currently receive or have received either for free or at a discount. That said, I won't ever recommend anything that I don't personally enjoy using or feel is a quality product.
© 2020 Rainy Day Creations Suffusion theme by Sayontan Sinha