Apr 122012

Last month my DH and I were in Mexico for a couple of weeks.  I packed some cardstock, my Copics and a few stamps so that I could stamp and color while enjoying the warm sun and ocean surf.  It was such fun!

Both of today’s cards were created using scenes that I colored there.  The images are from Flourishes “Beach Life” set.

A white gel pen was used to accent the tree trunks.


On this second card the flower center was made by splitting a small punched circle of cardstock in two.  This created a “fuzzy” texture where the layers were torn apart.

A black line was drawn with a Copic Multiliner for the horizon, and the sand was dotted using the white gel pen.

Surf’s Up!!  Happy Crafting!
—————————–

Card 1

Stamps: Flourishes “Beach Life”

Papers: PTI Select White and Hawaiian Shores; Echo Park “Happy Days” Designer Paper

Inks: Memento Tuxedo Black; White Gel Pen; Copics:

Accessories: Pearls; Fiscars Waves Border Punch; Maya Road Ruffle Edge Ribbon; Lace

Card 2

Stamps: Flourishes “Beach Life” and SU “On the Grow”

Papers: PTI Select White, Hawaiian Shores and New Leaf; Echo Park “Happy Days” Designer Paper

Inks: Memento Tuxedo Black; White Gel Pen; 0.1 Copic Multiliner; Copics:

Accessories: Pearl; Organdy Ribbon; Prima

Apr 072012

Played along in this week’s sketch over at Operation Write Home.

To give the sentiment a little dimension, the paper and bar section of the typewriter was stamped a second time.  The sentiment was then stamped on it and cut out.  This small section of the image was then adhered over the complete image of the typewriter.


But there was a problem!  After closer examination of the sketch, I realized that I had NOT followed it correctly.

What to do?  Try again, of course!  LOL

This is such a great sketch.  Really loved it (both versions!)  hehe

If you make any cards for OWH and have their name stamp, don’t forget to stamp it on the back of each card you send.

Happy Crafting!

——————————

Card 1

Stamps: SU You’re My Type and Teeny Tiny Wishes

Papers: PTI Vintage Cream and Dark Chocolate; My Mind’s Eye “Lost & Found Sunshine”

Inks: SU Chocolate Chip

Accessories: My Mind’s Eye Burlap Trim

Card 2

Stamps: SU Teeny Tiny Wishes

Papers: PTI Vintage Cream and Pure Poppy; October Afternoon “Sasparilla”

Inks: Memento Tuxedo Black

Last summer I had some fun playing with my embossing folders together with some ink.  I posted the resulting card “Embossed Kisses” here.  Shortly thereafter Beate asked me to do a tutorial for Splitcoaststampers using this technique.  It’s over at SCS today!  You can find the tutorial here.

If you’ve got some embossing folders, I hope you’ll give this quick, easy and fun technique a try!!
The possibilities are endless.. well almost. 

Happy Crafting!

——————————

Stamps: Waltzing Mouse “Teeny Trees”; PTI “Garden of Life”

Papers: PTI Select White; Basic Grey Indie Bloom Designer Paper

Inks: Brilliance Graphite Black; SU Old Olive, Rose Red, Taken With Teal

Accessories: Provo Craft Embossing Folders Victoria, Divine Swirl and Roses; Grosgrain Ribbon; Rhinestones

Sketches are my favorite kind of challenge, and today’s card was created for this week’s sketch challenge over at Splitcoaststampers.

An embossing folder was used on the long panel of designer paper.  I think it adds an interesting texture.

The image was colored with Copics and accented with a White Gel Pen.

Thanks for dropping by today.  Happy Crafting!
——————————

Stamps: SU ‘Every Moment’; Verve ‘Big Wish’

Papers: PTI Select White and Orange Zest; Basic Grey ‘Picadilly’ Designer Paper

Inks: Memento Tuxedo Black; White Gel Pen; Copics:

Accessories: Stitched Grosgrain Ribbon; Button; Craft Concepts ‘Garden Swirl’ Embossing Folder; Nestabilities Beaded Oval Die


A couple of my DBIL’s have birthdays in March, and clean and simple always seems to work for the guys.

The two masks for stippling were made using a deckle ruler for one and a Nestabilities Deckled Mega Rectangle Die for the other.


Love the effect.. just something a little different from the usual straight edge mask.


Thanks for dropping by today.  Happy Crafting!

——————————

Stamps: SU Inspired by Nature, Itty Bitty Backgrounds and Teeny Tiny Wishes
Papers: PTI Vintage Cream; SU Basic Black
Inks: SU Not Quite Navy, Certainly Celery and Basic Black
Accessories: SU Denim Jean Ribbon; Nestabilities Deckled Mega Rectangles; Deckle Ruler; Stipple Brush, Masking Paper

Mar 172012

Cut.. Stamp.. Emboss.  That’s the order that works best for me.  On today’s set of cards the shaped borders were cut first with a couple of different dies from SU’s Adorning Accents collection.

Next the borders were stamped with the coordinating stamps for each cut design.  And lastly the borders were embossed with the coordinating embossing folders.

On the birthday card I used the embossing folder twice to give a double embossed edge on both designs.
 

When running the cardstock and embossing folders through my embossing machine a second time, it tended to flatten the first embossed design.  So while the cardstock was placed on a soft mat (Ornare Piercing Pad was used here),  I traced the embossing tool over the embossed areas pressing gently to help redefine the original embossing.

And before you go… just wanted to show you a fun paper rainbow that my granddaughters made.  Their mom took a picture of them next to the display.  So fun!!  Happy St. Patrick’s Day!!

——————————

Card1:
Stamps: SU Bordering on Romance, Just B and Happy Together
Papers: PTI Select White and True Black
Inks: Memento Tuxedo Black; Copics:

Accessories
: PTI Swiss Dot Satin Ribbon; Floral Brad; Nestabilities Classic Circle Dies; SU Adorning Accents Die and Embossing Folder

Card2:
Stamps: SU Bordering on Romance and Curly Cute
Papers: PTI Select White; SU Tempting Turquoise
Inks: Memento Tuxedo Black; Copics:

Accessories: PTI Swiss Dot Satin Ribbon; Embossing Tool; Ornare Piercing Pad; SU Adorning Accents Die and Embossing Folder

Mar 092012

I recently bought a few of these cute little maze games and decided one would be fun on a birthday card for my nephew.

The maze is adhered to the inside of the card and peeks through a large circular window that was cut on the front.  Easy, fast and fun.  What could be better!

Have a wonderful birthday, Luke!!

——————————

Stamps: Hero Arts Birthday Messages
Papers: PTI Select White; My Mind’s Eye “Out of the Blue” Designer Paper
Inks: Memento Tuxedo Black
Accessories: SU Maze Game and Denim Jean Ribbon; Nestabilities Classic Circles Die

Mar 052012

I had been wanting a Martha Stewart Scoring Board for awhile, so I was excited to get one this past Christmas from one of my sons.  This card shows a diamond embossed (scored) design made with the Scoring Board.  It was an easy peasy detail, but it adds some great texture.

To help it stand out even more, a pad of white craft ink was run gently across the embossing.

For those that may care for a little more Earth friendly crafting, the Memory Box “Valise” designer paper is from a certified sustainable forest program and is printed with a soy based ink .  Cool, huh!

Thanks for dropping by today.  Happy Crafting!

——————————

Stamps: SU Simply Soft and Teeny Tiny Wishes

Papers: PTI Vintage Cream, Dark Chocolate and Hawaiian Shores; Memory Box “Valise” Designer Paper

Inks: SU Basic Black, Taken with Teal, Chocolate Chip, Close to Cocoa, Green Galore, Yoyo Yellow and Craft Whisper White

Accessories: Martha Stewart Scoring Board; Nestabilities Classic Circles; SU Corduroy Button

Seattle Chocolates.. Oh the truffles!  My hubby gave me a box of them for Valentines.  The box came all tied up with a big wide organdy ribbon.  And as much as I LOVE chocolate, {{ribbon}} is right up there on the list as well.  After the chocolates were gone, the ribbon found it’s way to my craft table.  Today it became a flower!

The challenge over at Stampin’ Sisters in Christ this week is to use a flower(s) on your project.  I played along with my new little creation.  (Now after reading the challenge more carefully, it says that the image must either be or have a flower in it.  Well, technically the flourish stamped on my designer paper does have a couple of silhouetted flowers.  So I’m hoping my card still qualifies.)

To make the flower, Jim Holtz Alterations “Tattered Florals” Die was used.  I cut six flowers out from the ribbon.  (Sometimes there are little threads that can be clipped with scissors as in the picture below.)

Using a heat gun, the cutout flowers were “melted.”  In the picture below I am holding the flower with my fingers.  However, I often will use a pair of tweezers to avoid any, “Ouch.  That’s hot!” moments.

It doesn’t take much to really get them to crinkle.  Here are all six flowers melted to various amounts.

To add a little more fun to the flower, I pulled several threads on the ribbon leaving them attached on one side.

Clipping off this end, I then heated these threads just enough to slightly alter them.

Taking a brad, I pushed through the center of each flower starting with the flowers which were crinkled the most.  When all the flowers were secured together, the threads were attached at the back with a couple of glue dots.  Voila!

This was so fun, and I still have a lot more ribbon to play with in the future!

Happy Crafting!

——————————

Stamps: PTI Birthday Bash Sentiments; SU Baroque Motifs

Papers: PTI Vintage Cream and True Black; Basic Grey “Little Black Dress” DP

Inks: Archival Brilliance “Graphite Black”

Accessories: Organdy Ribbon; Jim Holtz Alterations “Tattered Florals” Die; EK Success Plaid Border Punch; Decorative Brass Brad

TODAY IS MY 4-YEAR BLOGIVERSARY!!!!
To celebrate I have FOUR stamp sets to giveaway!!!!

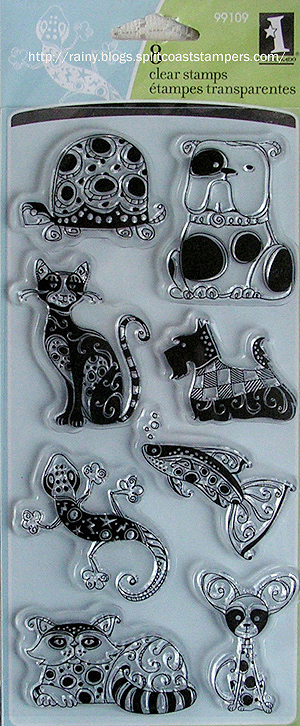
Let’s start with the set from Inkadinkado. (Each of the stamp sets in my blog candy are new and unused.  The cards using their images were made with a duplicate set.)

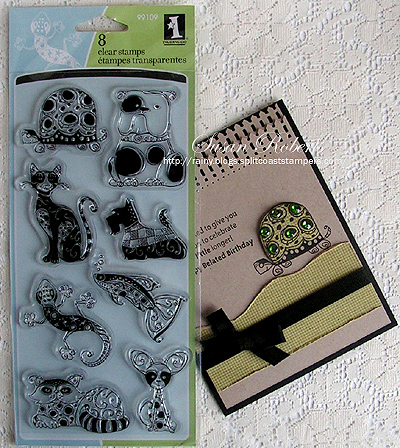
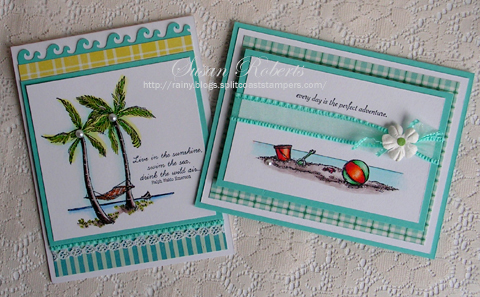
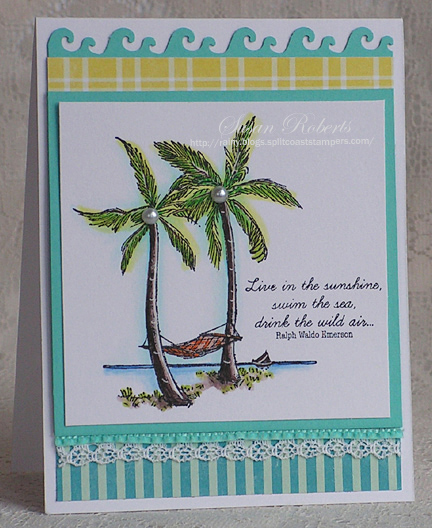
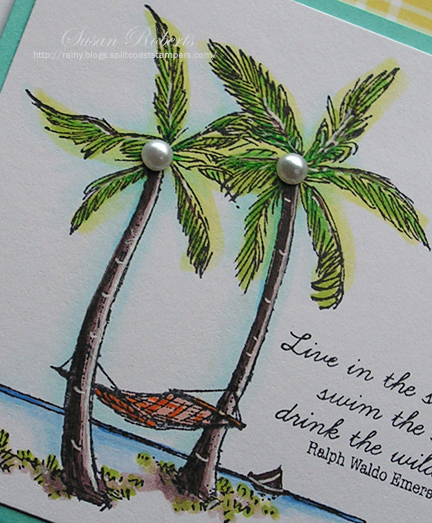
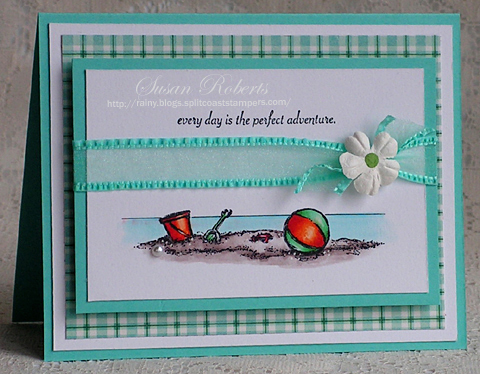
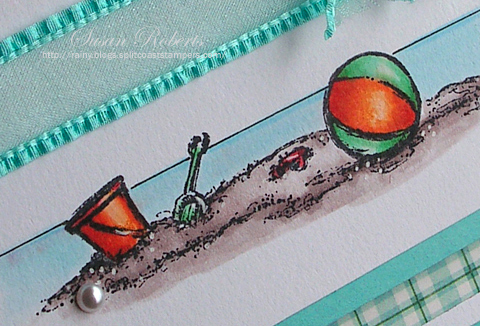
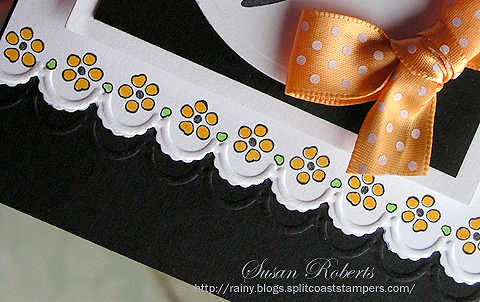
Here’s a card I made using one of the images from Set #1.

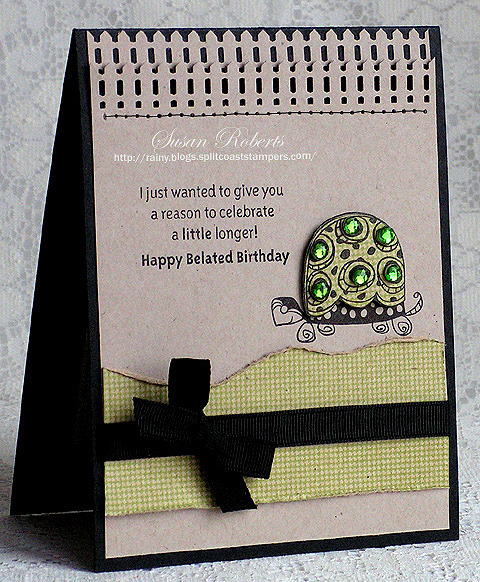
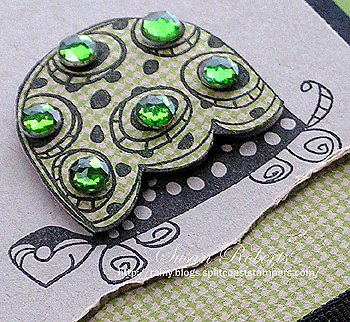
The turtle’s shell is cutout and adhered to the card with dimensionals.

The set is called “Patterned Pets”.

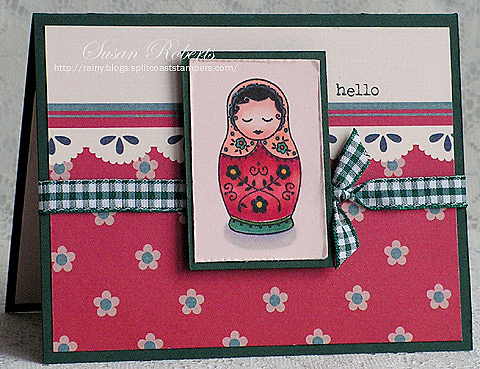
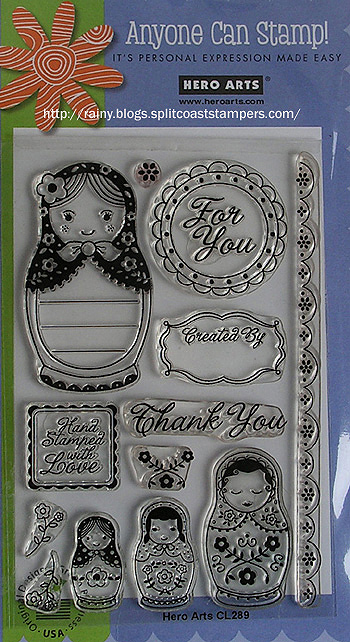
The second set is from Hero Arts called “Dolls”.

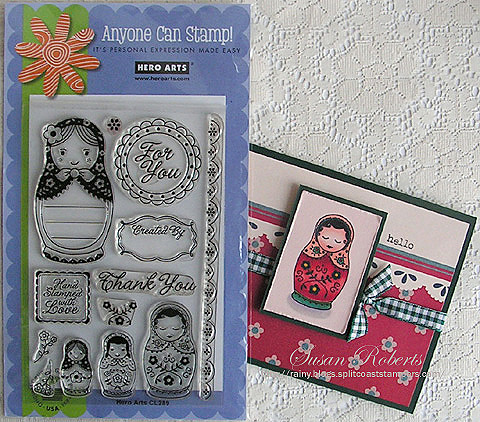
Love these sweet girls.

So many cute images!

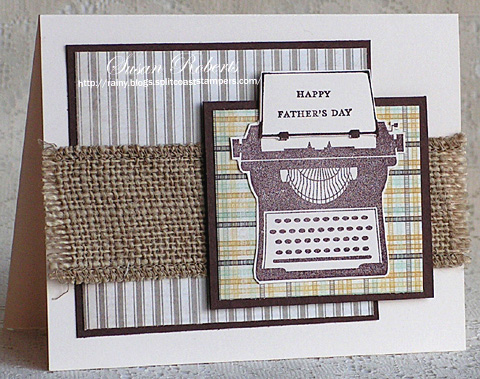
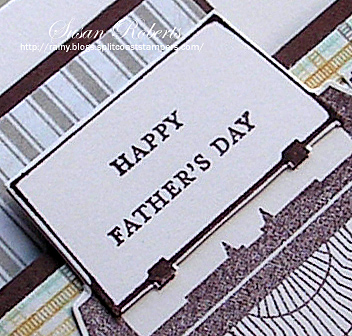
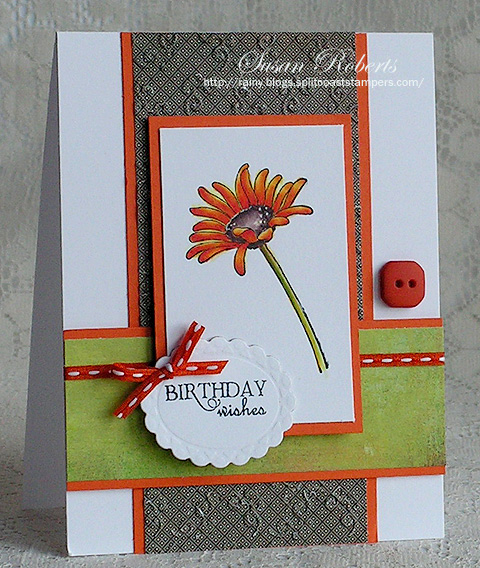
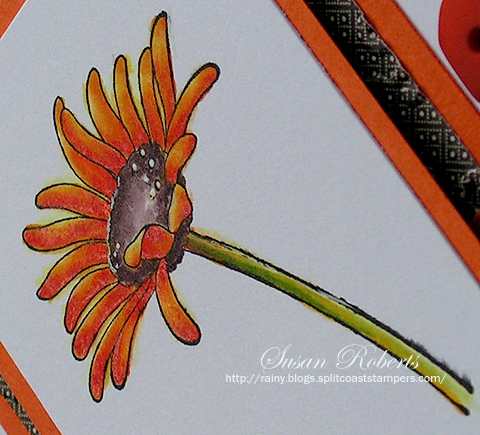
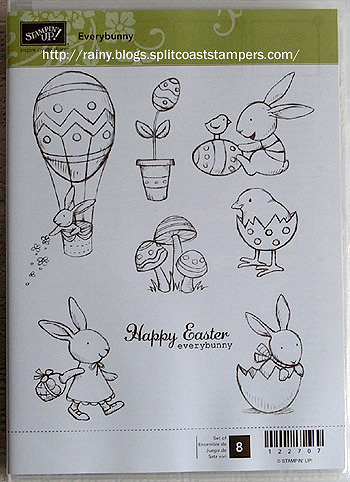
The third set is from Stampin Up.

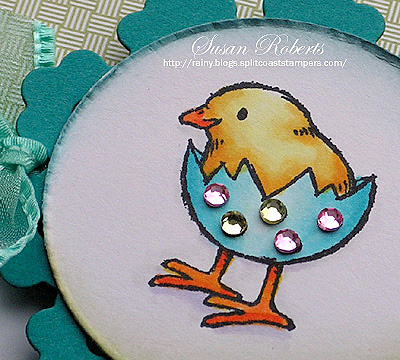
Here’s a card using that brand new little chick.

Such a darling image!

This set is just in time to start your Easter creations!

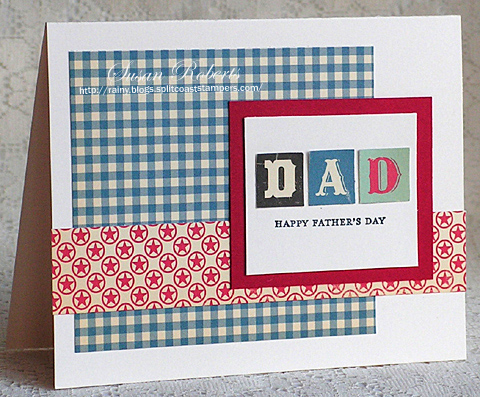
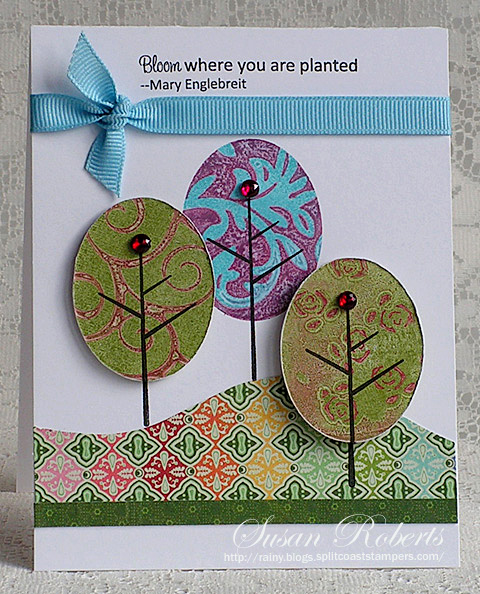
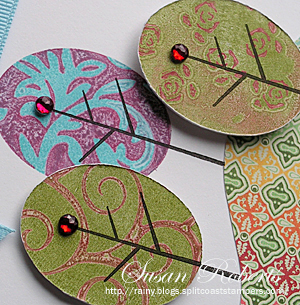
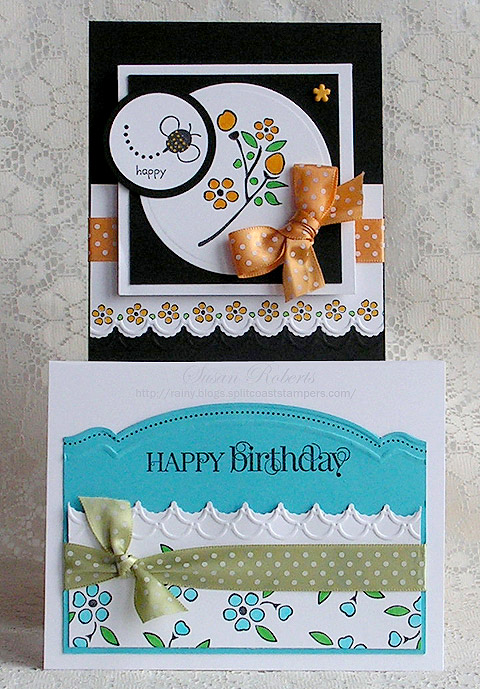
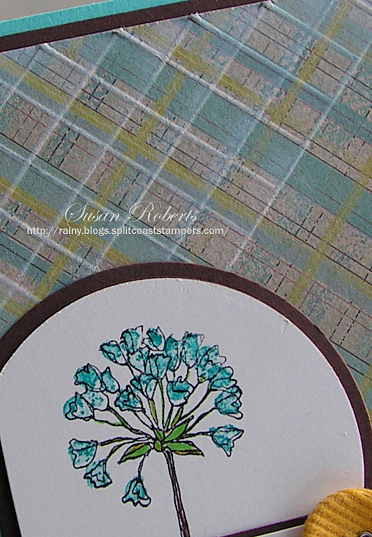
And finally here is the last set which is also from Stampin Up:
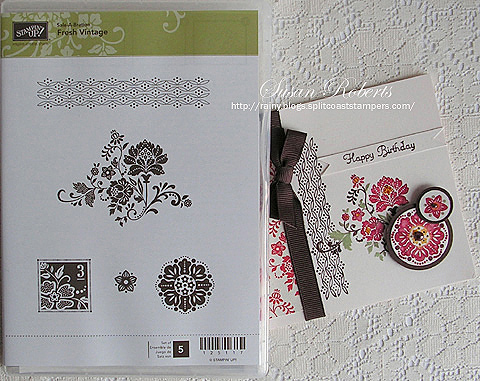
And here is a card.

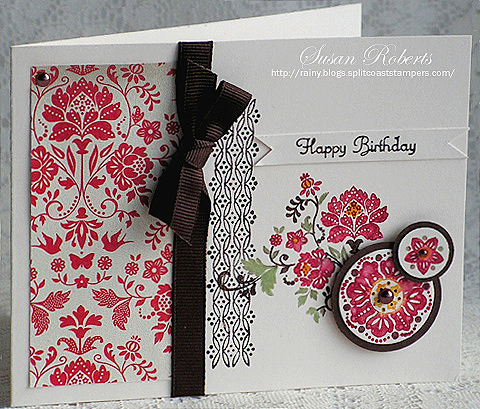
The watercolor look was achieved by coloring the stamps directly with a marker and then spritzing them with water before stamping.

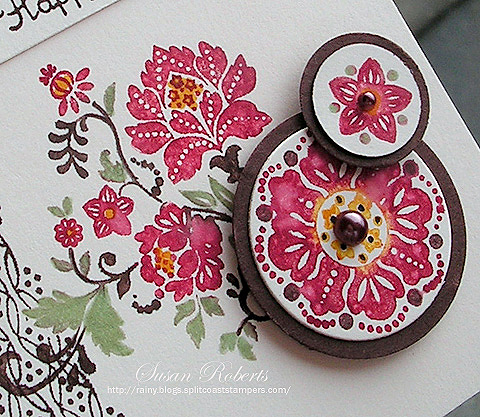
Love the beautiful and elegant images in this latest SAB set.

To enter your name in the drawing for a chance at ONE of these sets, simply leave a comment BELOW ON THIS POST.  This drawing will close at the earliest on Sunday, February 19th at midnight at which time I will draw FOUR winners.  The person whose name is drawn first will have first pick of one of the four sets.  The person whose name is drawn second will choose a set from the remaining three sets and so on.  And remember, if you are reading this post in your Reader, you must actually come to my blog and comment on this post below to qualify for the drawing.

Good luck everyone!!

Happy Crafting!

——————————

Card #1

Stamps: Inkadinkado “Patterned Pets”; SU “On Your Birthday”
Papers: PTI True Black; SU Kraft; Memory Box “Valise” Designer Paper
Inks: Archival Jet Black
Accessories: Grosgrain Ribbon; Rhinestones; Paper Piercer and Template; Martha Stewart Picket Fence Edger Punch

Card #2

Stamps: Hero Arts “Dolls”; SU “You’re My Type”
Papers: PTI Pinefeather; SU Blush Blossom; Jenni Bowlin “Home Sweet Home” Designer Paper
Inks: Memento Tuxedo Black; Copics:


Accessories: Gingham Ribbon

Card #3

Stamps: SU “Everybunny”
Papers: PTI Select White; SU Taken with Teal and “Twitterpated” Designer Series Paper
Inks: Memento Tuxedo Black; SU Taken with Teal and Certainly Celery: Copics:


Accessories: Martha Stewart Tulip Garden Edger Punch; Nestabilities Floral Doily Motifs and Classic Circle Dies; Rhinestones; Ribbon; SU Framed Tulips Embossing Folder
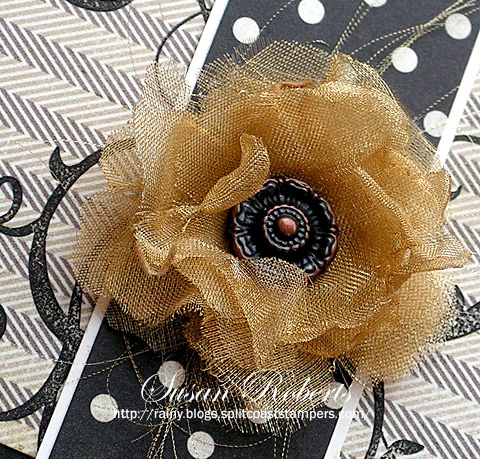
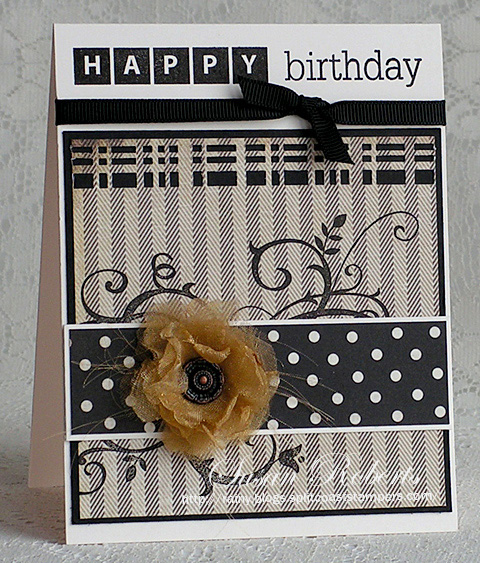
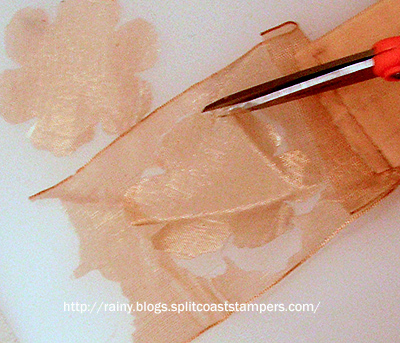
Card #4

Stamps: SU “Fresh Vintage” and “Create a Cupcake”
Papers: PTI Vintage Cream and Dark Chocolate; SU “Everyday Enchantment” Designer Series Paper
Inks: SU Chocolate Chip, Ruby Red, Certainly Celery and Summer Sun
Accessories: Kaiser Chocolate Pearls; Grosgrain Ribbon; Nestabilities Classic Circle Die; 5/8″, 3/4″ and 1-3/8″ Circle Punches

THIS POST IS NOW CLOSED FOR COMMENTS.

© COPYRIGHT © and FTC Declaration

All content on my blog is COPYRIGHT © 2008-2024 Susan Roberts. Please don't copy any of my stuff for publication, design or contest submission. I declare that I sometimes promote and/or endorse products that I currently receive or have received either for free or at a discount. That said, I won't ever recommend anything that I don't personally enjoy using or feel is a quality product.
© 2020 Rainy Day Creations Suffusion theme by Sayontan Sinha